Amber B Design Studio

Interior Design & Decoration for the South Florida region

  • Home
  • About
  • Services
  • Portfolio
  • Blog
  • Press
  • Contact

Project Design Now Reveal!!

March 11, 2016 by Amber Filed Under: accessories and vignettes, amber b design, amber b design at home, before and after, blog, design, mantle, personal design style


The time is here… the reveal of two different spring mantels for Project Design!! You may have seen several of us bloggers hinting on social media {#ProjectDesignNow} about our spring mantels. We have styled them two ways and today is reveal day!! I want to thank Mary Ann of Classic Casual Home and Cindy of Rough Luxe Lifestyle for including me in this fabulous group!


A gray circle with the words project design in it.


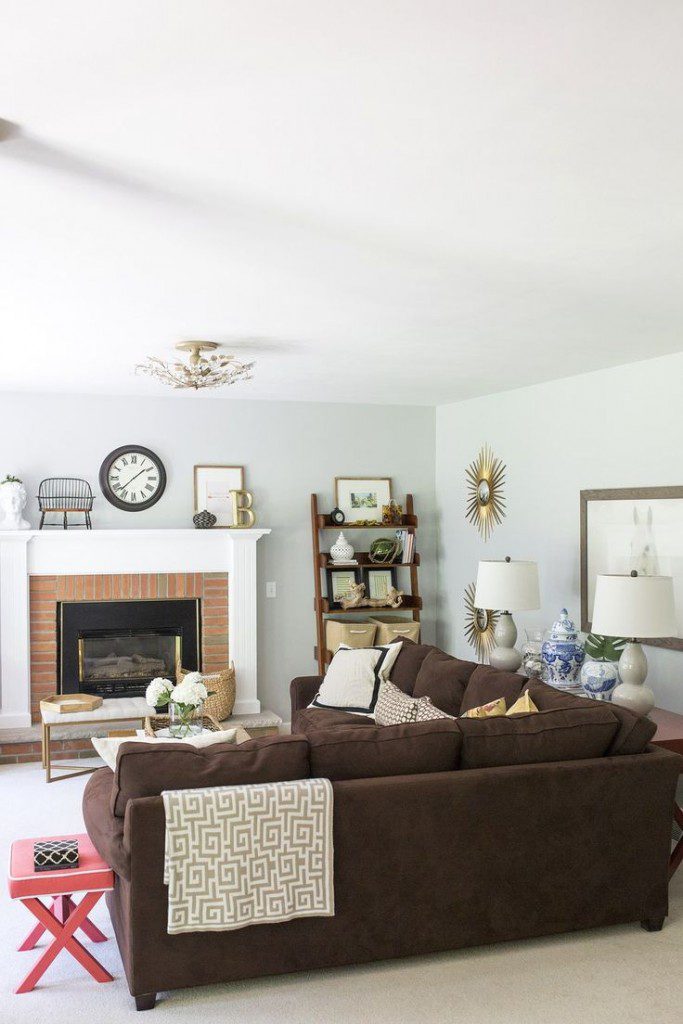
Our mantel is located in our family room and it’s always fun to make some changes and switch it up every now and then. Here is a full look at Option 1…

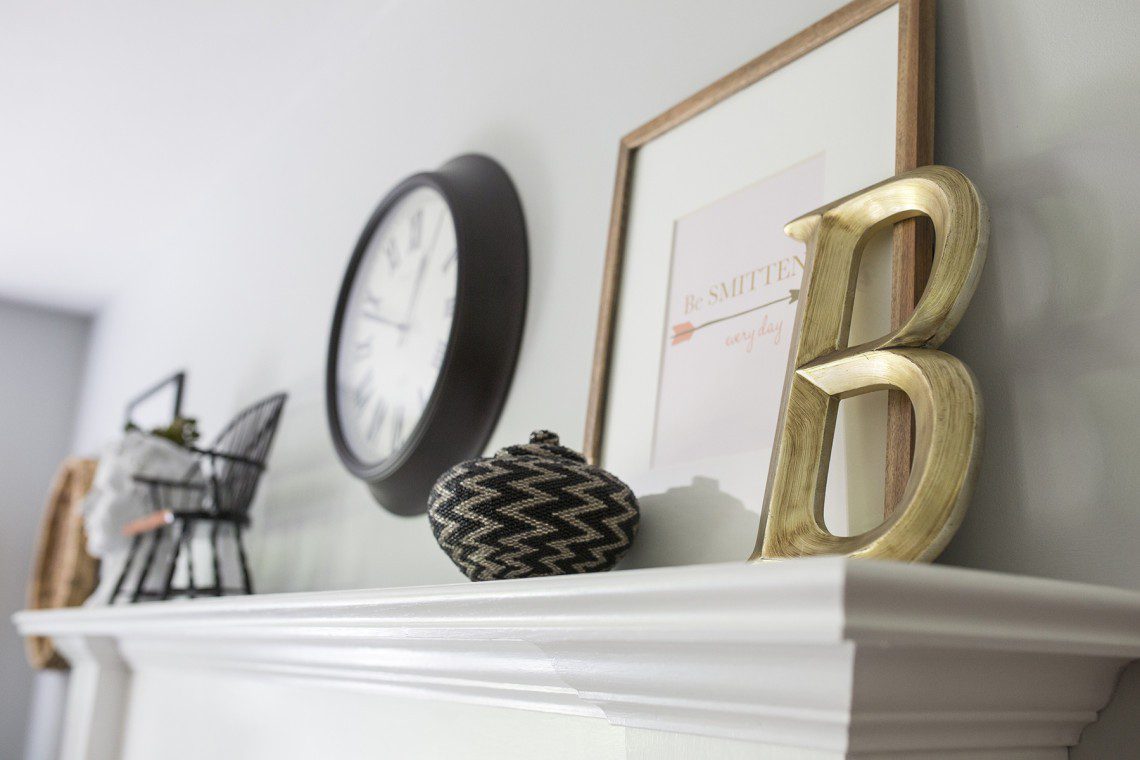
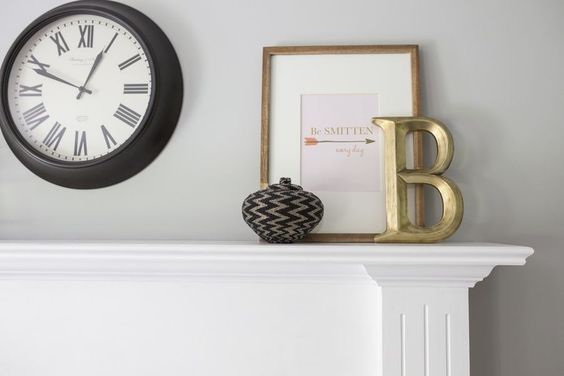
Spring Mantel Option 1…

A close up of a clock on the wall


A close up of a clock on the wall


A close up of a clock on the wall


A living room with brown couches and fireplace


A living room with a couch and fireplace

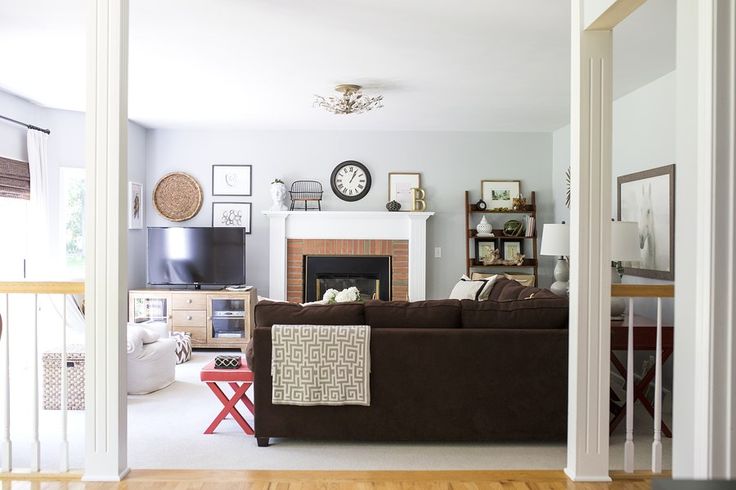
All Photos above by Sarah Heppell Photography

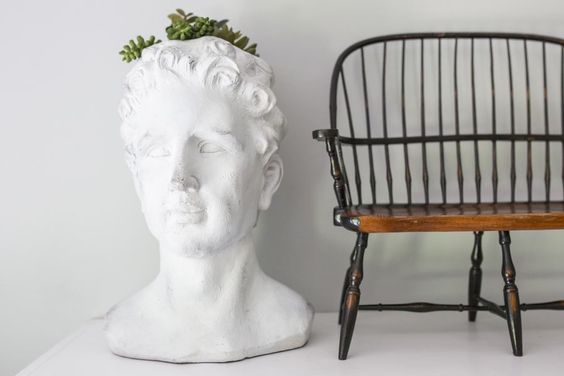
For mantel option 1, I went with a mixture of vintage and new and meaningful pieces with modern accessories. Starting from the right side, the “B” signifies the first letter in our last name. That is placed in front of a special print from the etsy shop, Pretty Smitten. The print says Be Smitten Every Day. I love its message and that pretty rose quartz background! I like to layer and add texture on mantels, so this beaded jar adds some interesting pattern and is unique. I also like to add round shapes to a mantel, so the clock was an old Target find and does just that. The mini windsor bench holds a special place in my heart, as I found it at an antique market when Mike and I lived in Germany. I will never part with it! And good old Zeus is next to the windsor bench. My kids named him and he is a great find from Target. I often put real ferns and small plants inside, but today- it’s one of the faux succulents that Target carries. {I am seeing a pattern here, that I shop at Target often!} ๐Ÿ™‚

Spring Mantel Option 2…

A fireplace with a mirror above it and a bench in front of the fire place.

A mirror sitting on top of a mantle.

A mirror sitting on top of a mantle.

A mirror and some vases on top of a mantle.

A green ball and some gold letters on top of a white mantle.

A blue and white vase sitting on top of a table.

A mirror, vase and other objects are on the mantle.

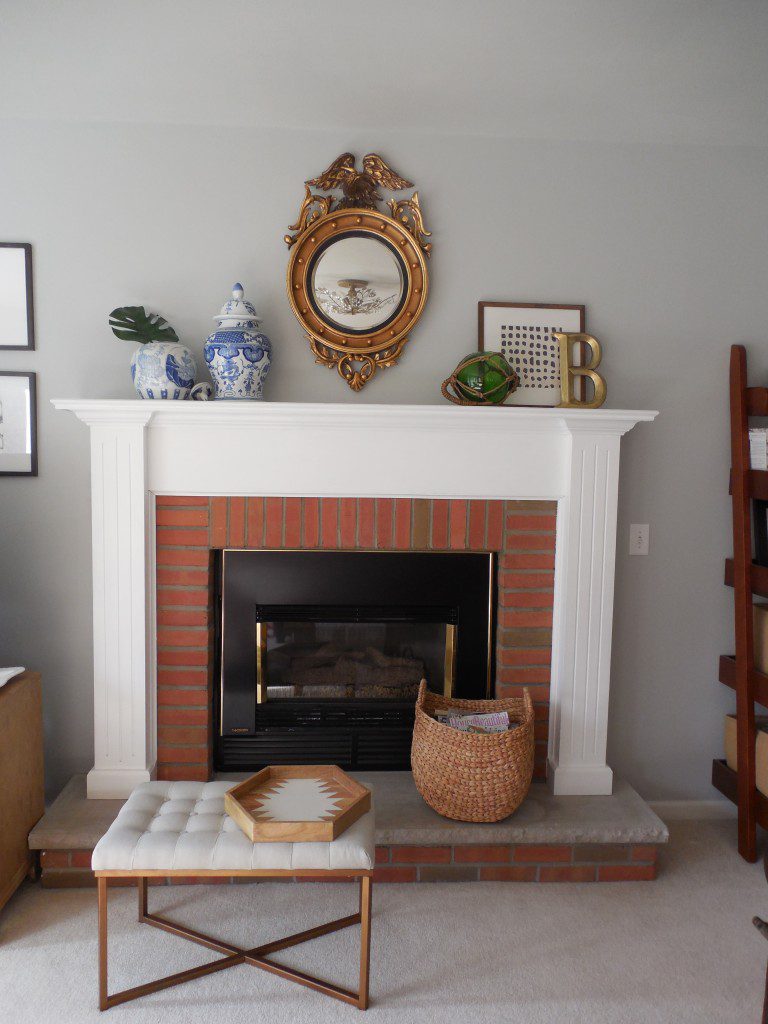
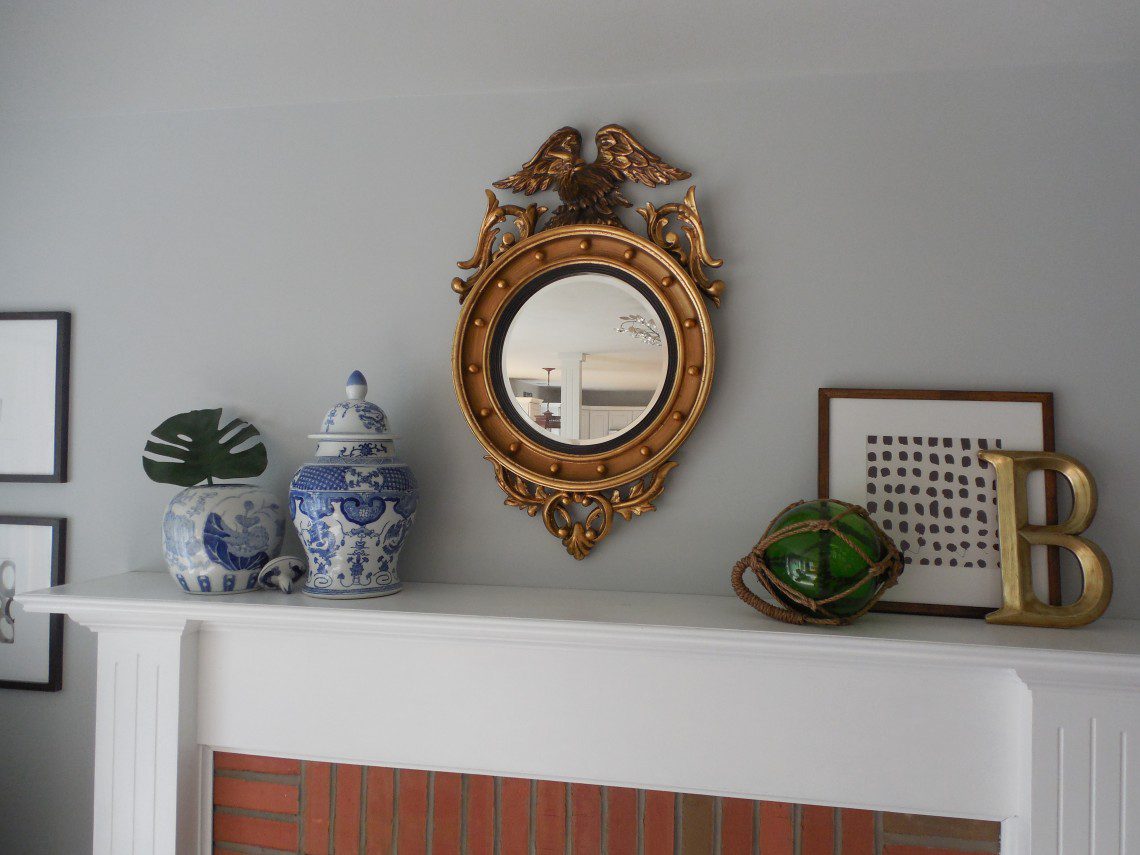
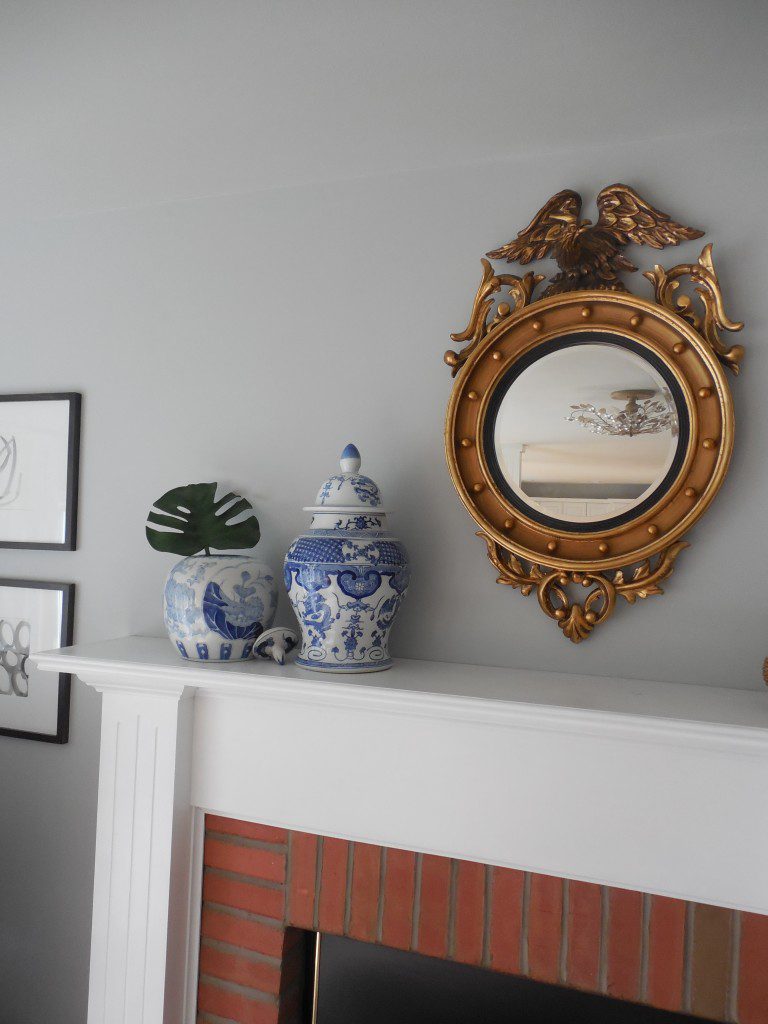
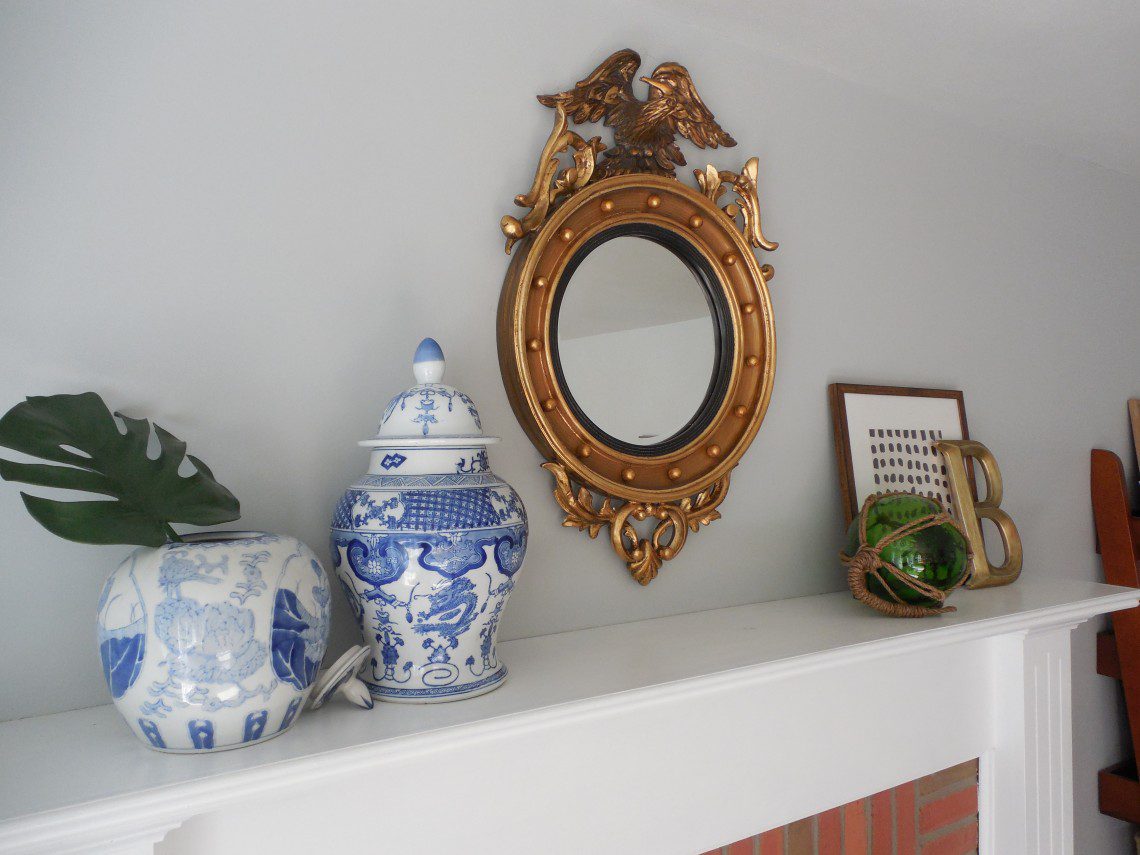
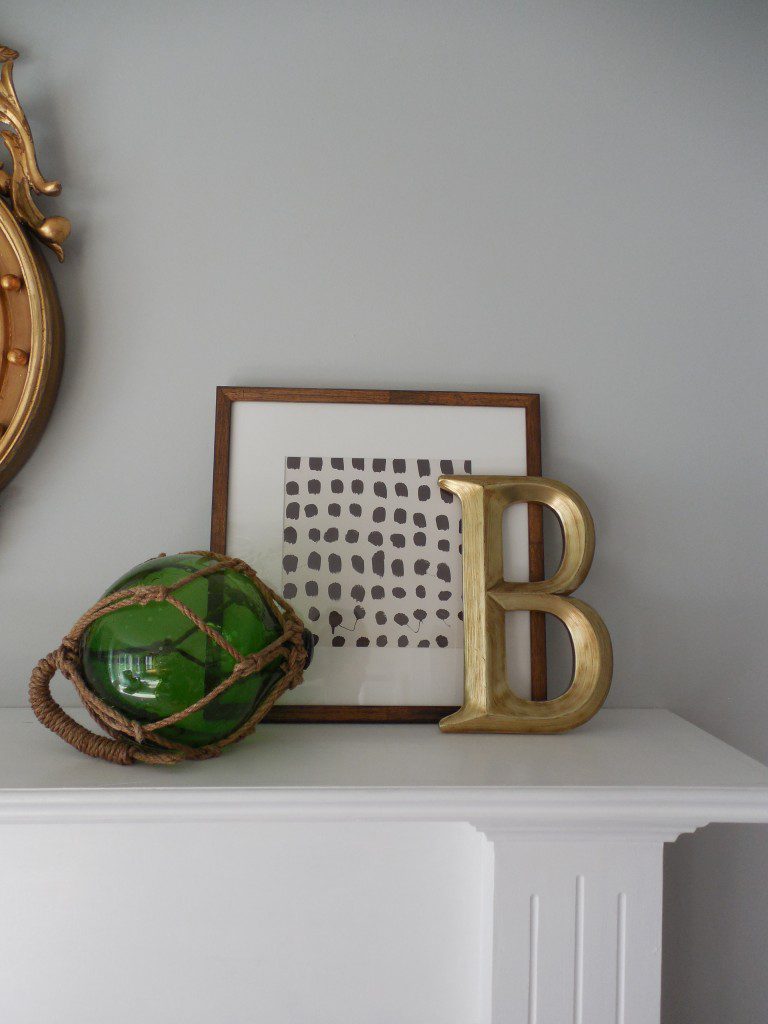
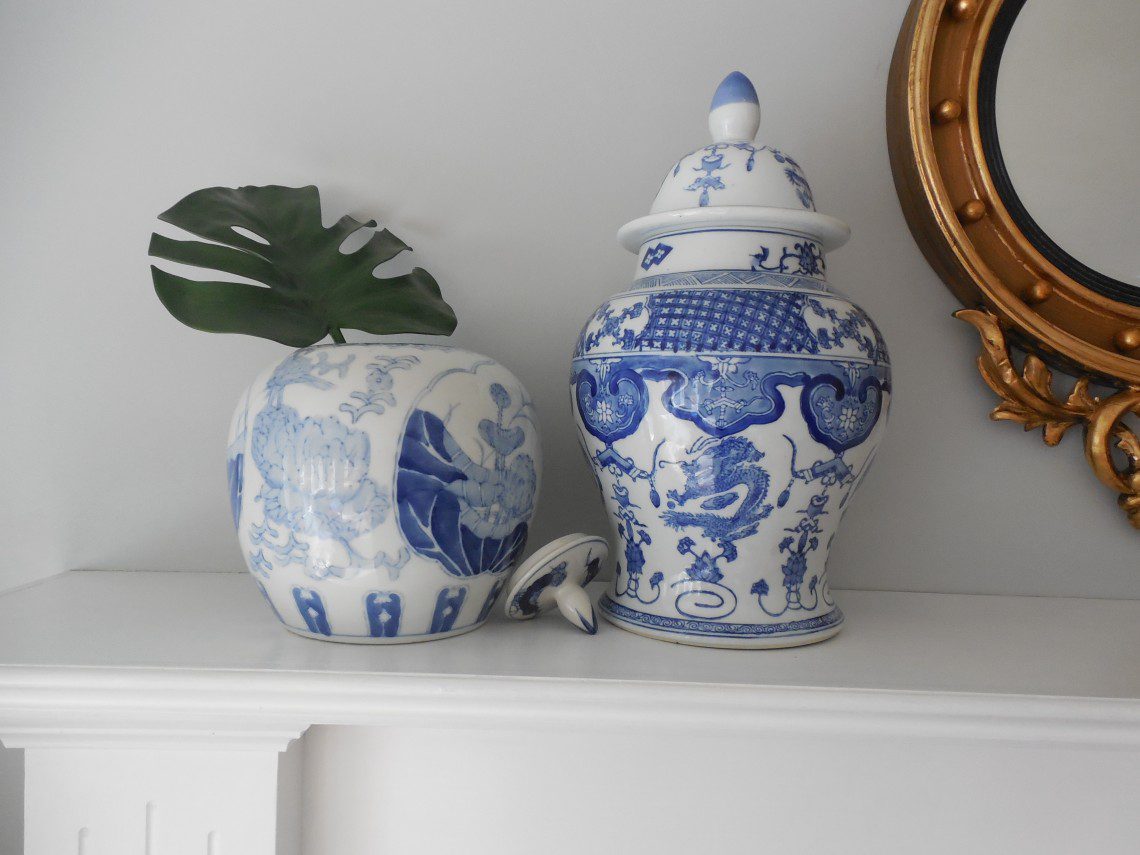
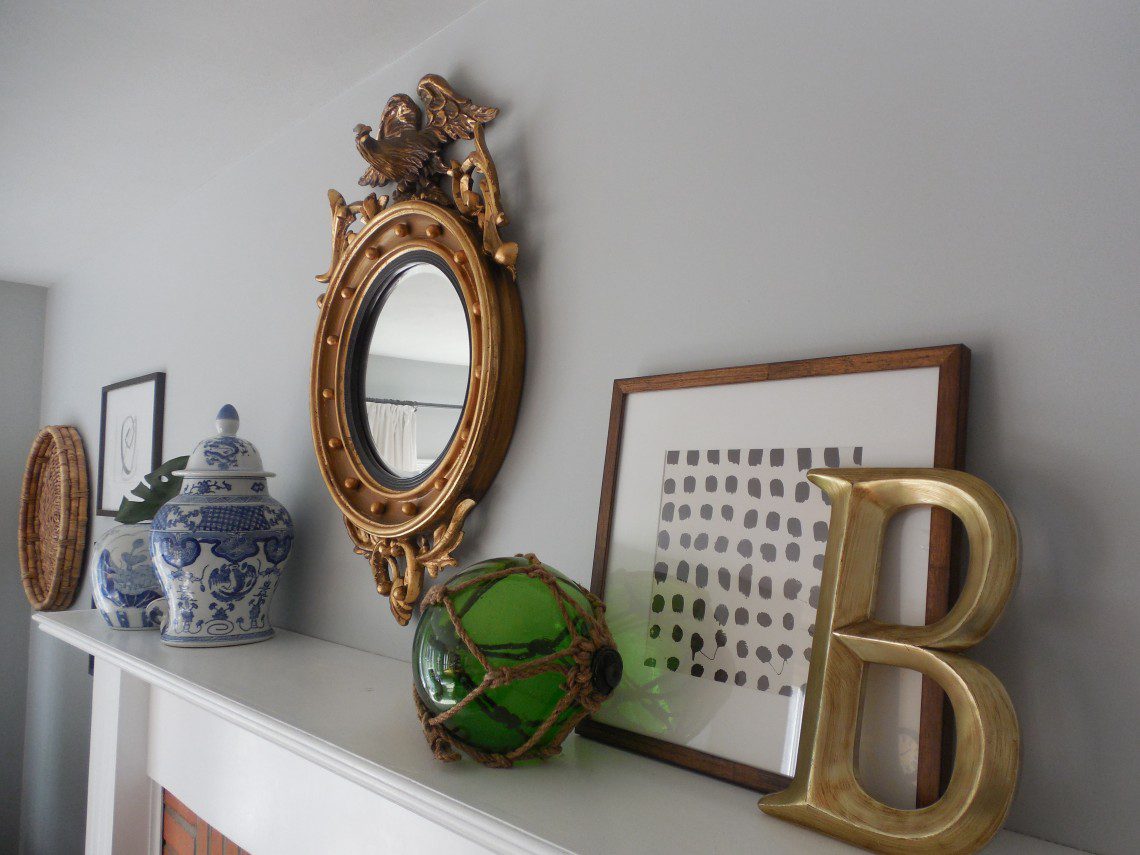
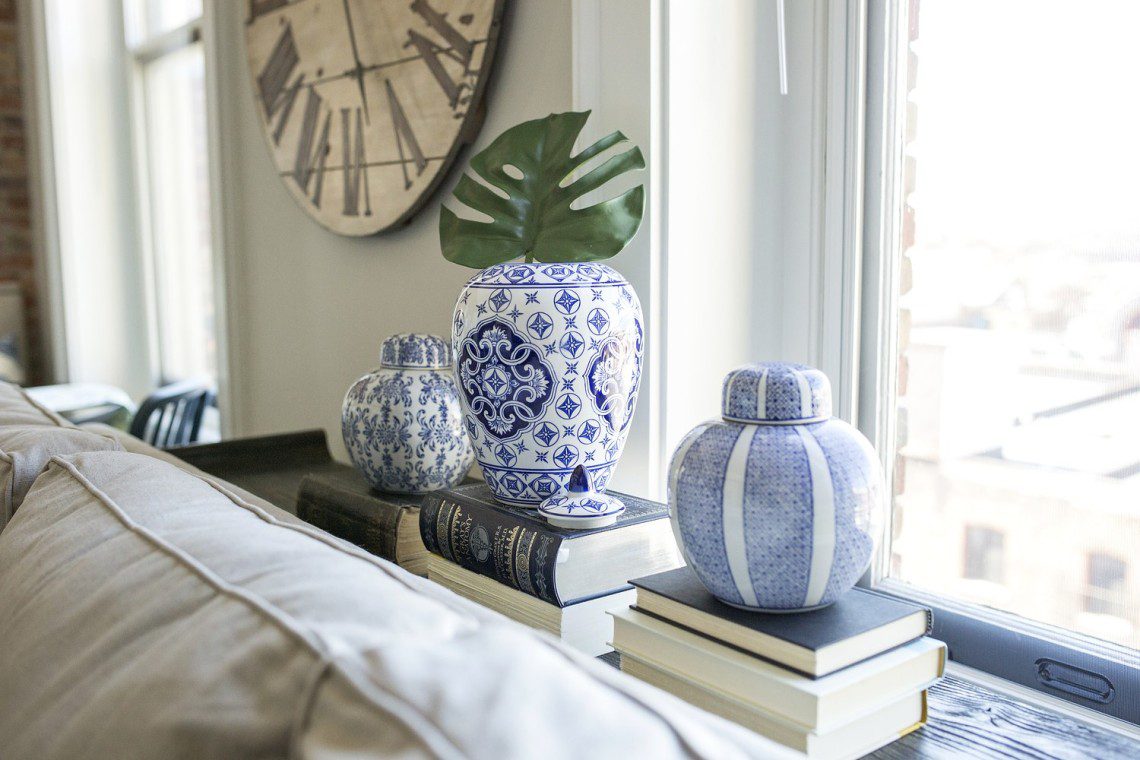
For mantel option 2, I also went with a mix of vintage and new. Starting with the right side again, I included the same “B” accessory from the first mantel. That is the only thing I kept for this option. I layered it in front of a spotted print I found at Target. I was so glad I scooped that up when I did, as about a week later, it was gone! I have always loved a hint of animal print somewhere, and this reminded me of cheetah spots. I found a green glass buoy from Home Goods. I like that it reminds me of the water and spring and summer activities. The rope detail adds some texture and interest. The ’round’ element that I love to add to mantels is now seen in both the buoy and this Federal mirror, which was a Christmas gift from my mom. It is the Ken Fulk Federal mirror from Pottery Barn and I love the vintage vibe it brings to the space. Not to mention that stunning aged brass! Adding a mirror to the mantel has been fun, as it reflects our ceiling pendant. The blue and white urns were antique shop finds. I decided to put a faux palm leaf from Pottery Barn inside the smaller urn, to bring a touch of nature to the mantel. I could also switch it out for fresh flowers, if I could remember to keep fresh water inside!

So there you have it! My spring mantel styled two ways! Which option would you choose???

Here are some tips to changing up your mantel for spring, or any time of the year:

Mantel Styling Tips

Add meaningful pieces and a mix of vintage and new to bring a collected over time style to your mantel

Layer pieces in front of each other and stand back every now and then to access what you have and what you need to add

Add different shapes, such as a round mirror, clock and mix that with a square or rectangle frame

I hope this got you ready to add some spring touches to your mantel! Now it’s the fun part… let’s check out the amazing bloggers who have transformed their mantels! They are such a talented group of ladies and I have been thrilled to be a part of this with them. Show these ladies some love:

ciao! newport beach
classic • casual • home
Dimples and Tangles
Garden Home and Party
Katiedid
Lisa Mende Design
Lucy Williams Interiors
Rough Luxe Lifestyle
The Pink Pagoda

A gray circle with the words project design in it.

From Concept to Reality with E – Design

January 15, 2016 by Amber Filed Under: amber b design, before and after, design services, e-decorating, e-design


I am excited to share this post with you today, as it gives an inside look into the e-design experience. I have shared the projects that this client and I have worked on before, but this update is pretty special! I have been working with this sweet client on a few of her rooms and she just recently put the house on the market! She kindly shared with me, the photographer’s pictures of the home, including the rooms I designed! It was fun to see the photographer’s vision and also take a look back at where the room started, as well as the original design plan. So, here we go!

My client and I originally started working together when she asked for help with her master bedroom. Here is a before picture of the space…

Before

A bedroom with two windows and a bed


A room with a couch, dresser and tv.

My client loves a blend of modern with traditional and even a splash of eclectic bohemian. Here is the design plan I came up with…

The Design Plan

A collage of different types of furniture and accessories.

I also included a gallery wall mock up for the wall space around the television…

A white dresser with a mirror and a lamp

Here are the fun after photos taken by photographer Danielle Benham…

A bedroom with a bed, pillows and a window.


A bedroom with a bed, dresser and tv.


A bedroom with a bed, dresser and mirror.

After Photos by Danielle Benham

Isn’t that fun to see the concept all the way to completion?!? I just love it! But we’re not done yet! I also helped her with her first floor bathroom. This was an amazing transformation, with new flooring, additional molding and tiles removed from the walls. Here is where we started with the room…

Before

A bathroom with a toilet, sink and mirror.

Almost everything was replaced in this space! Here is the design plan..

The Design Plan

A collage of different types of furniture and accessories.

And here is an after photo, taken again by Danielle Benham…

A bathroom with a toilet, sink and mirror.

I am thrilled with how this room came out! There is also a new marble floor that you can’t see in this image, but what a transformation! And that is a wall stencil- not wallpaper. What a great impact for under $50! You can purchase that stencil HERE. I am so happy with how it came out and super excited to hear that her house sold very quickly! My amazing client and her husband both did a great job implementing these designs. I am currently working on her bonus room in her new home and I can’t wait to show you those plans!!

Thanks again to my client for allowing me to share these pictures and to the talented photographer, Danielle Benham, for also letting me share her talents!


Project Vintage Gem – The Reveal Part 4

October 15, 2015 by Amber Filed Under: #projectvintagegem, amber b design, before and after, design, interior design


Welcome back to the final installment of Project Vintage Gem! Today, it’s all about the foyer. My client has a pretty small foyer and we wanted to make it as functional as possible. We wanted to add storage, a place to sit down and a spot for the litter box. You may be worried when you hear that a litter box is going in the main foyer, but no fear… it came out pretty cool and blends right in with the vintage/rustic charm we wanted for her home. Let’s get right to the pictures! It was a tough space to photograph, because of the lack of natural light and compact size. But yet again, Sarah Heppell worked her photography magic!

Heading to the foyer from the living room…

A table with a vase of flowers on it

A table with a vase of flowers on it

A table with a vase of flowers on it

A table with a vase of flowers on it

A table with a vase of flowers on it

A room with a wooden crate and a lamp

A table with a lamp and mirror in the corner of a room.

A table with a lamp and mirror in the corner of a room.

For a quick before and after, here is how the space was when we began…

Before

A hallway with a door open and a green bowl on the floor.

A room with two suitcases and a backpack.

I actually forgot the electric box was on that wall! We strategically hung the mirror there, to cover it up!

After

A table with a vase of flowers on it

A table with a lamp and mirror in the corner of a room.

After photos by Sarah Heppell

A huge credit goes to my client for finding the custom litter box cover on etsy! It really works with the home’s design aesthetic. We always need functional design too, right?!? Thank you all for your encouraging and sweet feedback from this project. It was truly amazing to work on and I am so thankful to my client for allowing me to share this journey on the blog.

Project Vintage Gem – The Reveal Part 3

October 13, 2015 by Amber Filed Under: #projectvintagegem, amber b design, before and after, central new york design, design


Welcome back to the third installment of the Project Vintage Gem reveals! Today is Master bedroom day. For this space, the only thing that stayed was the bed. Everything is new, including all of the bedding. Thanks again to my friend Nicole, for helping me get this space ready on photo shoot day. And thank you to Sarah Heppell, for these amazing after photos. Here we go…

A living room with a couch, chair and table.

A table with a lamp and mirror in the corner of a room.

Here are before pictures of the space, the first day we met…

A bedroom with a bed and two windows.

A bedroom with a bed and a refrigerator.

And now…

A dining room table with chairs and a clock on the wall.

A dining room table with chairs and a clock on the wall.

A dining room table with chairs and a clock on the wall.

A dining room table with chairs and a clock on the wall.

A dining room table with chairs and a clock on the wall.

A dining room table with chairs and a clock on the wall.

A dining room table with chairs and a clock on the wall.

A dining room table with chairs and a clock on the wall.

A dining room table with chairs and a clock on the wall.

A table with a vase of flowers on it

A table with a lamp and mirror in the corner of a room.

A table with a lamp and mirror in the corner of a room.

A living room with a couch, chair and table.

All after photos by Sarah Heppell

Tomorrow, I’ll take a break from the reveals for Why This Works series and then I’ll finish off reveal week with the foyer!

Project Vintage Gem – The Reveal Part 2

October 12, 2015 by Amber Filed Under: #projectvintagegem, amber b design, before and after, central new york design, design


And here we are, ready for Part 2 of the reveal for Project Vintage Gem! Thank you all so much, for your kind words about this project on facebook, instagram and here on this blog. Your encouragement means more to me than you know! Today’s reveal will be the living room portion of the great room. Thanks again to my dear friend Nicole, for helping me style this space up on photo shoot day! And just like Part 1, all of the after pictures are by the very talented Sarah Heppell Photography. Lets get right to the pictures…

A living room with a couch, chair and table.

A living room with brick walls and a white couch

Here is where we started with this space, at our first meeting…

A room with exposed brick and wood floors.

And now…

A living room with a couch, chair and table.

A living room with a large clock on the wall

A living room with a couch and clock on the wall

A couple of vases sitting on top of books.

A living room with a couch, chair and table.

A living room with a couch and pillows

A table with a vase of flowers on it

A table with a lamp and mirror in the corner of a room.

A table with a lamp and mirror in the corner of a room.

A table with a lamp and mirror in the corner of a room.

After photos by Sarah Heppell

Next up after today, will be the Master Bedroom portion of this project!


Project Vintage Gem – The Reveal Part 1

October 11, 2015 by Amber Filed Under: #projectvintagegem, amber b design, before and after, design


I am so thrilled to be here today, showing you the reveal of #projectvintagegem. You may have seen that hashtag around for quite a while, if you have been following along on instagram {AmberBDesign}. I began working with my client in January, when she asked me for help with her combined living/dining room, master bedroom and foyer. She needed to start fresh and we only kept the dining table, bar stools and bed. The rest is all new! Today’s reveal will be the dining room and the rest of the week will show her gorgeous apartment, one space at a time. She lives in a renovated early 1900’s building with loads of character. The builder decided to leave the exposed brick walls, plumbing pipes and tall ceilings. They added the soft and neutral gray walls, dark wood stained floors and stylish kitchen finishes to bring a modern, yet rustic vibe to these apartments. So let’s get right to it! A huge thank you to my great friend, Nicole, for helping me style the place on photo shoot day. She helped make the day so much fun! The amazing after photography shots are all by the very talented Sarah Heppell Photography. She shows this space in its best possible form. Enjoy!

A living room with brick walls and a table

And here is a before photo of this same space…

A room with a brick wall and wooden floors

Here are some more after photos…

A living room with a couch, chair and table.

A table with a vase of flowers on it

A dresser with two lamps and a brick wall

A dining room table with chairs and a clock on the wall.
A table with a vase of flowers on it
A blue lamp sitting on top of a wooden table.

A couple of crates sitting on top of each other.

A wooden pallet with wine glasses and bottles on it.

A cat is laying on the floor in front of a couch.
A kitchen with two stools and a sink

The building’s landlord was thrilled that this apartment has been designed and is now being photographed, that he wanted to stop by and take a look…

A man and woman standing in front of a brick wall.

{Deep in design conversation, in this photo}

And then one last full shot of this side of the room, again…

A living room with brick walls and a table

All after photos by Sarah Heppell

Throughout this week, I will show the living room side, the master bedroom and finally, finish with the foyer. This project has been so much fun and rewarding. I love being able to look back at where we began!

Bathroom E-Design Reveal – Before & After!!

July 13, 2015 by Amber Filed Under: amber b design, bathroom, before and after, e-decorating, e-design, interior design


I am so excited to show you this before and after today! A while back, a wonderful e-design client, who I have worked with on some rooms before, contacted me about putting some love back into their downstairs half bathroom. She wanted a more serene, spa like vibe and was definitely ready for a change.

Before 


Short of changing the vanity mirror and pedestal sink, they pretty much replaced everything else! My clients couldn’t wait to take the tile off the walls and floor. They were also looking to change the wall color and bring a softer, more modern look to the space. Here is the design plan I came up with…

The Design Plan


I knew that the new lighter wall color, stenciled top walls, wainscoted lower walls and new marble flooring were going to be the game changers. Everything else was the icing on the cake. Are you ready to see the afters?!?

After


Can you believe it’s the same space? My clients worked extremely hard to make this bathroom reflect their style. They did the work themselves and did a phenomenal job!! The best compliment on Instagram was a reader asking if that was wallpaper. It’s a stencil and you can purchase it HERE, in small. Thank you to my clients for allowing me to share their hard work. Bravo to you both!!

An Update on #projectclassickitchen !!

March 4, 2015 by Amber Filed Under: #projectclassickitchen, amber b design, before and after, design, interior design, kitchen, local clients


I am sorry for the long absence on the blog! Time got away from me, but I am happy to return with a local client project update. You may have remembered a post I wrote HERE about #projectclassickitchen. It was a local client project that I was so thrilled to be a part of. The project got its name because my clients contacted me after remodeling their gorgeous traditional and classic kitchen. They live in a 1930’s Georgian brick colonial and the finishes they chose totally work with the era of the home. I was hired to complete the space with: breakfast nook furnishings, wall accessories and window treatments. I recently went over to the house, since we are working on some other rooms on the first floor and decided to snap even more pictures of the kitchen. When I was there last, the drapes had not arrived yet and there were some other items that needed to be hung on the walls. Here is the space now…

And just for fun, let’s do a before and after of the breakfast nook…

Before


After


I can’t wait to show you the design process for the rest of the rooms we are working on!

Before and After {#projectdelicatenursery Reveal!!}

October 17, 2014 by Amber Filed Under: #projectdelicatenursery, before and after, design, interior design, kids and design


I am so excited to share my latest client reveal! I have been working on a girl’s nursery with a wonderful local client. She lives in a gorgeous 1930’s home and the room has a lot of great potential. The space has beautiful hardwood floors, glass door knobs and loads of character. My client did a great job purchasing the area rug, dresser and crib before we met. I came in to make suggestions on wall color, accessories and the rest of the furnishings. Here is the room before we started…

Before


We immediately started talking about wall color and how we wanted to lighten it up and give the nursery a warm glow that feels cozy and inviting. She wanted the space to feel soft and delicate and a room her soon to be daughter can grow with. We met a couple of weeks later and I presented her with the design plan…

The Design Plan

{To read more about this design board, I spoke about it in a post HERE.}

We basically went ahead with every plan, but changed the art a bit along the way. Here are the after pictures…
After


My clients are so happy with the room and I am so excited they love it! There are only a few elements left to fully complete the room. We have a beautiful paper cut mobile going above the crib that has yet to arrive. My client chose the gold lotus ceiling pendant, but it is currently out of stock. In the meantime, we also love the character of the original brass fixture. That might work out after all. Also, wall ledges for book display will be mounted to the right of the glider. I will go into more detail about the space in the coming weeks. Now we anxiously await for this beautiful bundle of joy to arrive!
Thank you so much to my amazing clients for allowing me to share the nursery! 

Before and After {Foyer E-Design}

August 19, 2014 by Amber Filed Under: before and after, design, e-decorating, e-design, foyer, interior design


A love a great before and after, don’t you? It always amazes me to see how a space can transform with just a few changes! I have a great before and after to show you, today. My wonderful client and I have been working on several rooms throughout her home and she has been a pleasure to work with. Her and her husband have been plugging away at each of the spaces and are truly doing a wonderful job seeing the design vision through. Here is the foyer when we began working together…

Before


We wanted to bring some pattern and texture to this space and make it a fun welcoming area to look at upon entering her house. A foyer is a very important room to consider, since it sets the stage for what’s to come throughout a home. I created the foyer design along with the living room, since they are really one big space. Here is the design board I came up with, the foyer design towards the left of the board…

Design Plan


I wanted to create pattern on the walls with a new stencil. This helped to separate the foyer from the living room, while still making it feel like one design. To unify the spaces, we painted all of the walls in both the foyer and living room the same gray/white shade. That really helped to lighten up the spaces and allow the accessories to shine. Here are the afters of her foyer…

After


The stencil and the lighter walls really make the space, don’t you think? I also love the way a room changes with just some paint. The door and trim looks amazing painted black! I love the way she pulled this space together. And thanks so much to my client for allowing me to share these photos here on the blog. ๐Ÿ™‚

  • « Previous Page
  • 1
  • 2
  • 3
  • 4
  • Next Page »
Welcome!

Hi, I'm Amber... a wife, mom and interior decorator. I am the writer of Simple Dwellings and the designer behind Amber B Design. Blog topics are all things design, with the occasional DIY attempt! Thanks for stopping by Read more...

  • Bloglovin
  • Email
  • Instagram
  • Pinterest
  • Twitter

Blog Posts, Straight to Your Inbox

Popular Projects

A dining room with white walls and wooden table.
A black door with white curtains and a red chair
A staircase with black and white chevron pattern on the steps.

Blog Love

  • Addison’s Wonderland
  • A Thoughtful Place
  • Alison Giese Interiors
  • Amber Interiors
  • Bailey McCarthy
  • Caitlin Wilson
  • Chris Loves Julia
  • Classic Casual Home
  • Cottage and Vine
  • Design Indulgence
  • Dwell by Cheryl
  • Eddie Ross
  • Elements of Style
  • Emily A Clark
  • Emily Henderson
  • Gallery No Eight
  • Hi Sugarplum
  • House of Jade
  • Jana Bek
  • Juniper Home
  • Kate Marker Interiors
  • Lucy Williams
  • Monika Hibbs
  • Our Fifth House
  • Pencil and Paper Co
  • Rachel Parcell
  • Rambling Renovators
  • Pure Style Home
  • Sita Montgomery
  • Studio Mcgee
  • The Makerista
  • The White Buffalo Styling Co
  • the Zhush
  • Traci Zeller
  • Young House Love

Copyright Amber B Design © 2025 ยท Design by Britt Douglas


Loading Comments...