Amber B Design Studio

Interior Design & Decoration for the South Florida region

  • Home
  • About
  • Services
  • Portfolio
  • Blog
  • Press
  • Contact

Before and After: A Mini Reveal of #projectclassickitchen !!

December 21, 2014 by Amber Filed Under: #projectclassickitchen, central new york design, interior design, kitchen, local clients


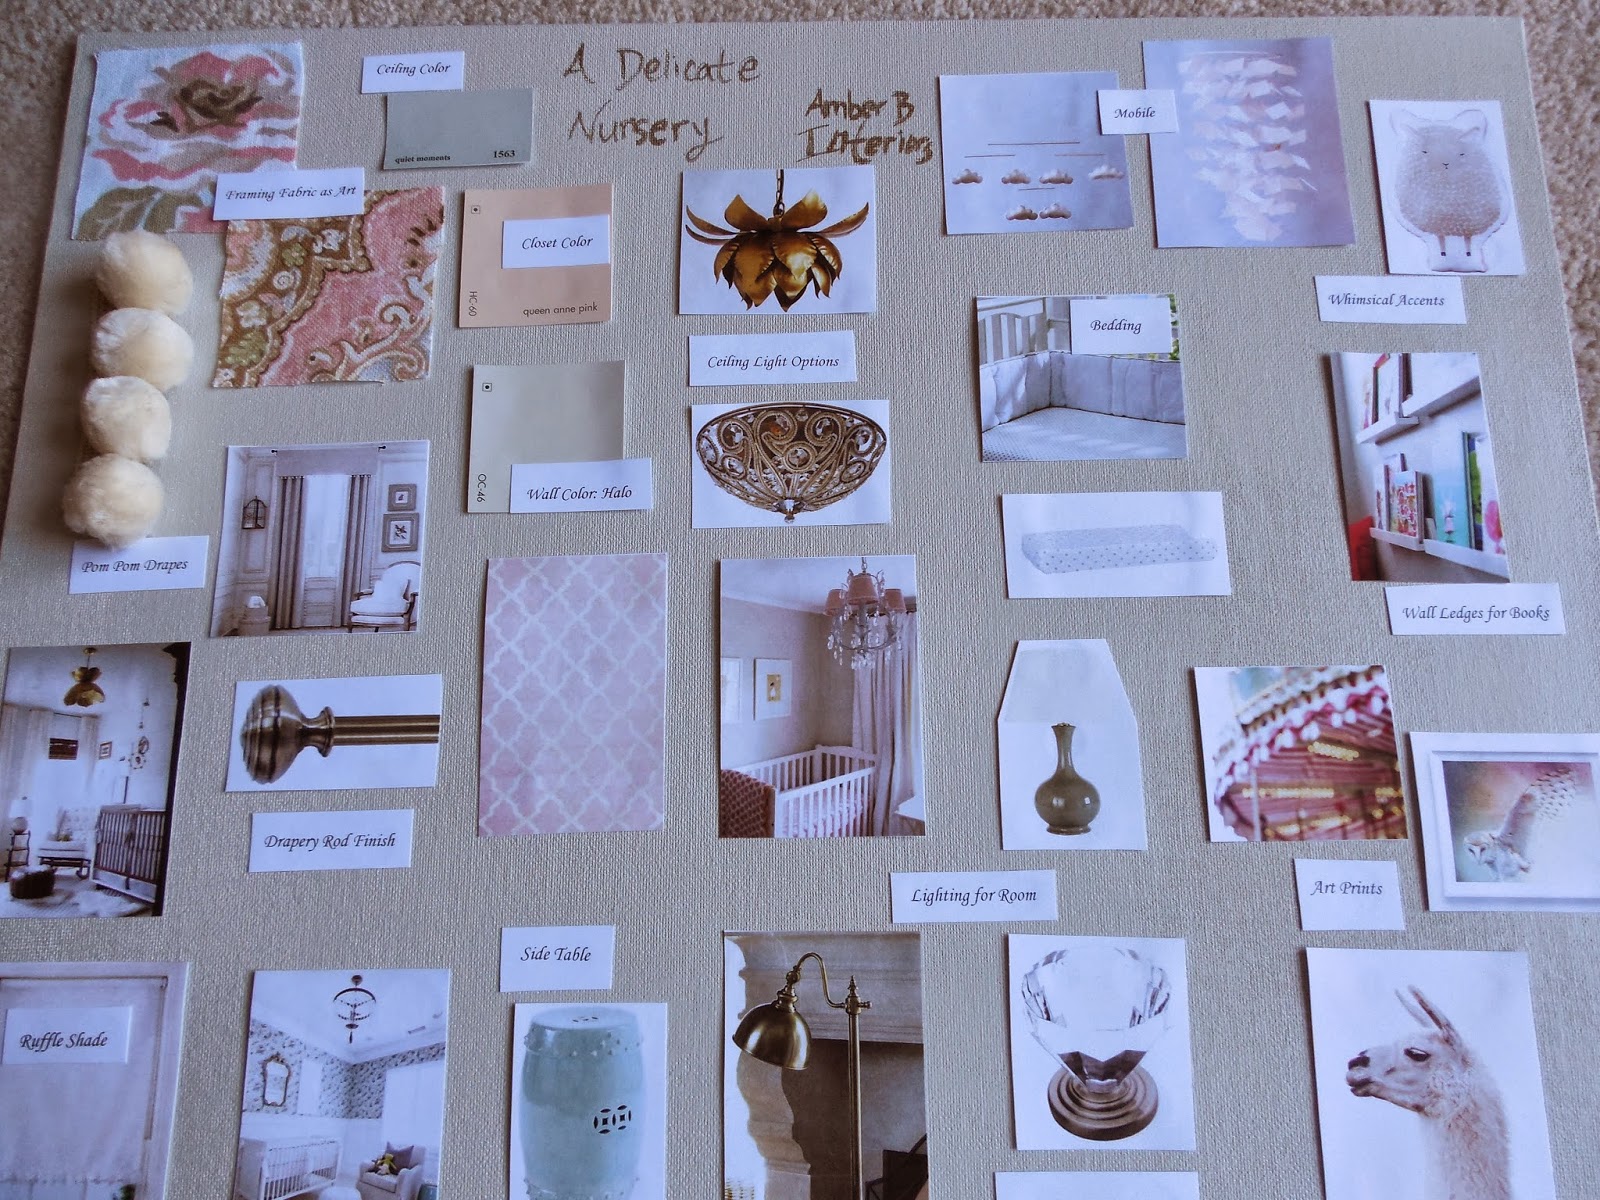
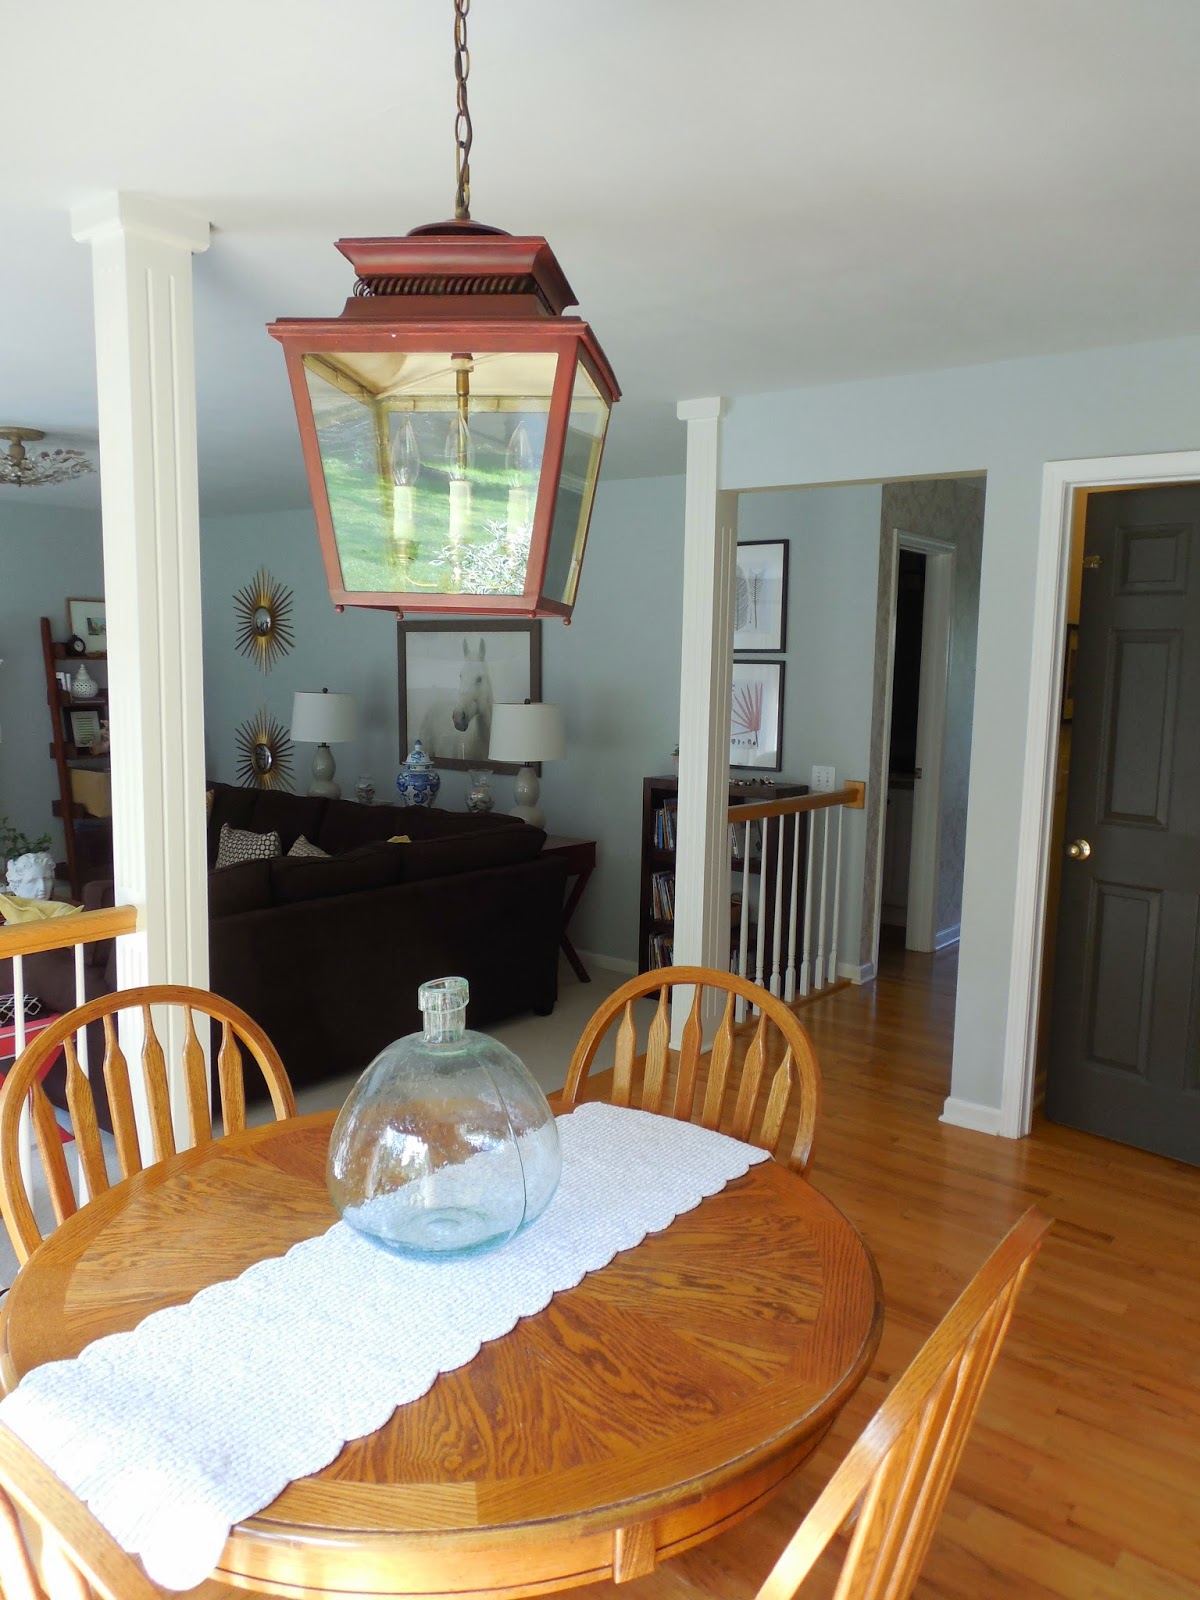
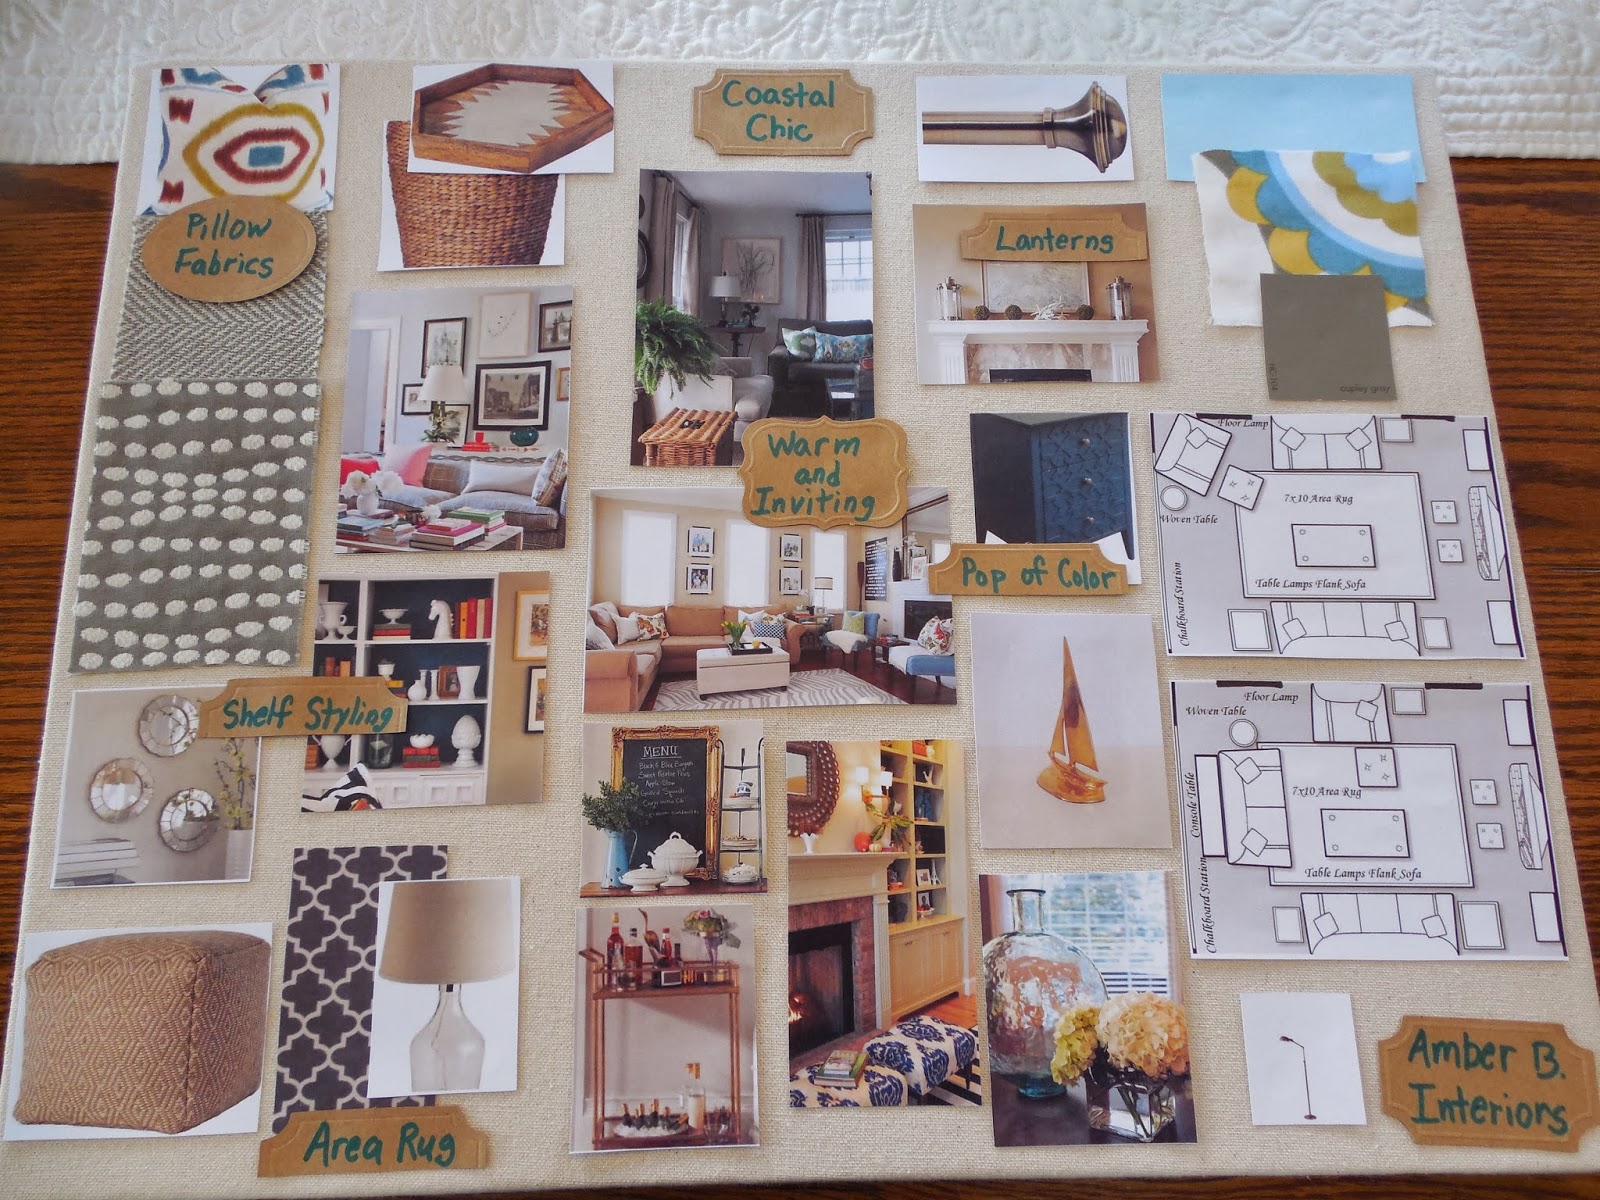
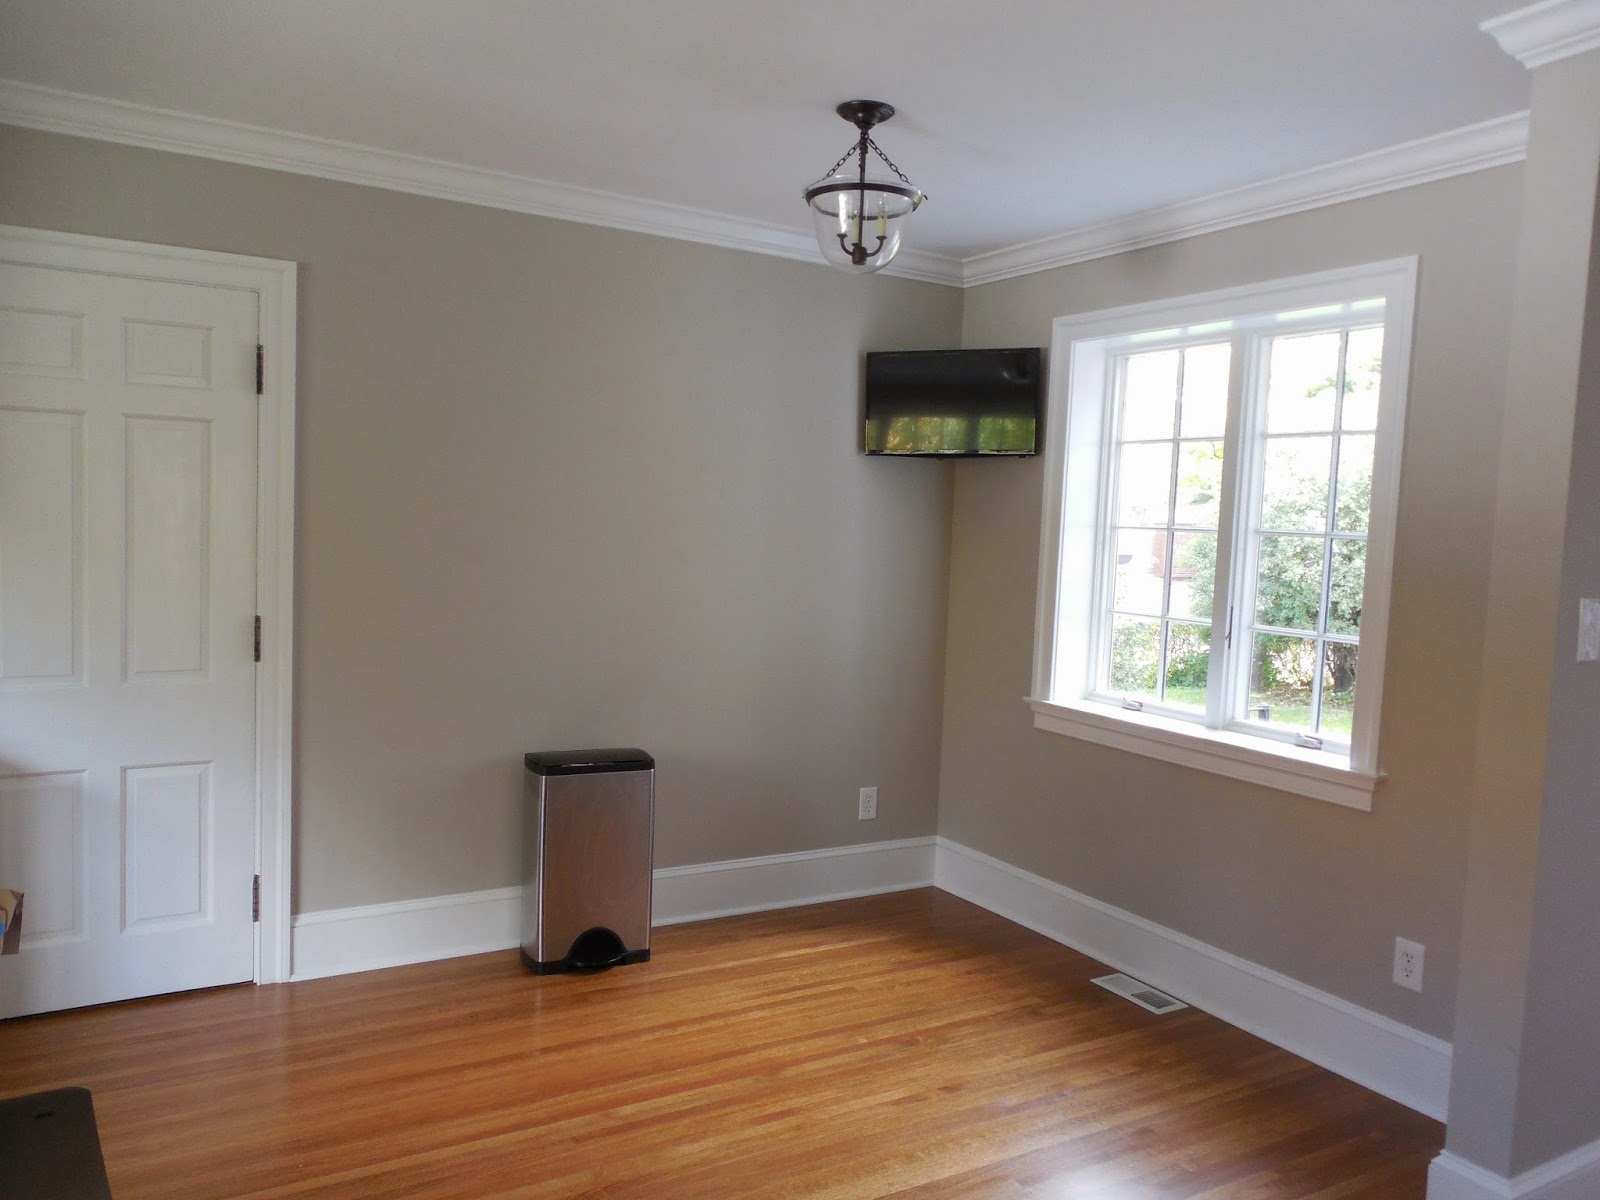
I am thrilled to reveal a local project I have been working on! I first started working with these clients with #projectdelicatenursery and we have since began working on other areas of their home. I am so fortunate that my clients found me… they have been wonderful to work with. They just completed a major renovation of their gorgeous kitchen and needed my help with dining furniture, wall accessories and just pulling the eating area together. Let’s get right to the pictures!! Here is the dining area after the renovation and before we started working together on the space…
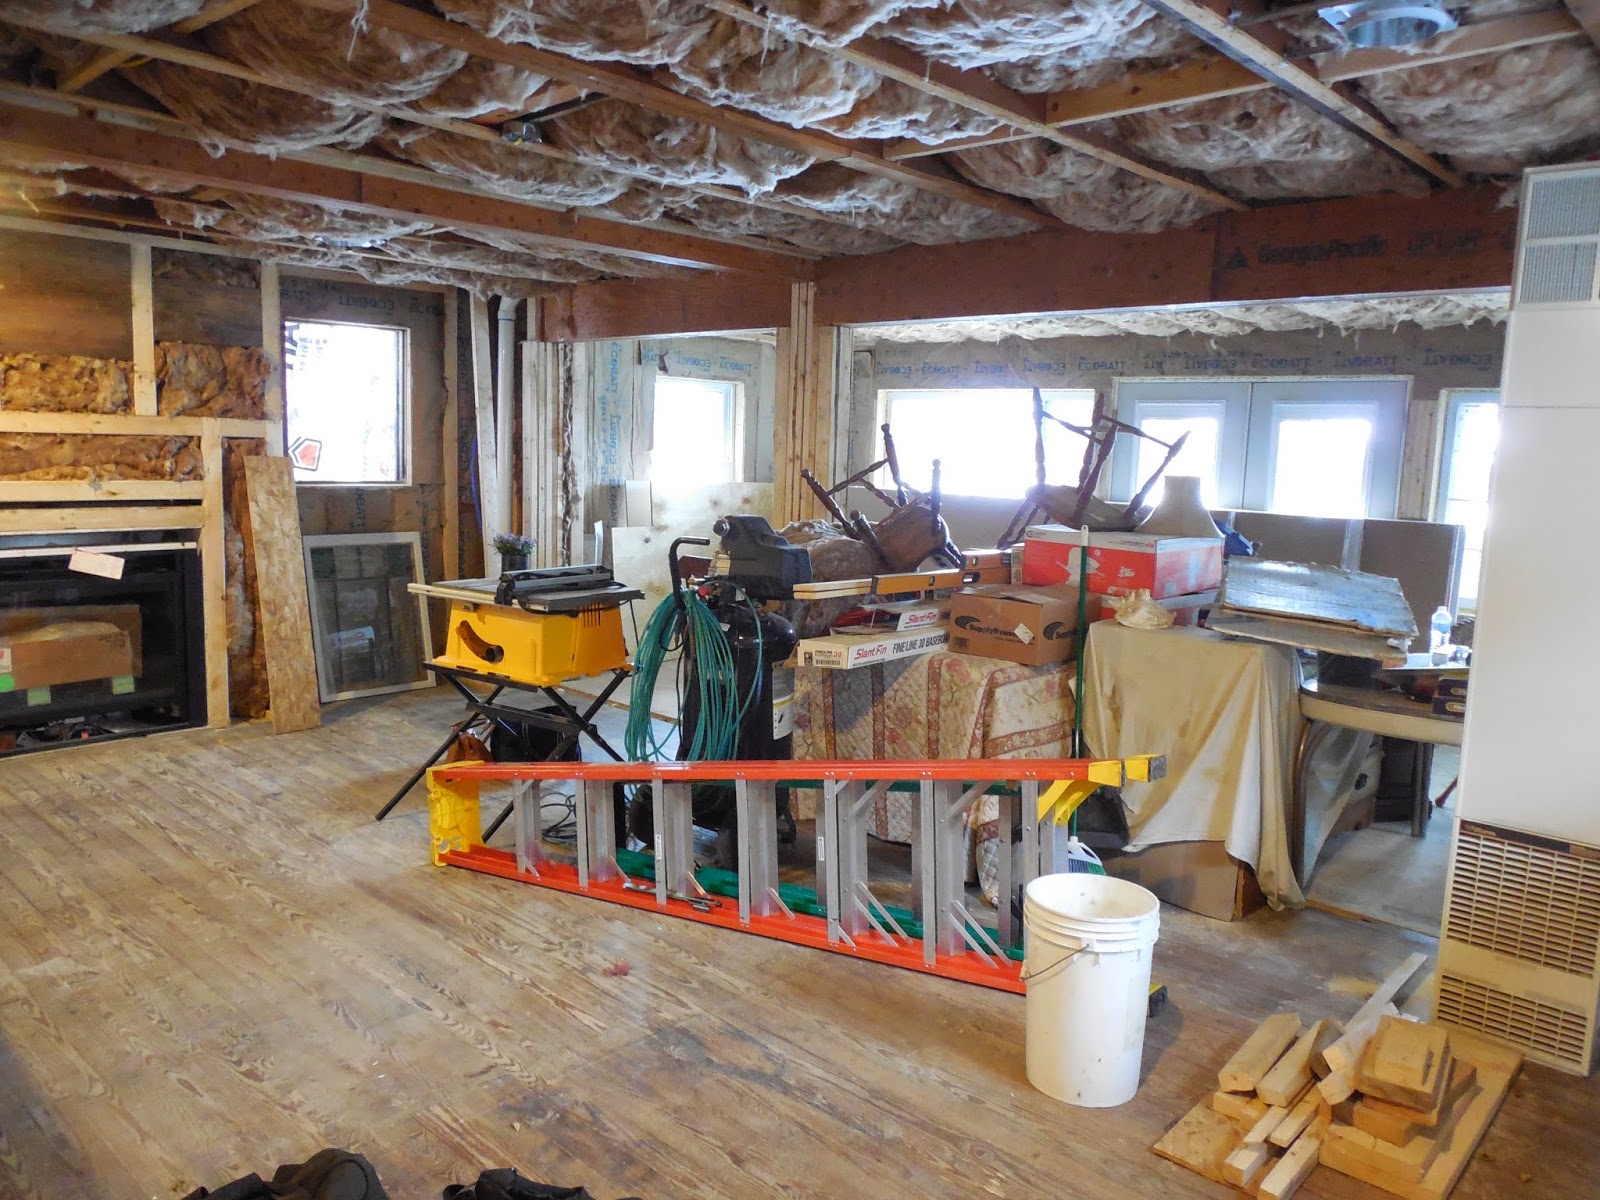
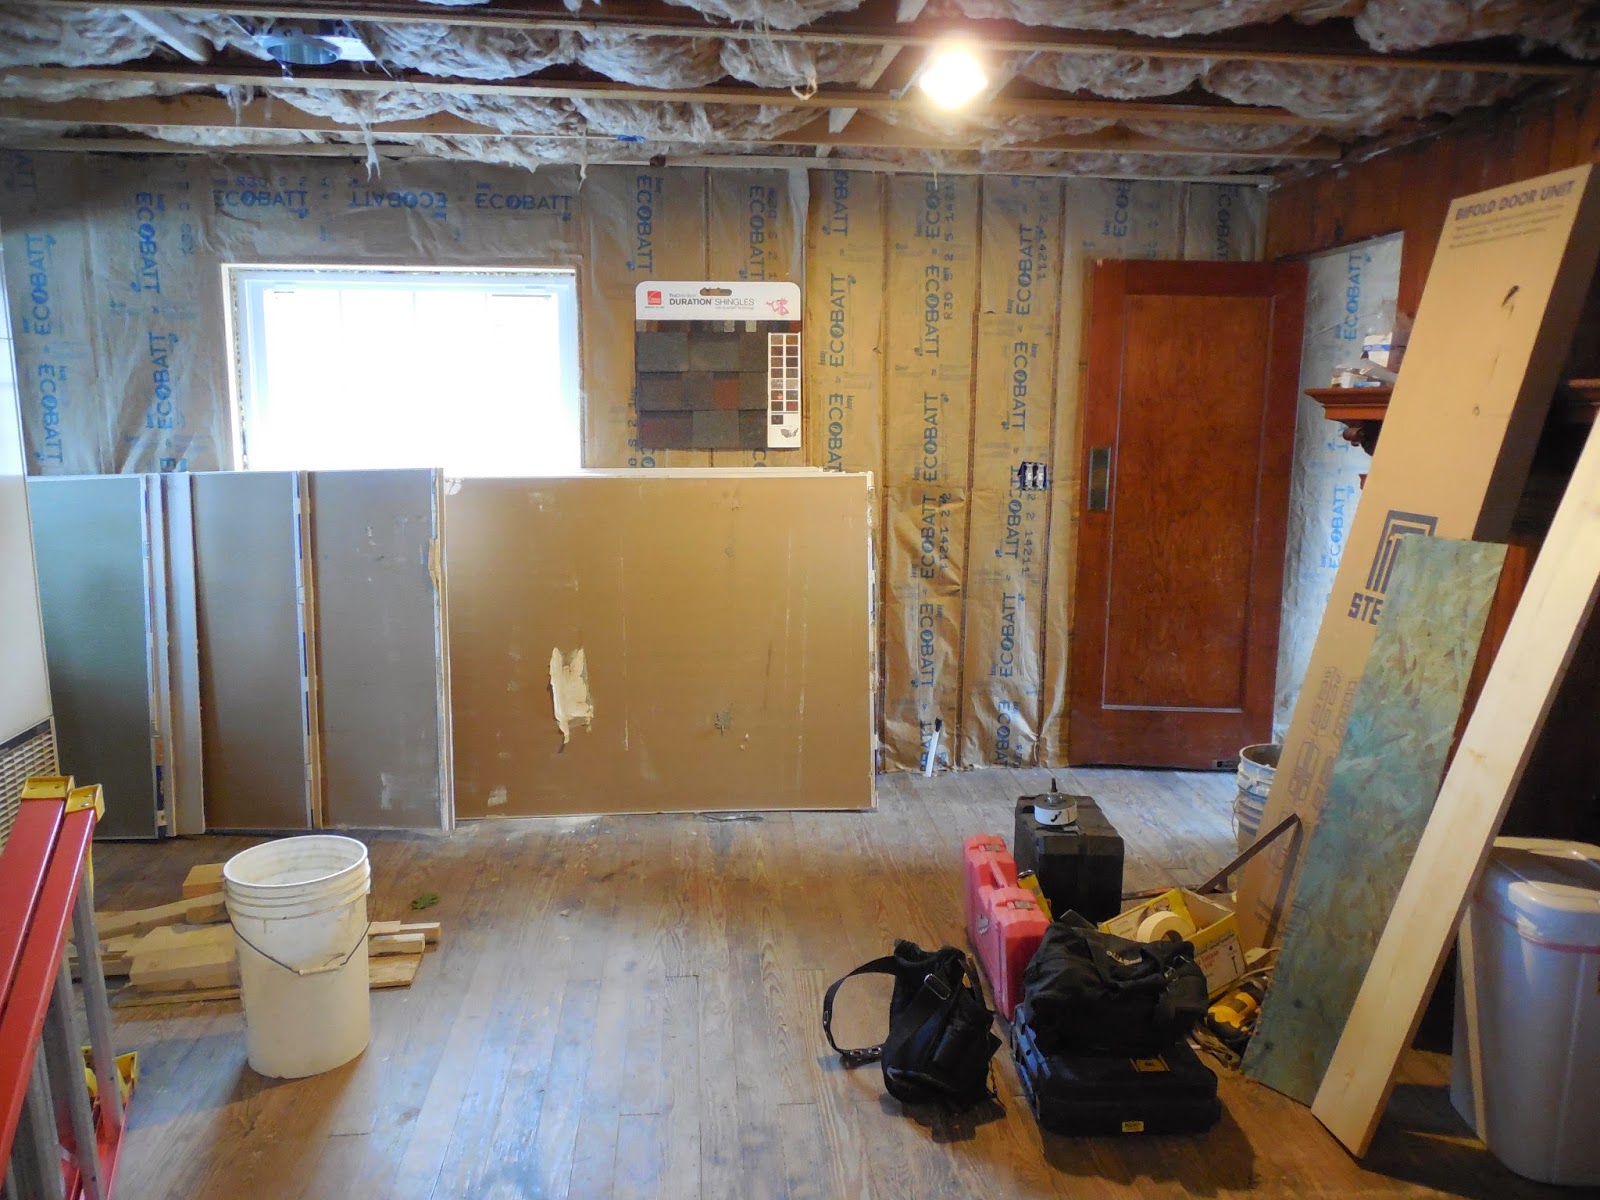
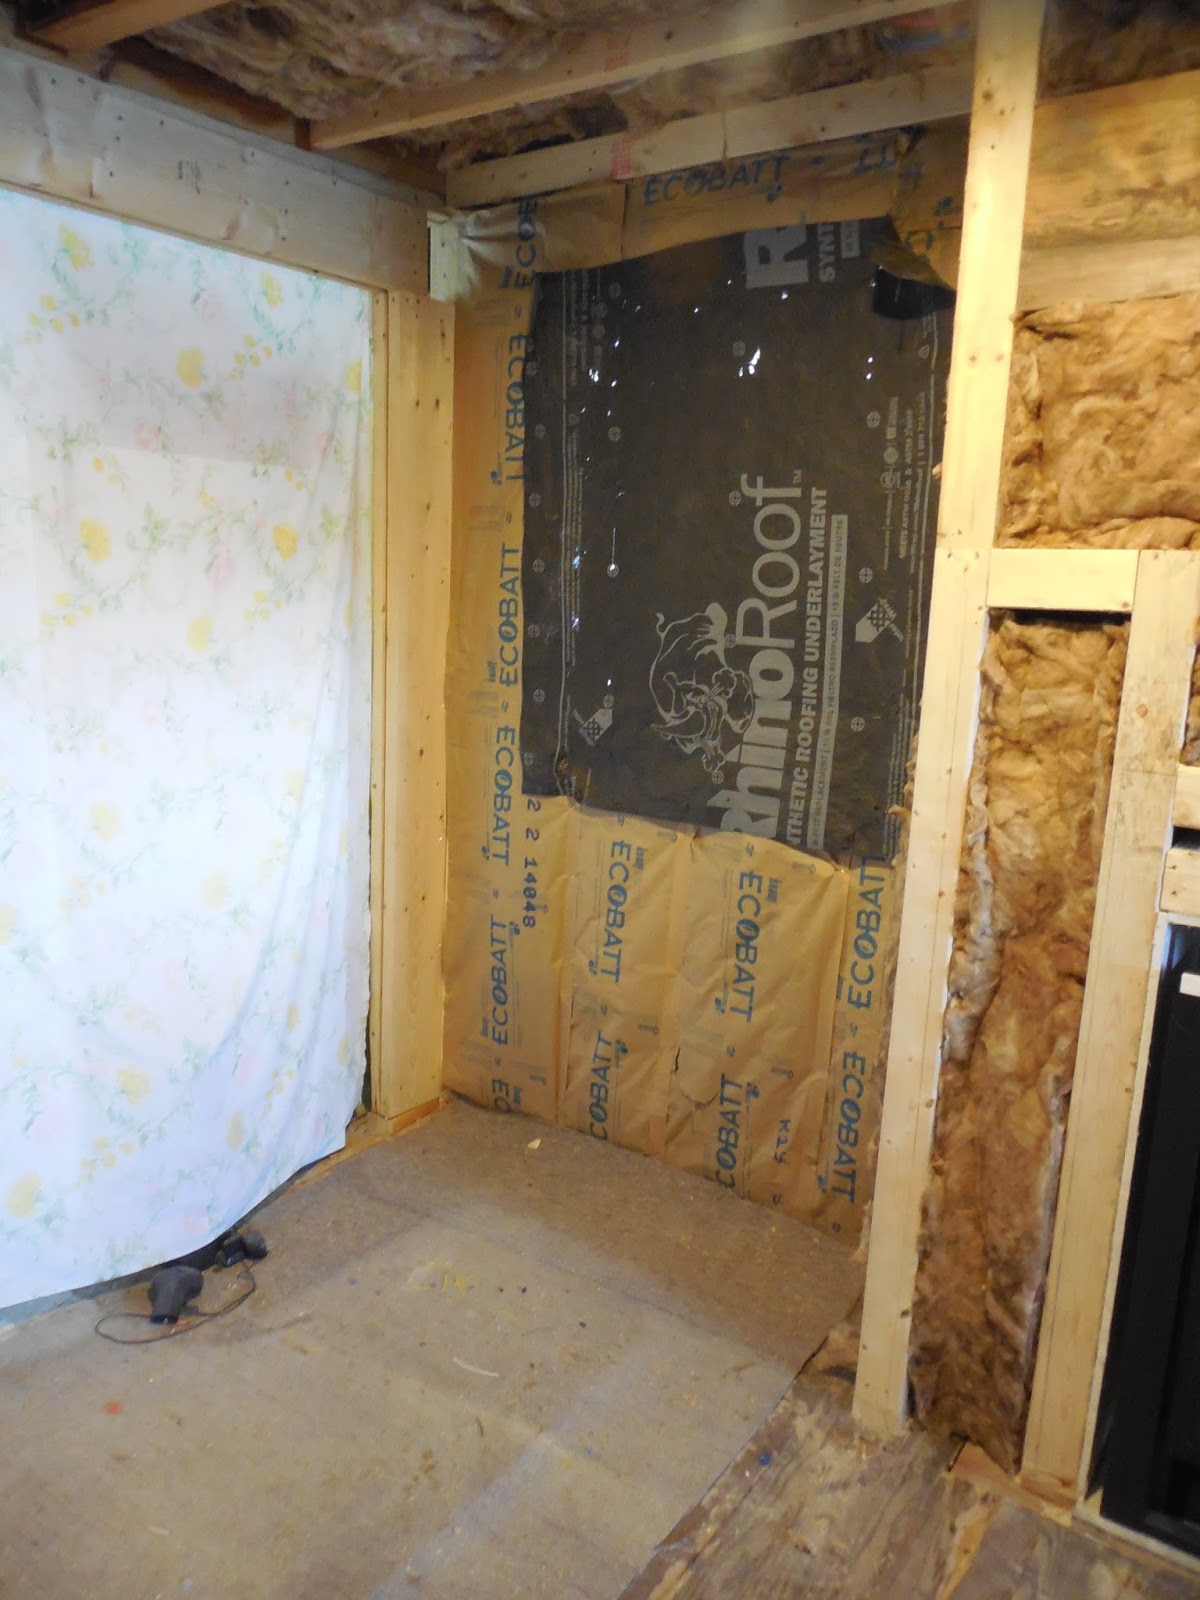
Before


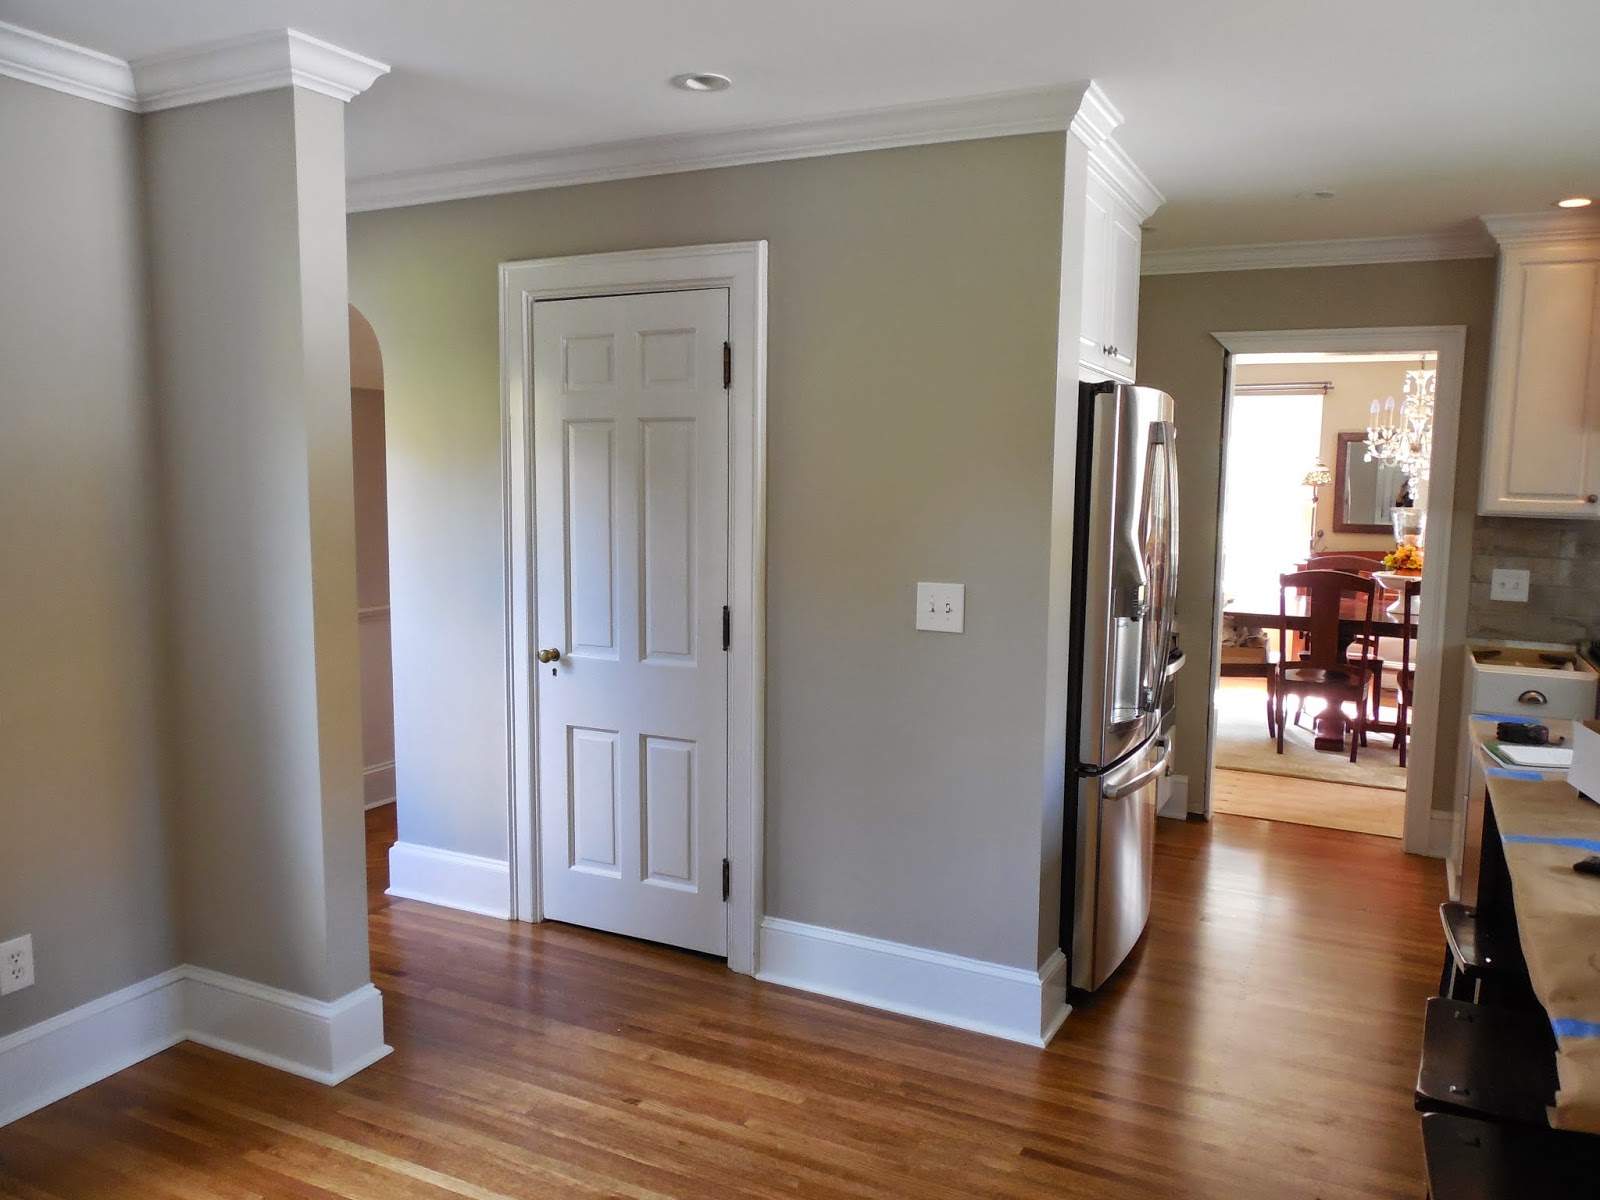
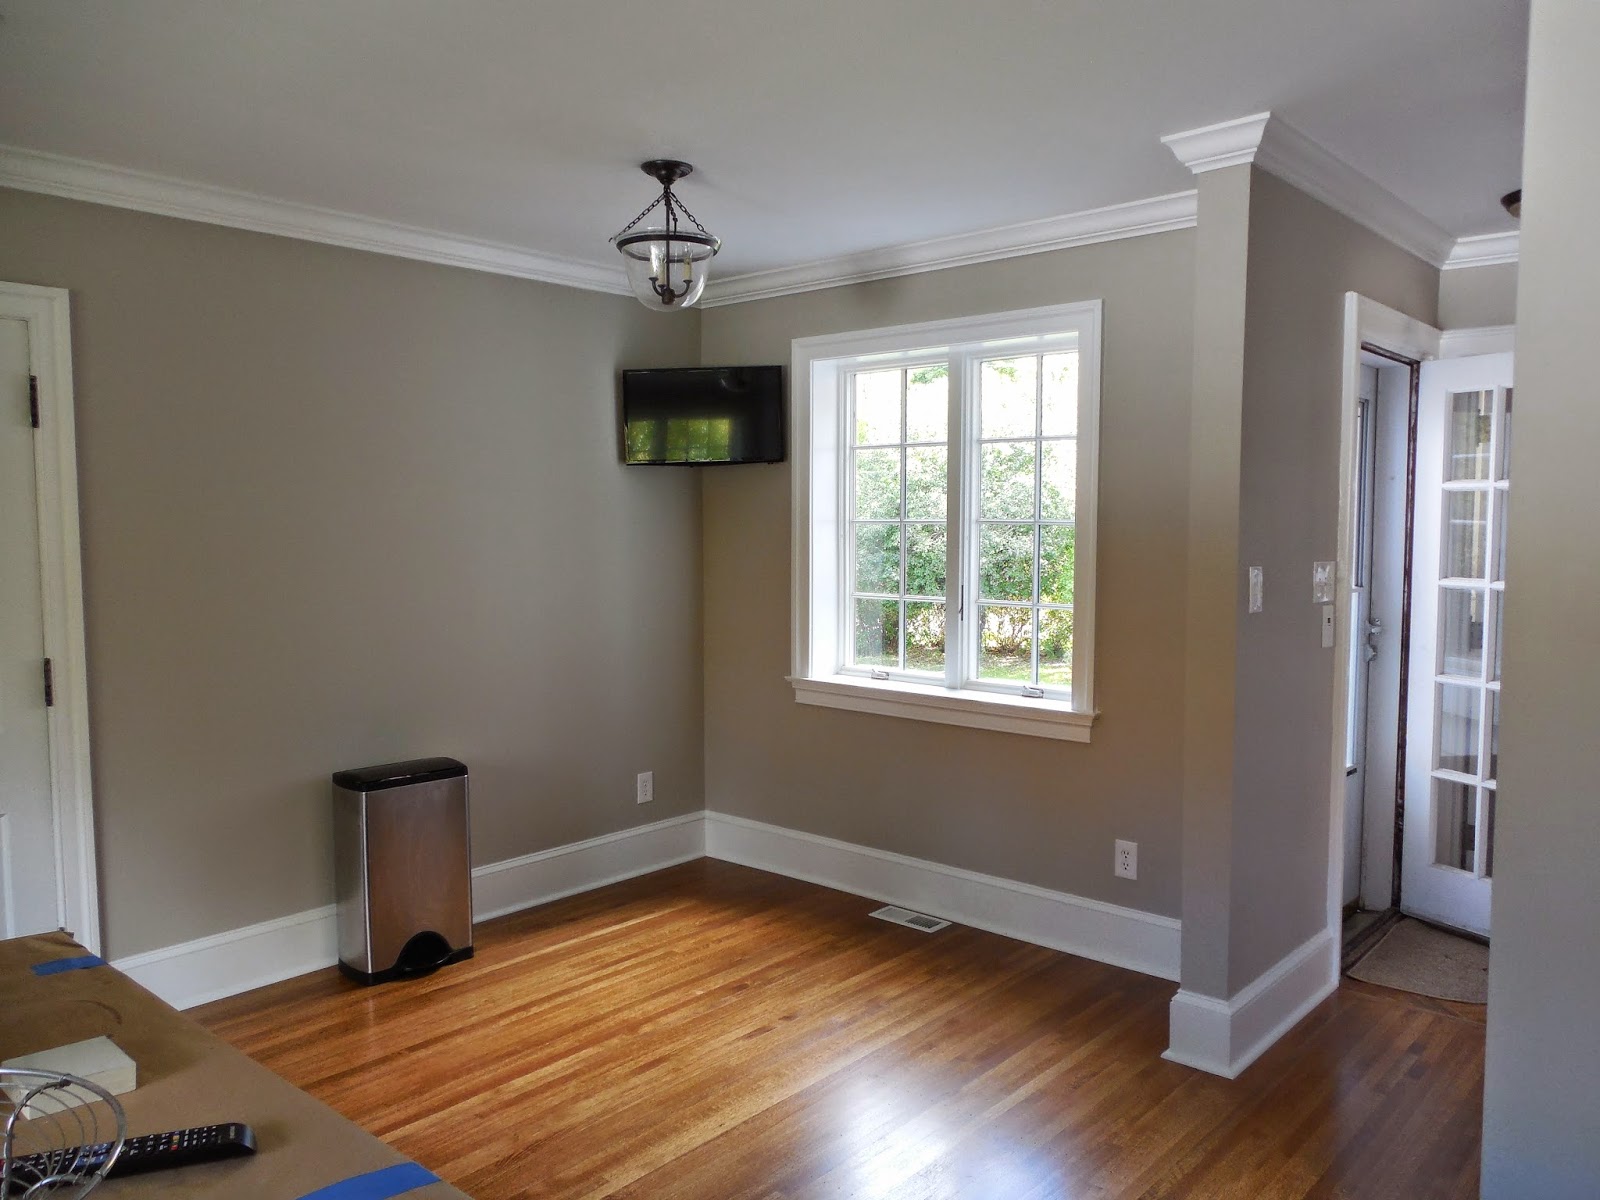
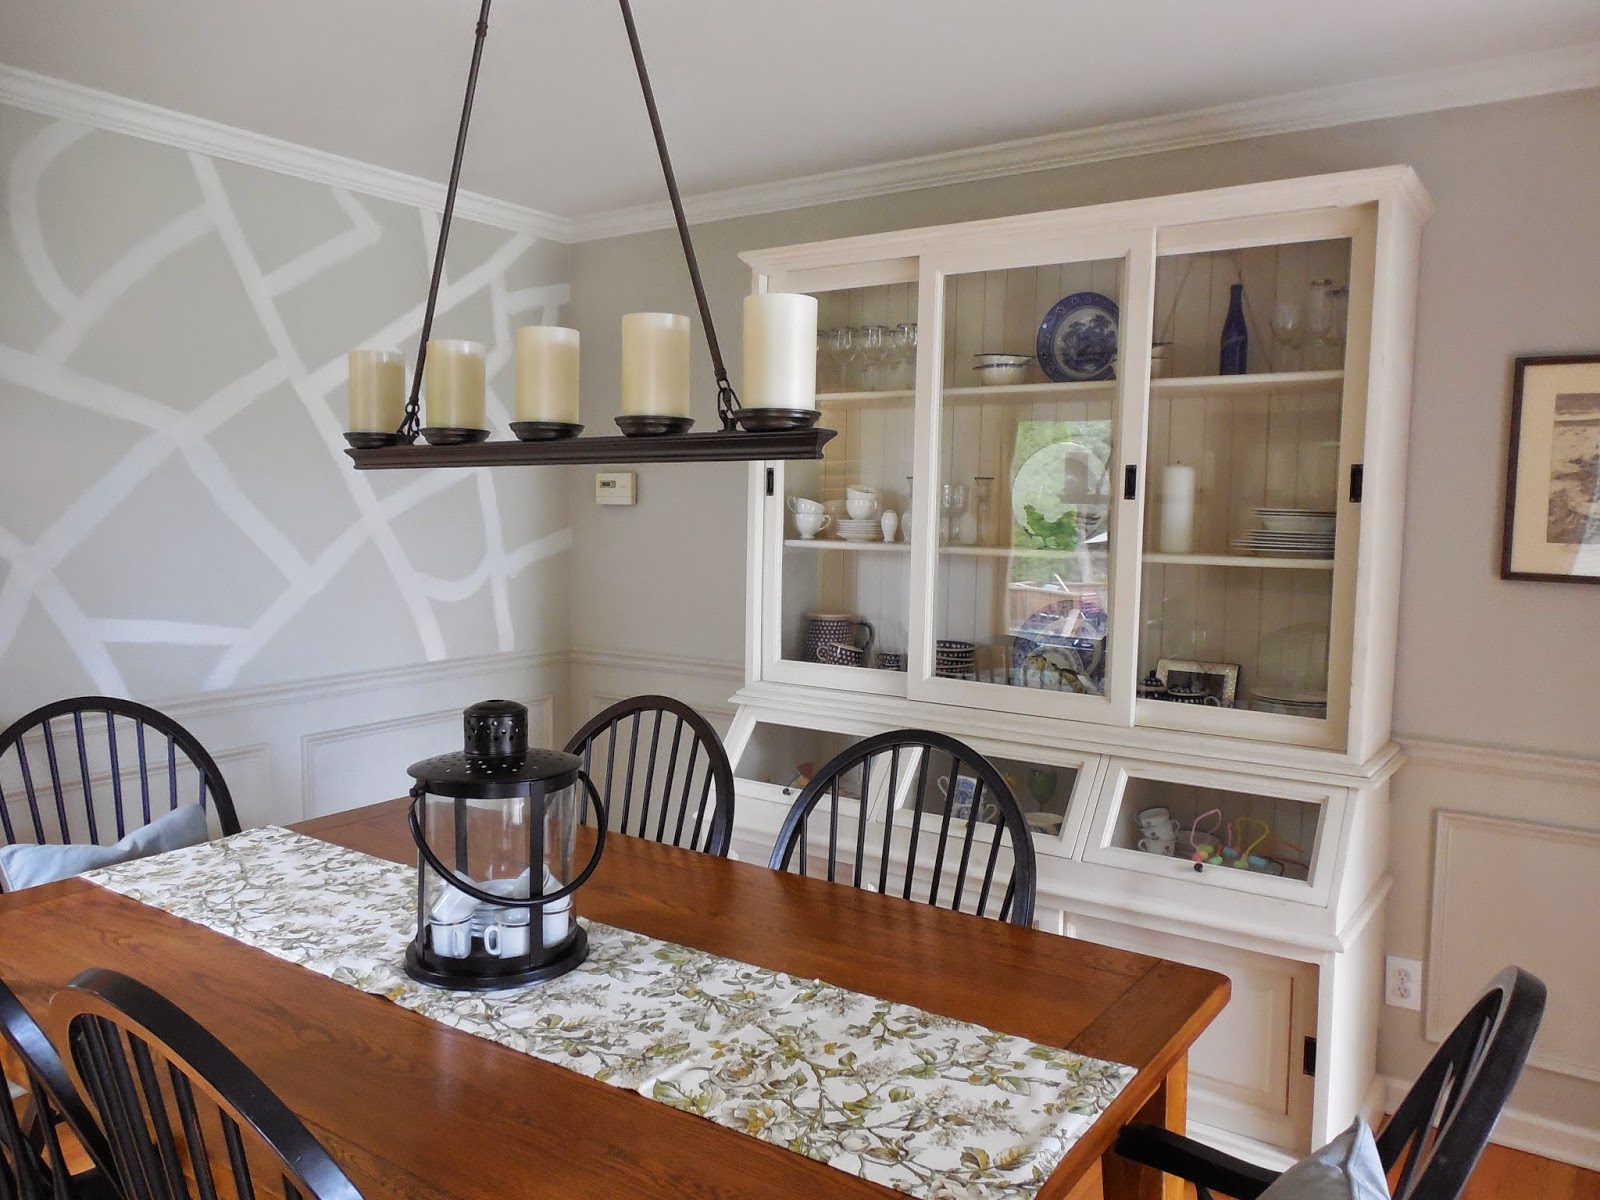
In these before pictures, the kitchen renovation was almost complete. They were just waiting on the counters to arrive and some finishing touches. The kitchen area is now complete and is fabulous! They can also check the eating area off their list of finishing touches!
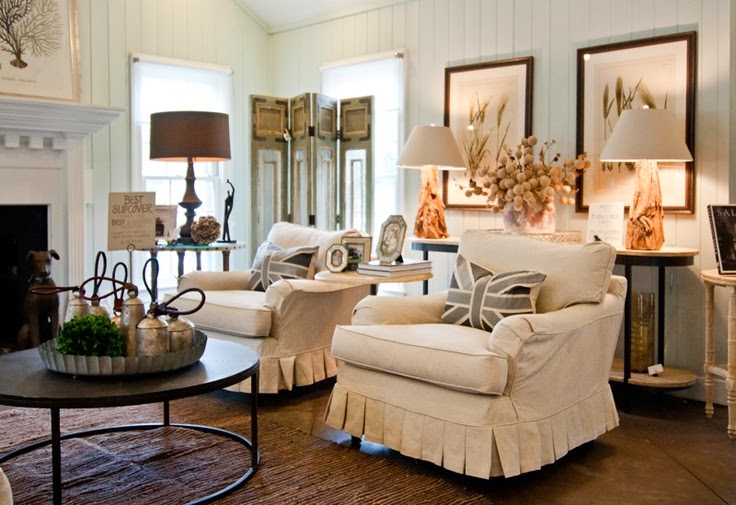
After


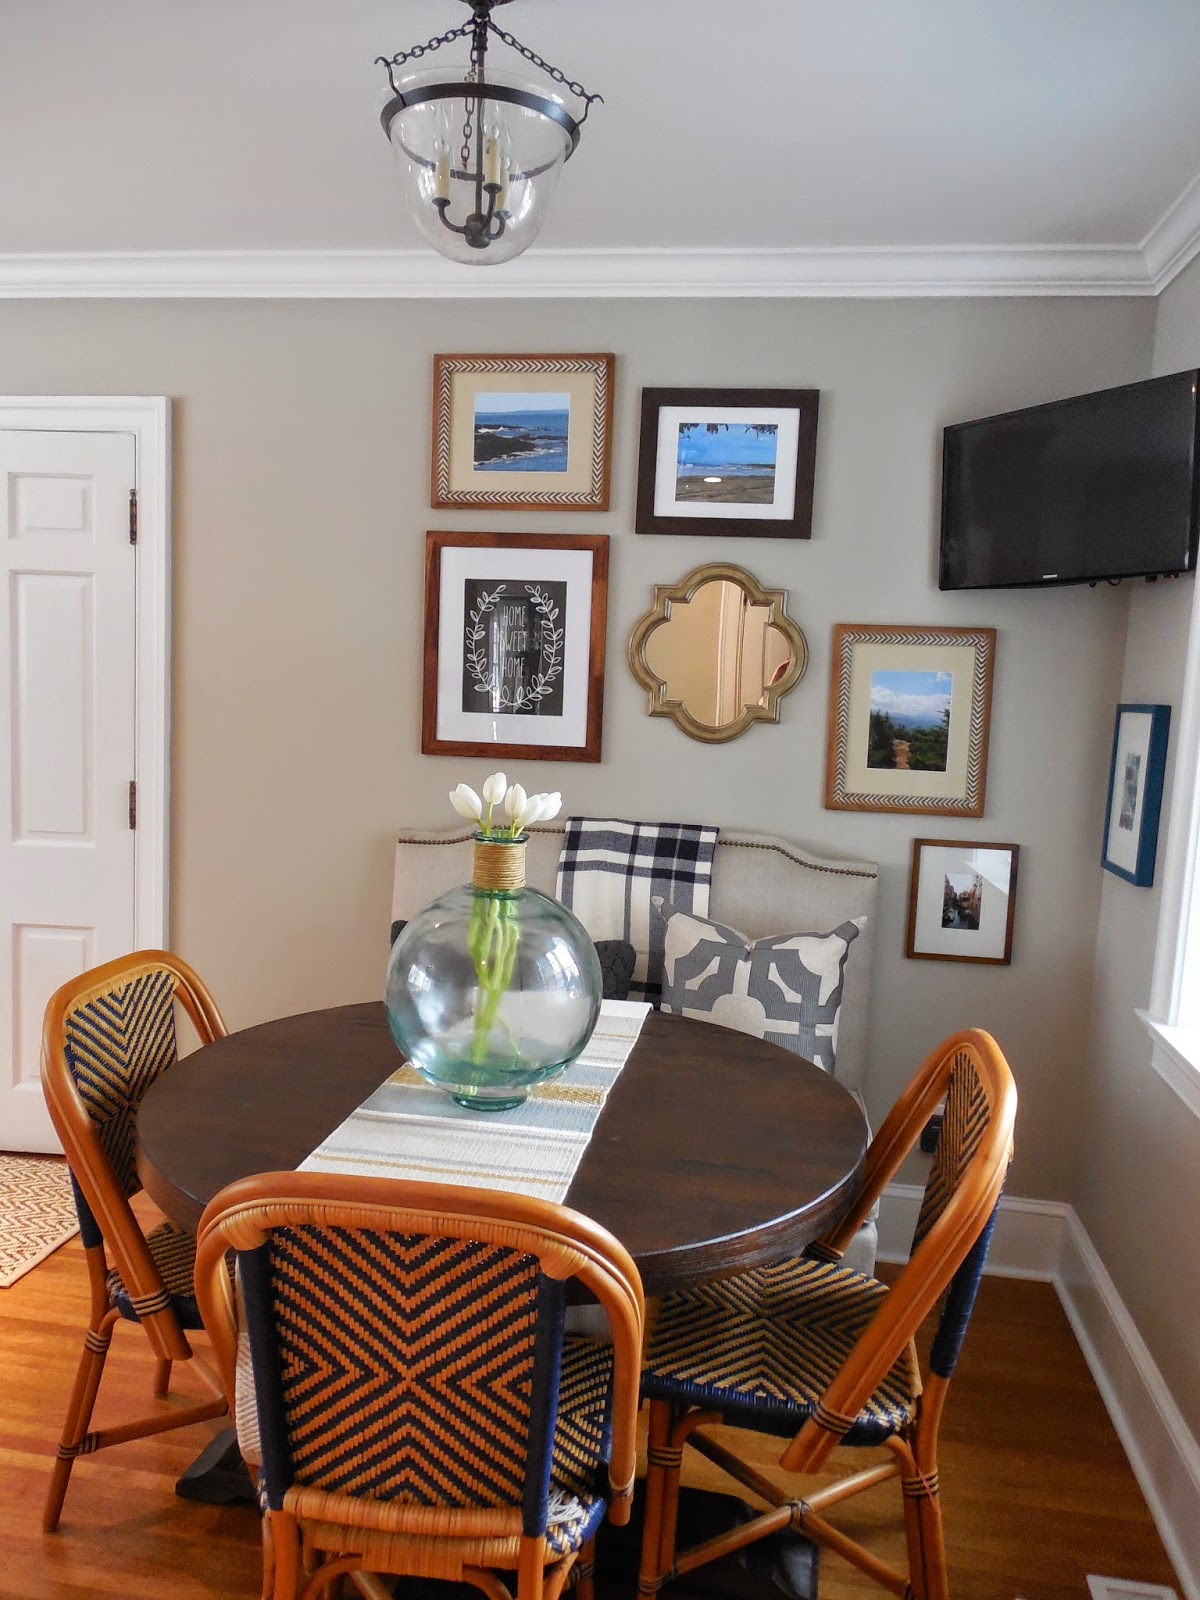
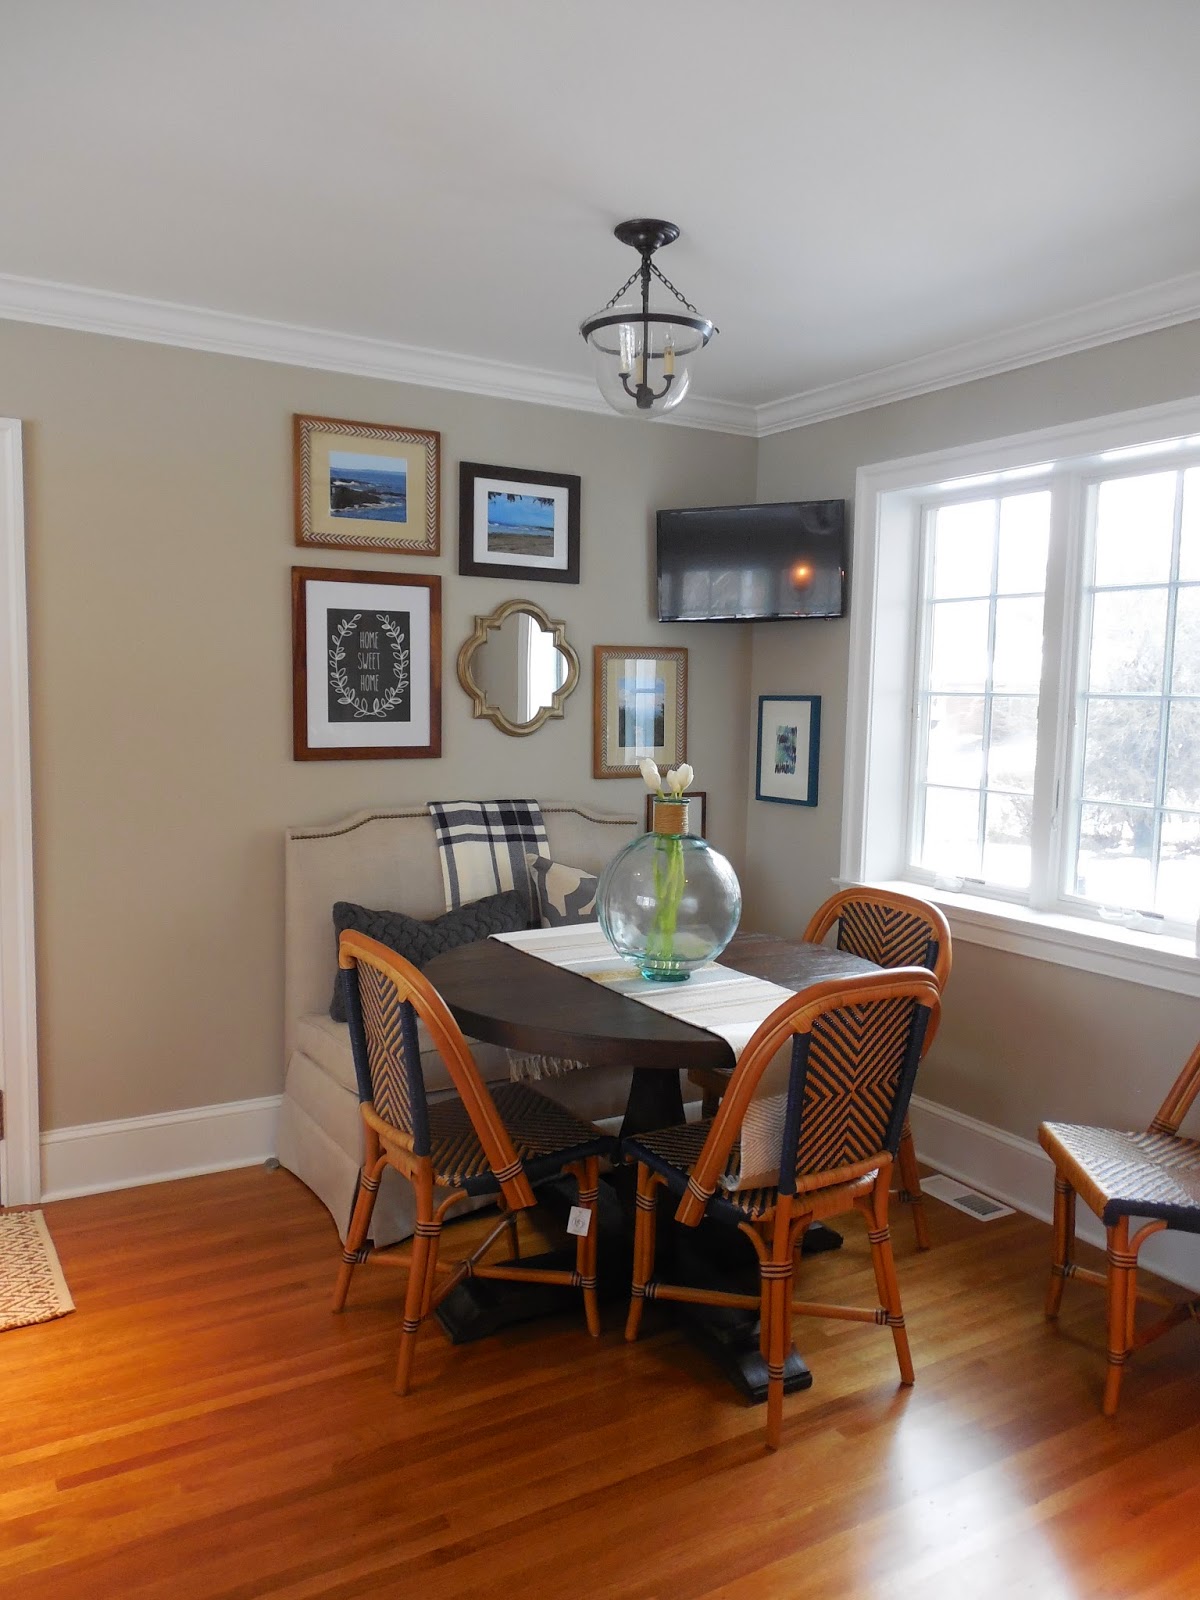
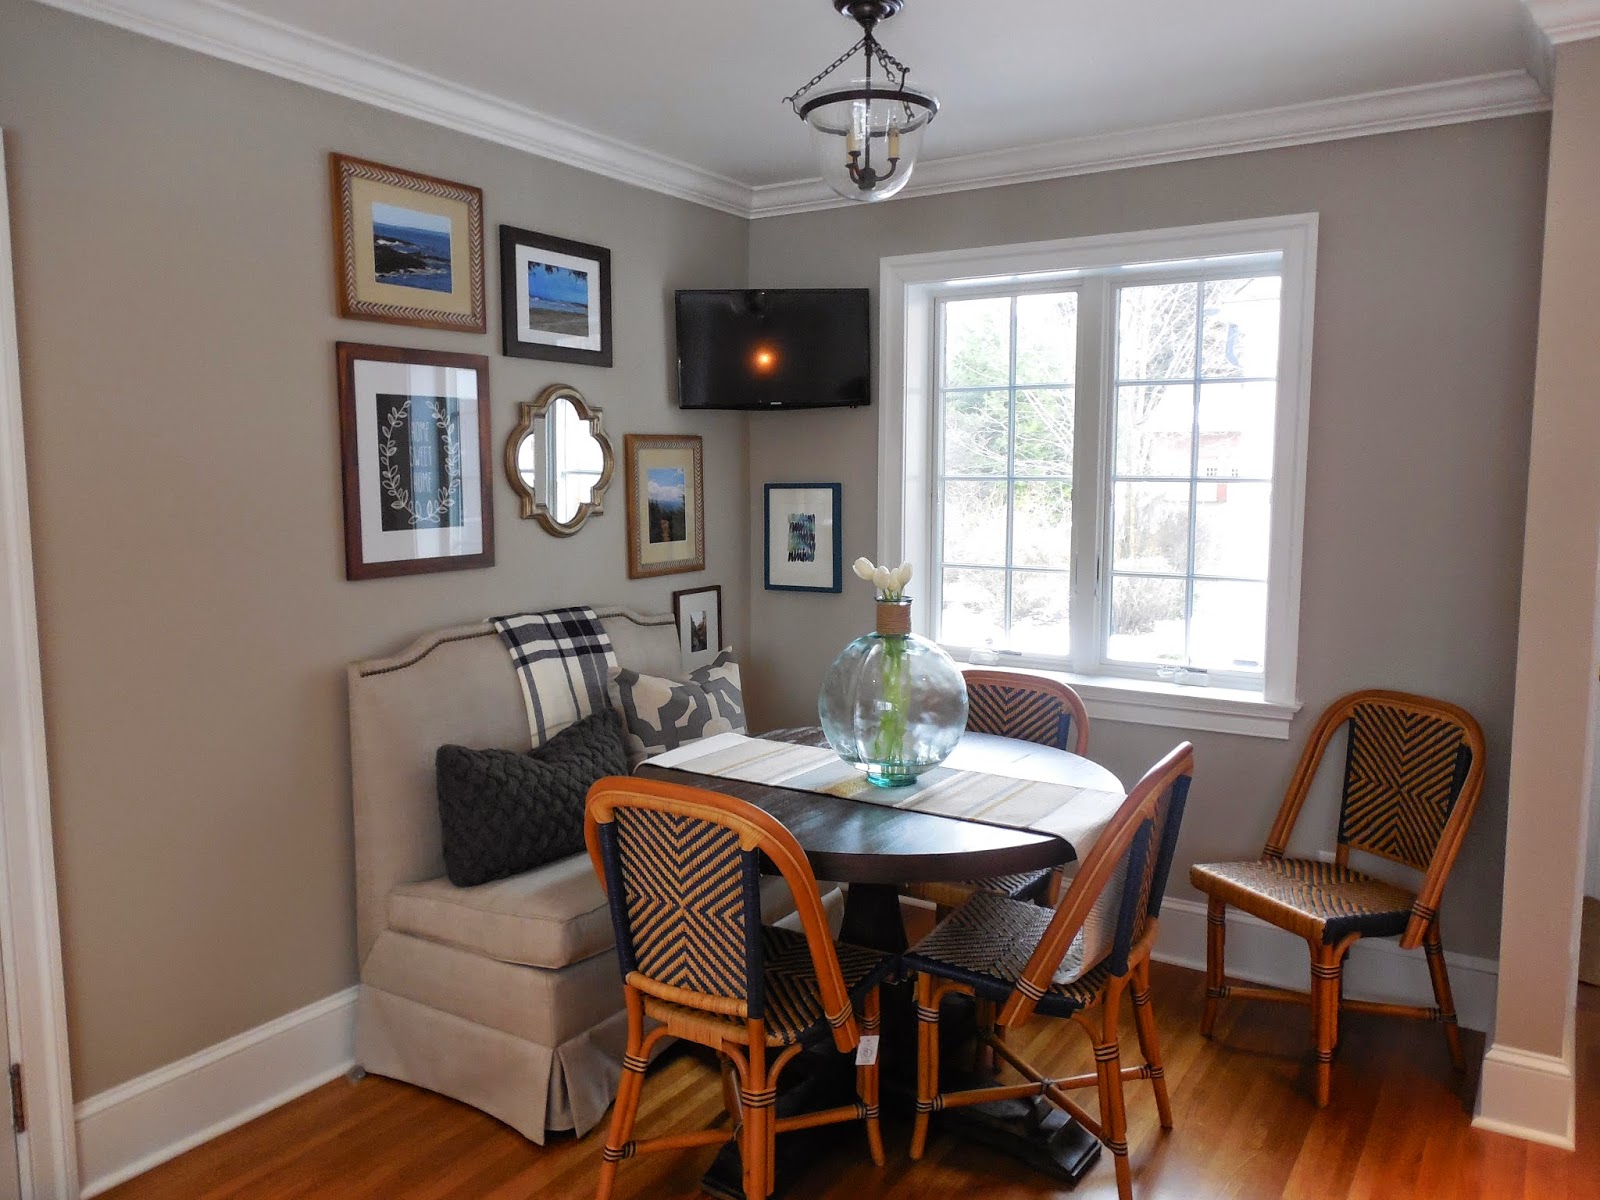
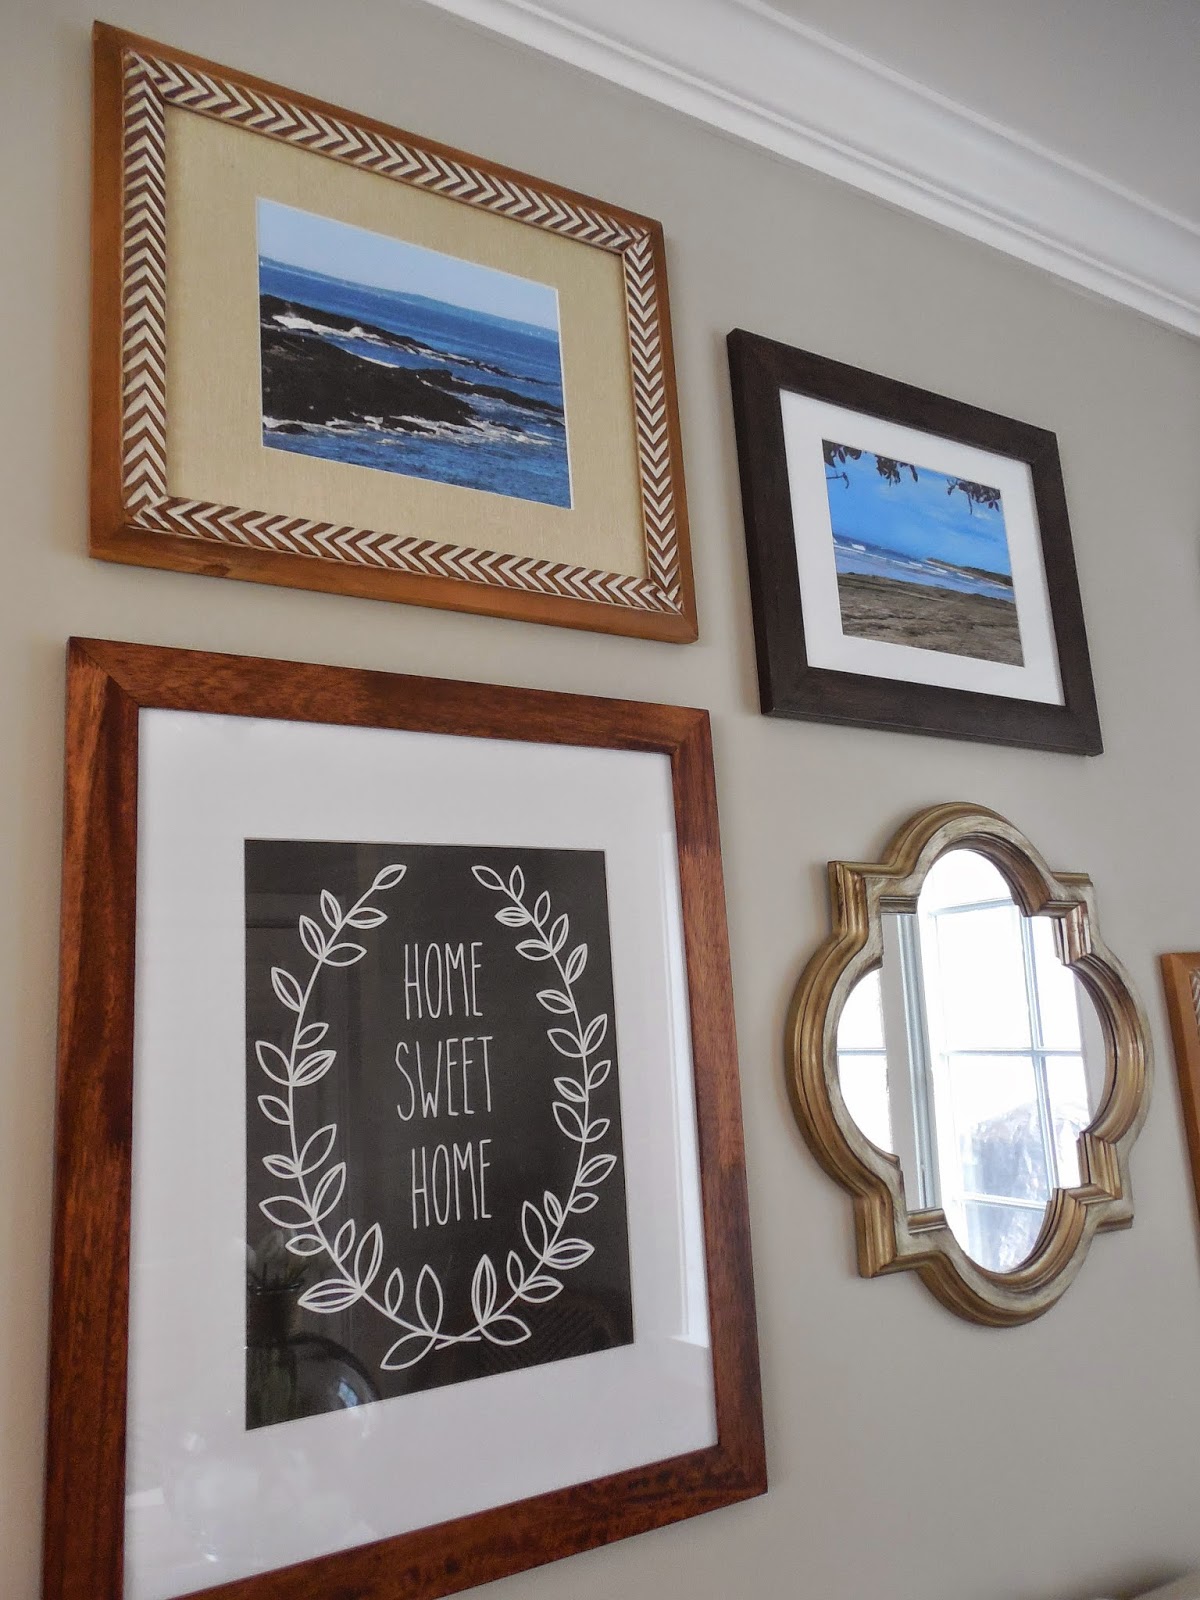
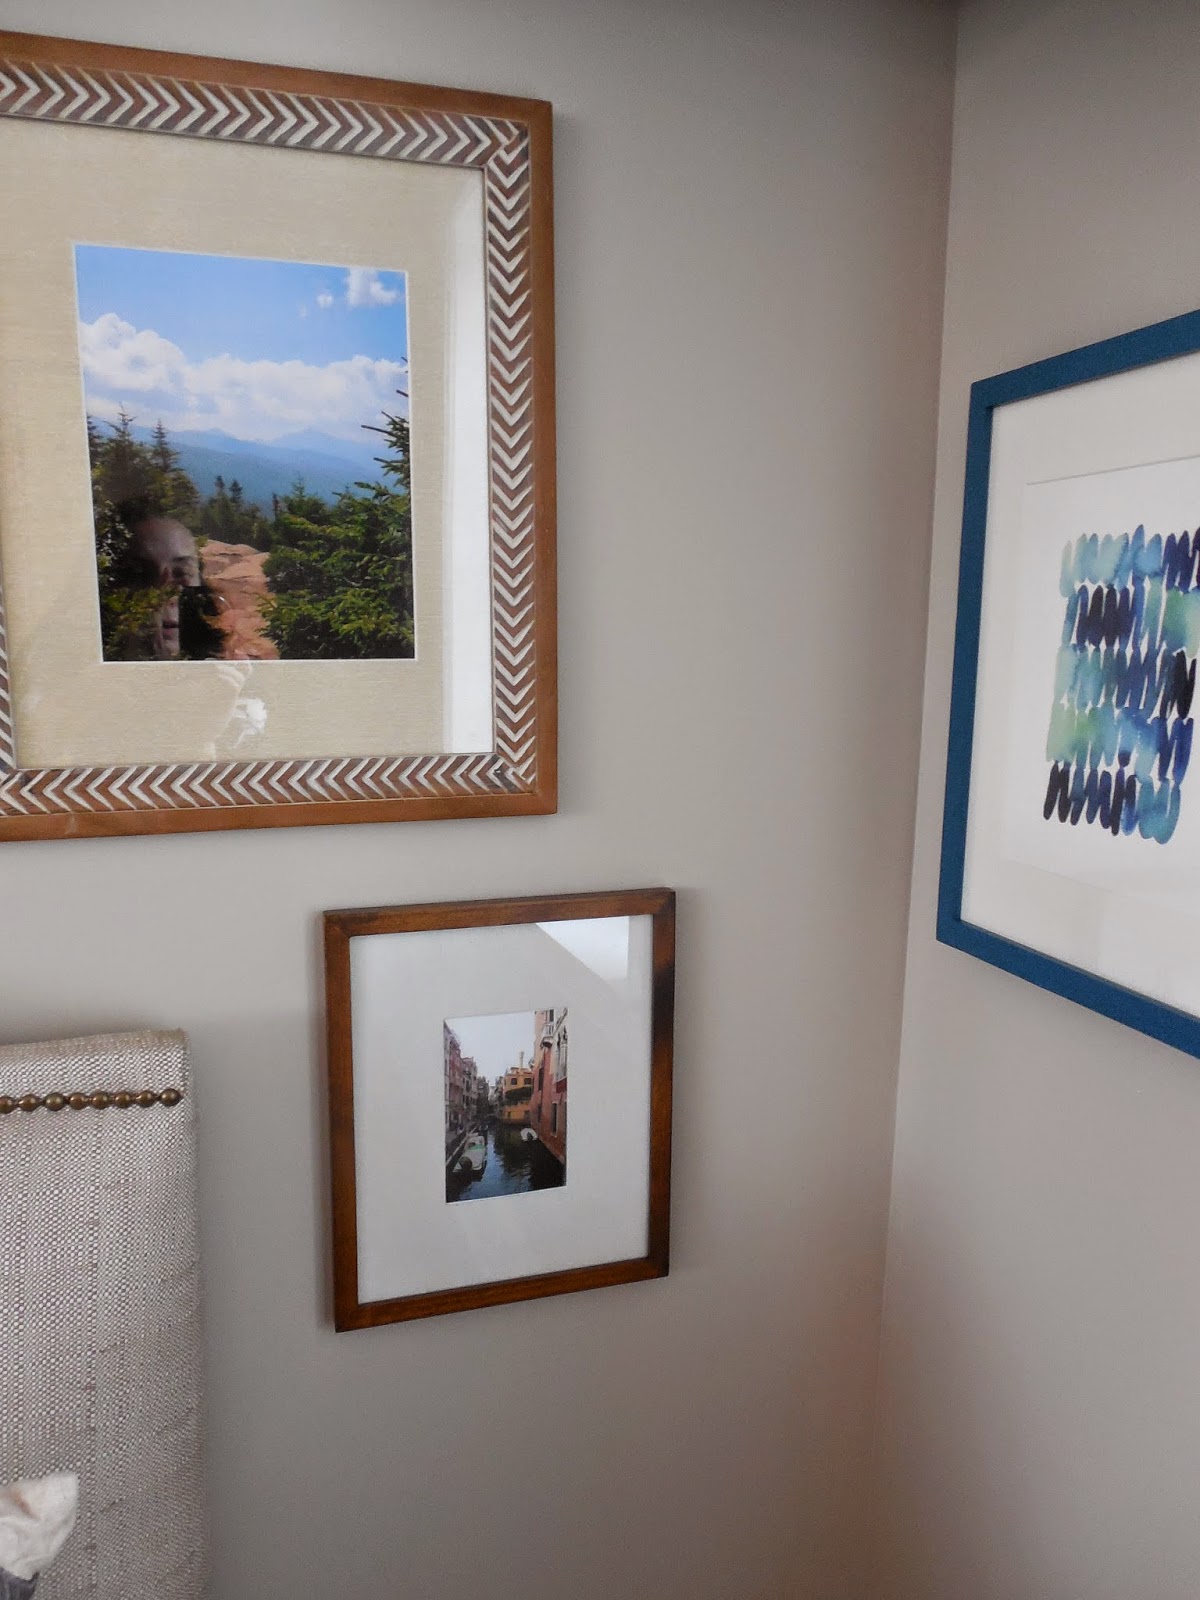
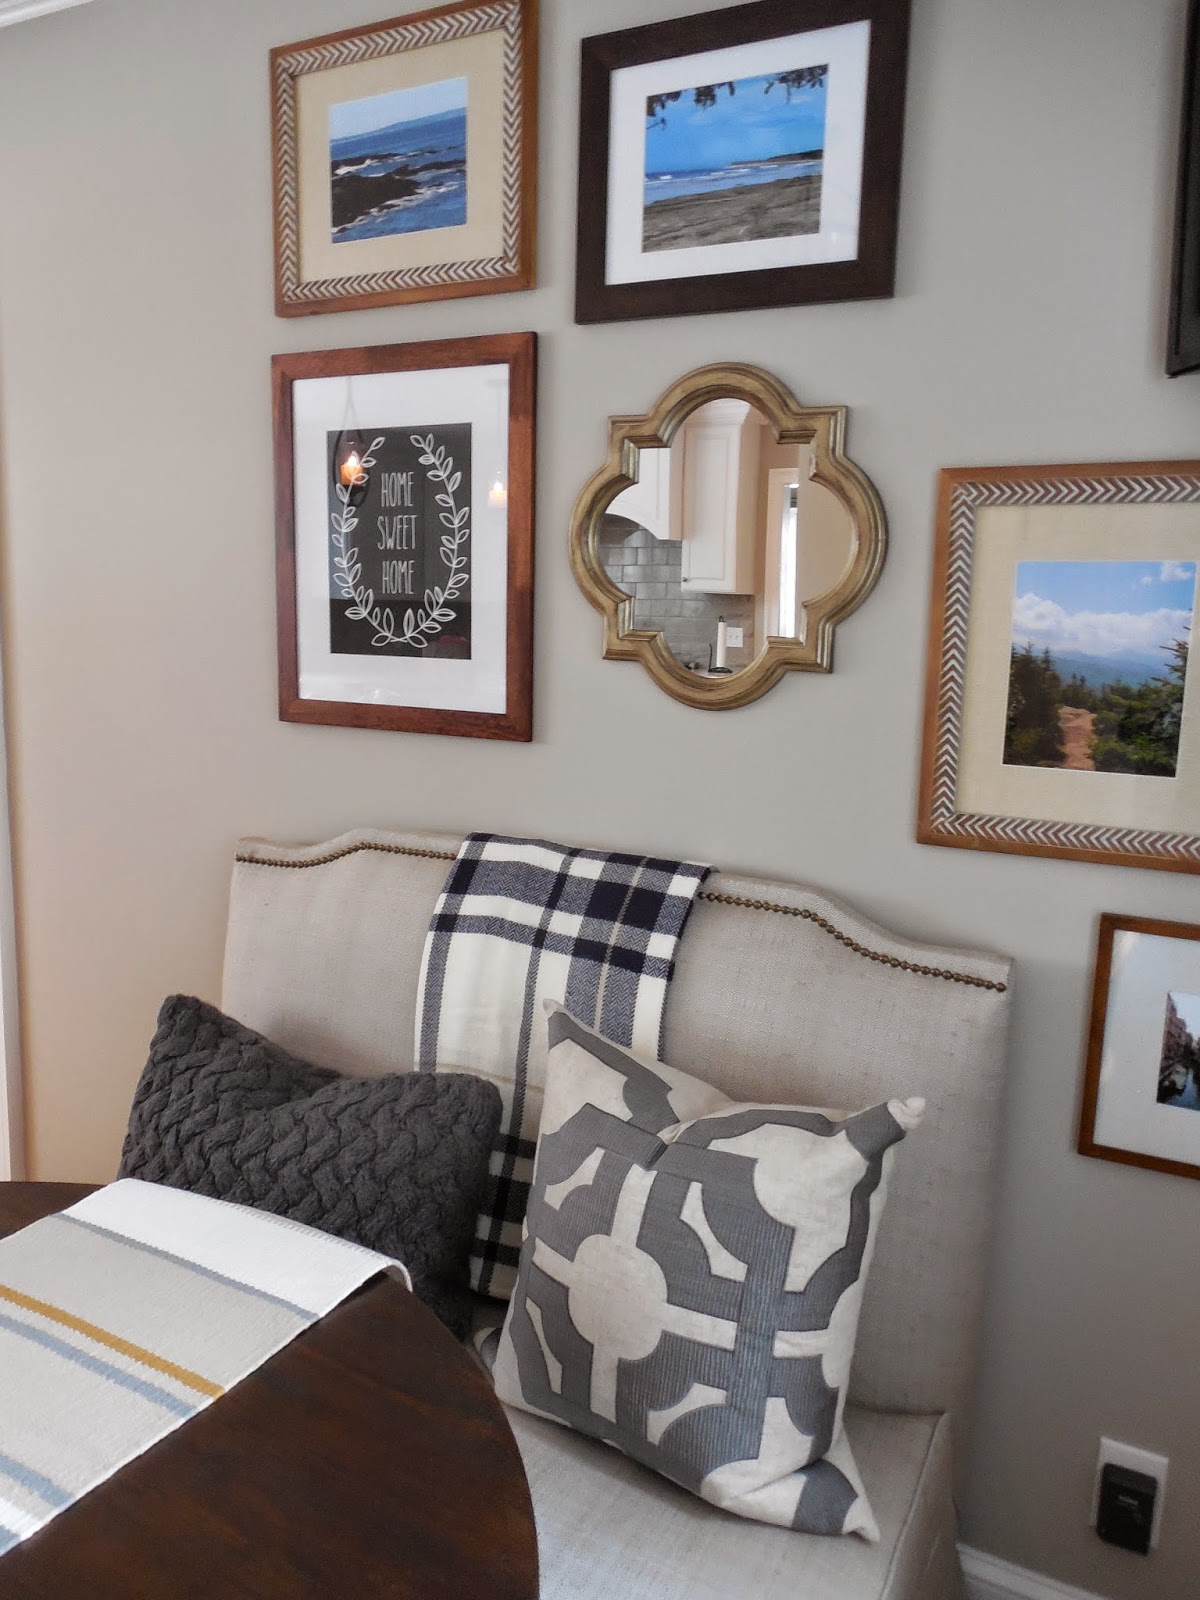
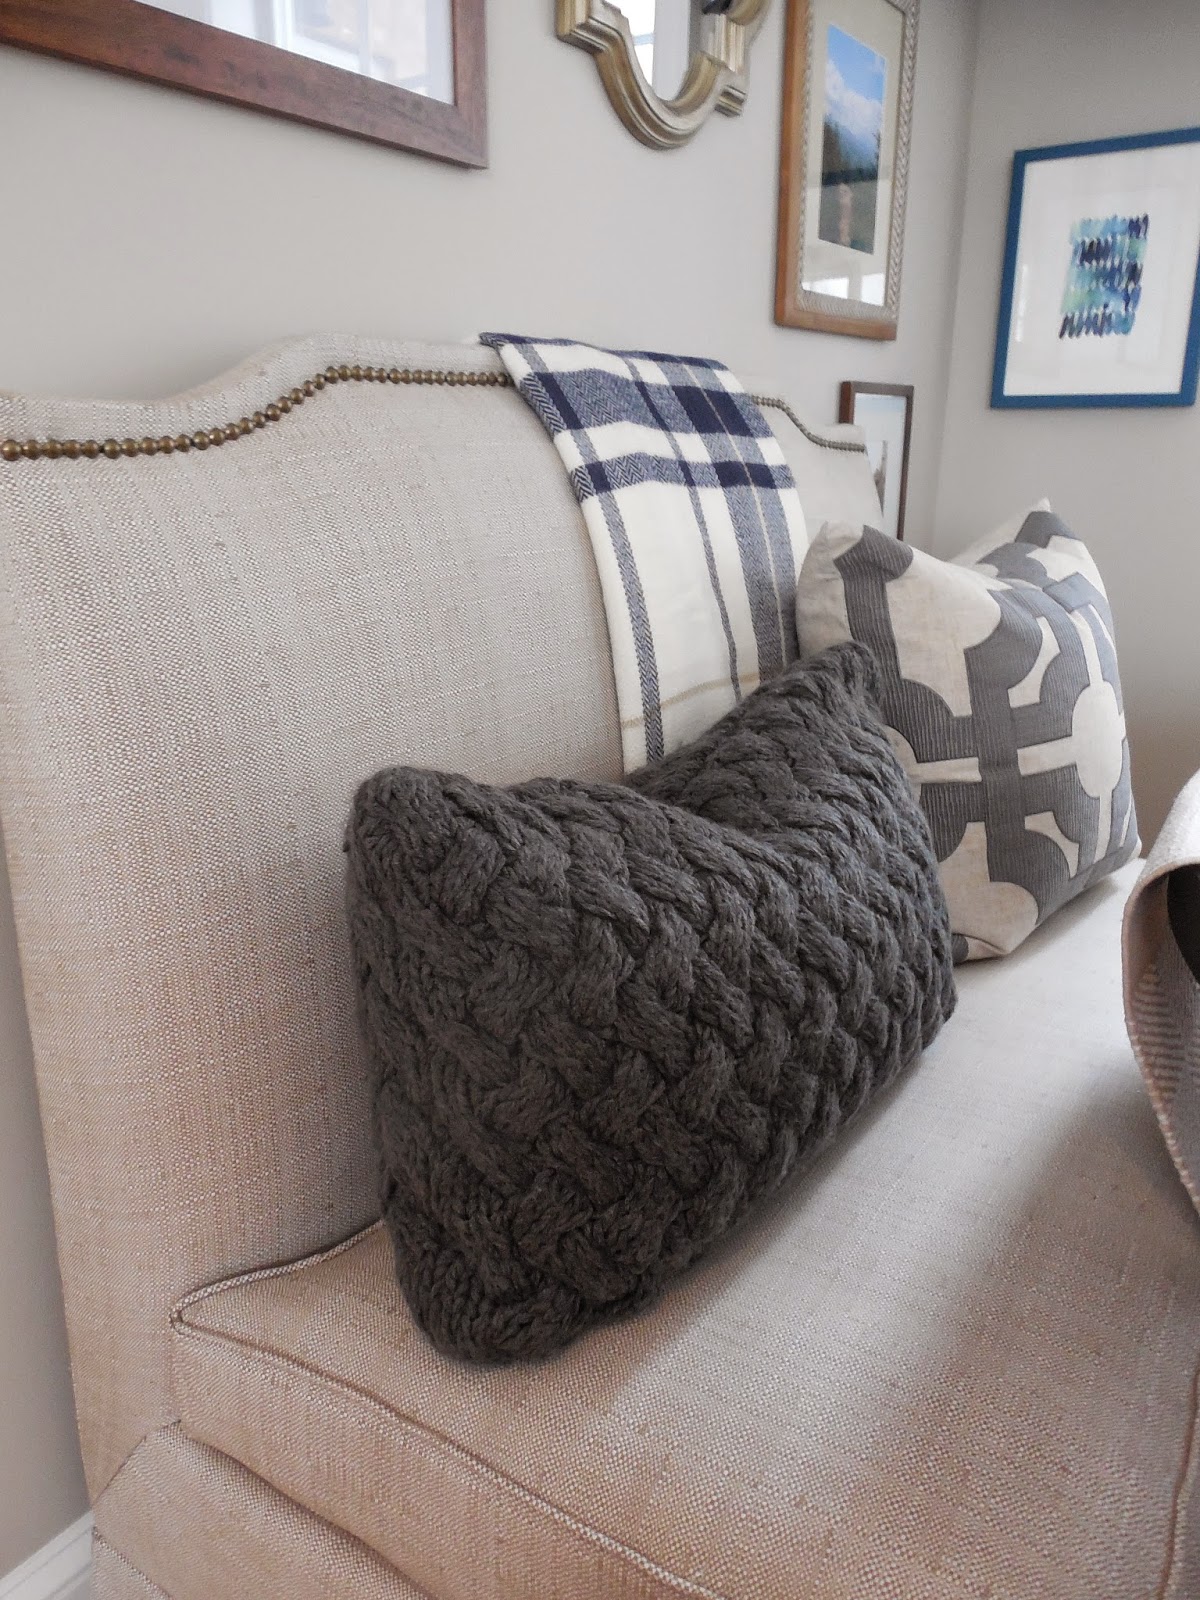
To say that I am thrilled with the space would be an understatement! I am so lucky to have trusting clients that allowed me to show them an eclectic mix of furnishings for the space and try something that was a little out of their comfort zone. Luckily, they loved it all when it was complete and my client said she was just speechless when she saw the reveal! That truly made my day!  ๐Ÿ™‚ We went with an upholstered banquette that has a very durable, family friendly fabric. The brass nailhead trim is the icing on the cake! My clients had a wonderful collection of photos from their travels, which made the gallery wall meaningful and special to them. We are waiting on a few elements, before this room has the full reveal. The wall space to the left of the gallery wall will have a message station. That will hold mail, keys and even has a small shelf for a pretty picture frame. That is why the gallery wall might look like it stops too early right now. Don’t worry… more to come! The windows will be dressed in roman shades in this fabric…

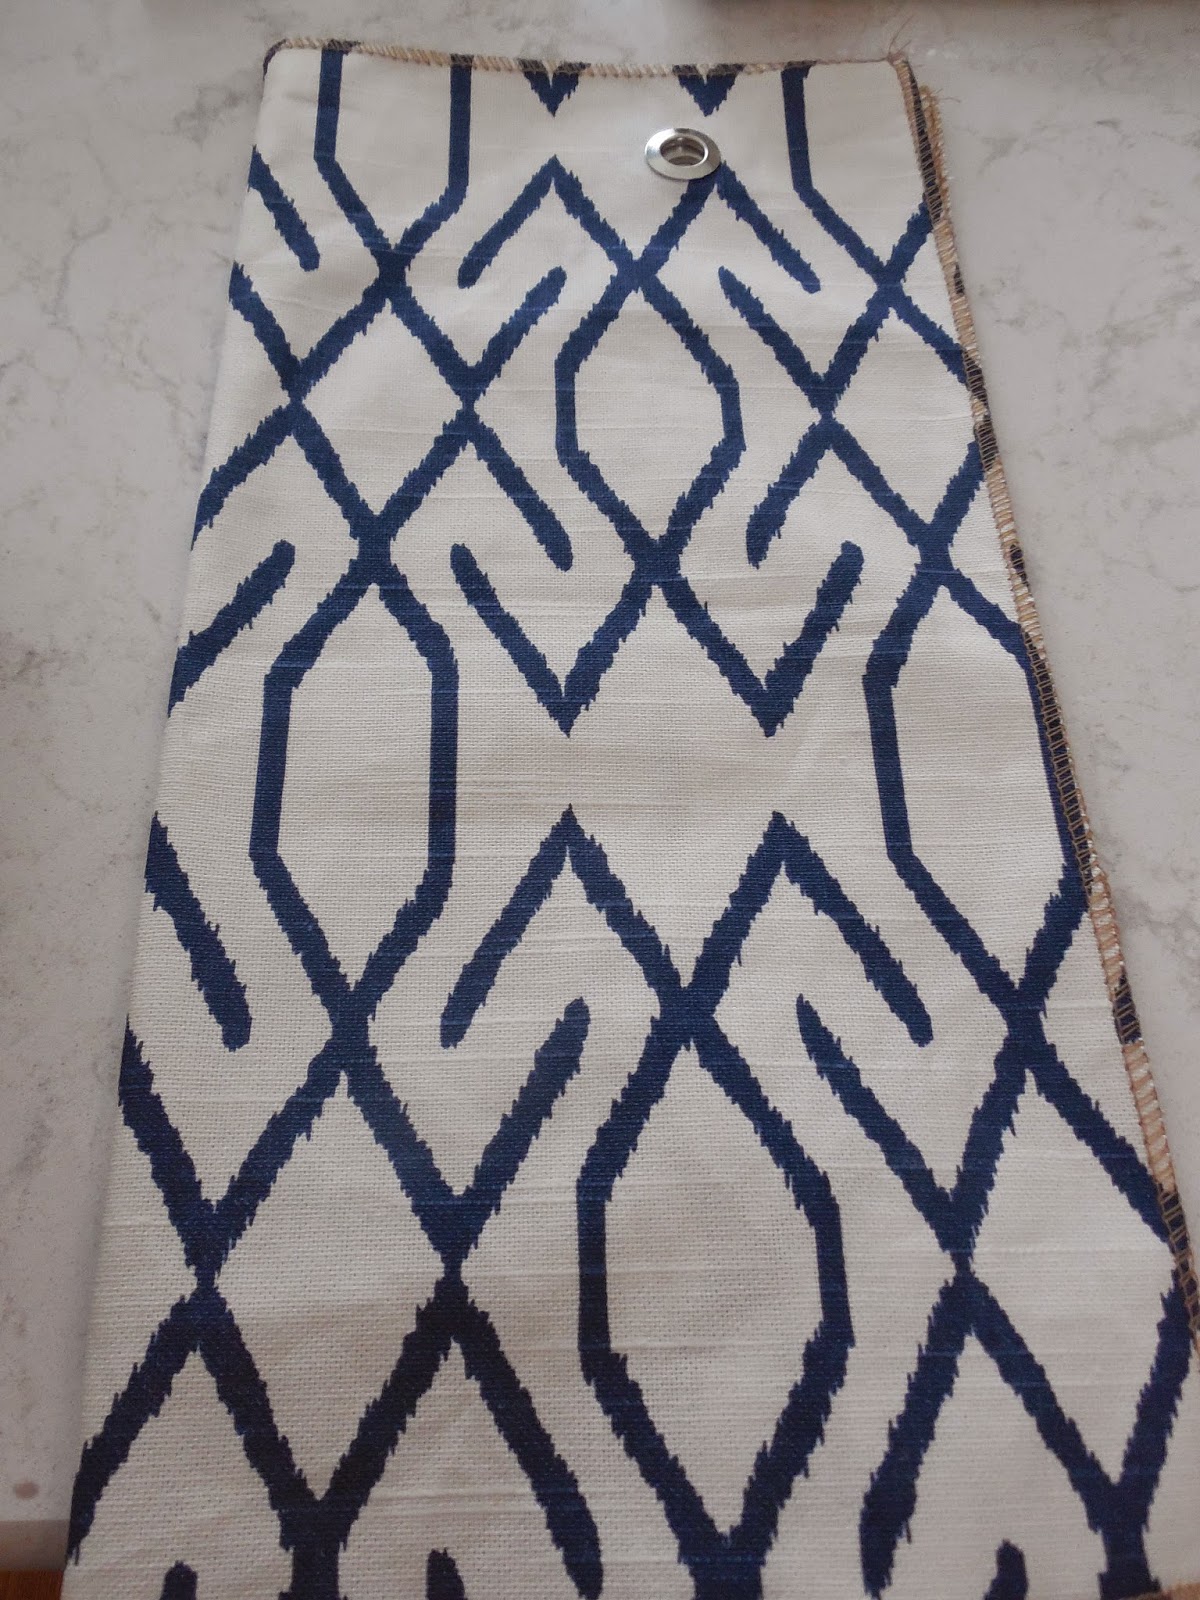
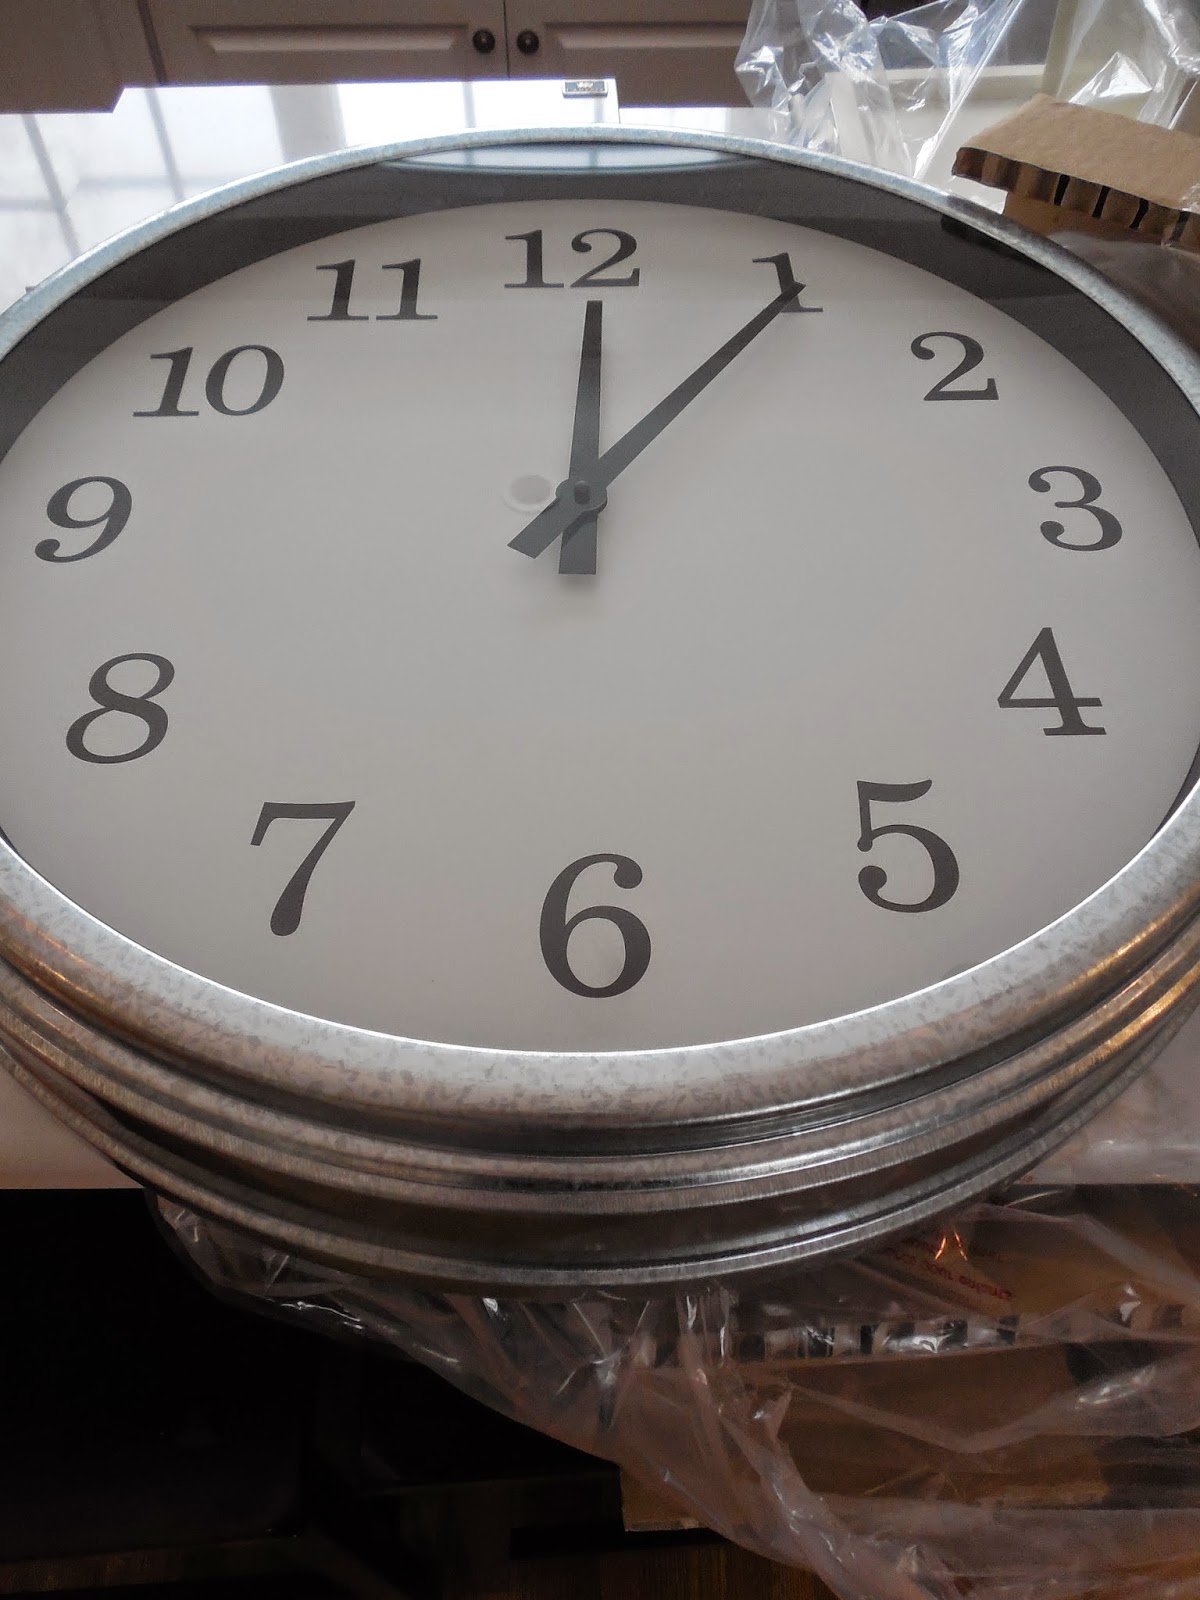
They are on their way as we speak and I cannot wait to see them in the room! The wall to the opposite of the dining nook (near the fridge) will have this old school style clock…

And the before and after {because I know we all love them} just one more time…

Before


After


Thank you so much to my amazing clients for allowing me to share their home here on my blog. ๐Ÿ™‚
If you would like to work together, I am now booking for the spring! Please e-mail at [email protected] for more information

Happy Holidays!!

Jump Start Your Decorating With a Pinterest Board… A Local Client’s Lake House Project

November 26, 2014 by Amber Filed Under: interior design, local clients, pinterest


I recently had the privilege of meeting with a client who is going through a major gut renovation of her cottage lake house. Her home is nestled on the bay of a beautiful lake. I can just imagine looking out of the windows during the changing of the seasons! What a treat! She hired me to come in and give her a jump start on ideas for her home, so she can hit the ground running. She took advantage of a new local design package that I offer for clients… it’s a style session complete with a pinterest board! We had our initial meeting at the cottage and brainstormed ideas. She came ready with all of her questions and we started to get to solving them right away. Then, I came home and began work on a pinterest board just for her. This board will help her get a start on the decorating process and is complete with specific ideas and inspirations for her to complete her cottage herself, over time. She can click on the product links to take her directly to the site for purchase. I also made specific comments under each image, so she can go back and know exactly why the image was pinned to her board. This is a great design package if you are looking for a designer’s advice, but you primarily want to accomplish the work yourself over time. My client told me she wanted to hear that her ideas were valid and also wanted the answers to some of the questions that had puzzled her about her home. Here is what the cottage looked like when I visited…

Cottage Lake House

The main entrance is the door to the right

This is an antique mantel that will be used

There will be built ins on either side of the fireplace

Amidst all of the renovation, there sits a little potted plant I brought to give to my client. I always like to come with a small gift in hand.  ๐Ÿ™‚  

This will be the serving counter and dining area 

I love all of the windows and natural light!

This was my first time seeing a project from the ground up like this and I was so excited! The part that made me the most excited was the fact that I could envision this cottage complete. That was such an amazing feeling to walk around and tell her where the furniture should go and how the layout will flow throughout the main floor. This visit, we tackled everything from a wall color scheme to furniture placement, counter finishes, etc. We covered so much during that session. I then came home and got to work on the pinterest board.
Since my client wanted to tackle this project herself over time, this style session/pinterest board design package was perfect for her. It gave her a start on the process and encouragement to move forward with some of her ideas and many new ones from myself. Here is a glimpse into her pinterest board and the direction we will take with this cottage lake house…
The Plan via her Pinterest board

Ship Lap on the ceiling throughout the main level
pin via
Four club chairs facing each other, by the wall of windows
pin via
Coastal accents
pin via
A basket for cozy blankets
pin via
A window seat to lounge and watch the water
pin via
An overall cozy design aesthetic with slipcovered furniture pieces
pin via
A warm and rustic, yet modern style with hints of green accents
pin via
My client is excited to move forward and is so happy about the design vision. She is also a pinner to this board, so she can add and edit the board over time. To see the rest of the board, visit my pinterest page HERE.
Would you feel at home with a cottage like this??
To see this new local design package and other packages I offer, visit my design services page HERE!
Have a wonderful and happy Thanksgiving!!  ๐Ÿ™‚

Shelf Styling is a Process

November 20, 2014 by Amber Filed Under: design, family room, interior design, local clients, shelf styling, styling


I recently stopped over my client’s house to begin styling her shelves in her family room. I wrote about the progress of her room in this post and after this most recent visit, we both feel that the finish point is near! And that’s definitely an exciting thing to see. All of the room’s elements have been on the design board and it is now so rewarding to get to see the results in action. Shelf styling is definitely a process, though. Every designer approaches it differently, but for me, I have some tried and true methods when I work…

1. Start from scratch. The shelves should start with a clean slate, i.e. empty. My client was amazing and already spread out everything she had, so we could see what we had to work with. That’s so refreshing and helpful, so you can get right to it.

Where we started…

Today, I styled the shelves seen behind the sectional. There is my empty slate.

2. Find all of the hard cover books you can use and remove the book jackets. You will be amazed at how they all of a sudden look like bound collector’s books.

3. Before placing items on the shelves, I hung a trio of sunburst mirrors on the wall. I made sure I did that first, so I had the mirrors right where I wanted. Then, I styled around them. Hanging mirrors on the walls behind your shelves gives the furniture piece depth and interest. You could also hang small pieces of artwork or family photos.

4. Start placing the items on the shelves to see how they will work together. This can be a long process. And it may even change from today to the next styling visit. I like to take pictures and study them, to see if the shelves are how I like them. This can involve a lot of editing, but it is really worth it and the true fun part of the room!

This was how I had the shelves styled in phase one…

Like I said earlier, the three mirrors were hung first. I then started styling around them. But this first phase seemed a bit too cluttered to us. I made a few more changes…

This was how I had the shelves styled in phase two…

I removed some of the books on the top shelf, but the globe still didn’t look right in that spot and it all felt cluttered and busy.

And this was how I styled the shelves in the final phase…

5. Editing, editing and more editing! I think it is almost impossible to get it 100% right the first time. Stepping back to see the changes you have made is a great way to finalize your shelves.

Do you like the changes? I moved the globe to the top shelf, removed some of the glass bottles and added a blue and white bowl to the small stack of blue books. We are both excited about the transformation of these shelves. And we were happy to be able to use so much of what my client already had! I know adding those personal items will be meaningful to the overall design. We are now on the lookout for two more storage bins for the bottom left shelves. I won’t necessarily match them, but find coordinating bins in a similar size. We will also add another detail to the wall space next to the globe. This room has a very high angled slope to its ceiling, so we will add a wall clock to visually draw your eye up and to also help make that tall wall feel useful.

So stay tuned… we will be having much more fun in this space in the coming months! 

A New Local Client – #projectdelicatenursery

September 16, 2014 by Amber Filed Under: #projectdelicatenursery, design, interior design, local clients


I have been starting to take on more local clients and it has been fun to watch that part of my design business grow. The process, while just as amazing as e-design, is different. Presentations are in person, with a real, tangible design board! This newest project was fun and exciting, because I had the privilege of working on a girl’s nursery. I named this design #projectdelicatenursery because the colors, fabrics and textures are soft, neutral and pretty. Here are some pictures of the design board before the client presentation…

Floor Plan Options…

The presentation went very well! My client is ready to move forward with the plans and I couldn’t be more excited for her and this new adventure!

Nurseries are so fun to think about and design. There are so many directions you can take a baby’s room. What is so unique about kid’s spaces in general, is that they can become an extension of the design of the rest of your house, while also being a space you can switch gears and have fun with! Here are some of the inspiration images for our project…

Inspiration…

via

via
via
via
I am excited to continue sharing this project along the way! 
Whether you live locally or far, we can work together. I am currently offering both local and e-design packages. Please e-mail me at [email protected] to get started. I still have a few spots available for the fall!

Tour Through Blogland

August 18, 2014 by Amber Filed Under: blog, design, e-decorating, e-design, local clients


We recently got back from a family trip to Washington, DC and I loved it! We had a great time seeing the sights, eating wonderful food and relaxing and spending quality time together. I feel refreshed, energized and ready to jump back into things around here. I am excited to start my first post this week with a little tour through blogland. Beth of the amazing blog Design Post Interiors, kindly asked me to participate in this tour where you get a chance to introduce some of your favorite blogs while also meeting some new ones! Beth has some savvy DIY skills, like this pretty fabric flower pot she made…

DIY Fabric Flower Pot

Before we get to the featured bloggers, I will take a little time to answer some questions about myself and this little blog…

I started my blog a few years back as a way to talk about my favorite hobby… design. I never knew it would grow into more than that. I now have the e-design business Amber B Interiors and I truly love it!

What am I working on right now?
With the summer coming to an end, my client schedule is starting to pick up with amazing new clients and fun rooms to design. I am starting to take on more local projects and I am excited to see Amber B Interiors grow.

E-Design Project: Keeping Room

How does my work differ from others in my genre?
This is a tough one, because I know there are so many talented designers out there with so much to share. I would like to think that I have a twist on my own design style that mixes various eras but also has a collected over time feel to each space. When decorating for clients as well as myself, I try to inject a personal, meaningful style for every room.
Our Dining Room

Our Living Room

How does my creative process work?
I always start with some form of inspiration and that can come from anywhere. Inspiration can come from nature, a great book or even from a piece of artwork.  I also gather the information my clients have given me and constantly think about the space all day long! It’s a good thing I love what I do. ๐Ÿ™‚ I then start to gather design inspiration on pinterest and get to work creating my design boards.
Mid Century Bohemian E-Design


Chic & Glam Foyer E-Design


How do I write/create what I do?

With the blog, I used to have a schedule and post every week about a certain topic. I have drifted away from that a bit and now write about what comes to me naturally. This works better for me at this stage, because I don’t have the pressure to post at a certain day. I do like the idea of scheduled posts and topics and may get back to that at some point. I will happily take any suggestions you might have! ๐Ÿ˜‰ When I am working on client projects, I post about that process. And anytime I am trying out something different around our house, I will post on that, too.

Our new kitchen chandelier

With the design work for clients, I literally think about the space all day long. Eventually, something just hits me and the flood gates open. It’s kind of funny how it happens… I just get an idea and start running with it. Once that initial inspiration hits, the room starts to come together pretty quickly. I build all of my design boards on Olioboard {which I love} and create my floor plans electronically through an on line floor planner. During the design process, I also take a lot of pen and paper notes, so my desk looks like a mack truck hit it! But it is all just organized piles of paper that makes sense to me. I have started thinking that I may need a better organization process soon, so my office can look more presentable. But this works for now!

And now the fun part for me… I get to introduce you to some of my favorite bloggers! I love their creativity, fun personality and their crazy amazing DIY skills!

Pam from the blog Simple Details has such an inspiring blog that is stocked full of design ideas to try. I am always checking out what she is up to next and she always amazes me with her vision on a project.

Hi there Simple Dwellings fans, I’m Pam from Simple Details. I dove into blogging almost three years ago, passionate about design, but hesitant that I wasn’t tech savvy. Turns out it was simple, sometimes! I live in a little 1938 cottage in Denver, with my husband, son and our fur babies. Interior design and DIYs are my passion, oh and I should mention I have a bit of a Craigslist addiction. In fact, I could head up a support group!  Thank goodness for my clients and readers, they are the best excuse for my Craigslist stalking. While it leaves my family confused, to me it is all so simple:  stalk, locate, repair, paint, style, love, play musical furniture, and repeat! I also share my love for entertaining, gardening, fashion, and the Simple Details that make all of our homes and lives more beautiful.  

I love so many of her projects, but her foyer reveal might be my current favorite!

foyer reveal
Next up is Cassie from Primitive and Proper. I have followed Cassie’s blog for a long time and I am always blown away by her DIY projects. Her warm personality is just icing on the cake. When you read her blog, you already feel like she’s your good friend! Cassie and her partners run Sweet Clover, a vintage home decor and handmade marketplace in Maryland. She truly lives life to the fullest and is following her dream, which I just love!
I am in awe of her DIY Pipe Shelves…
DIY Pipe Shelves
I hope you enjoyed the tour through blogland! Make sure to check out these amazing bloggers and their talents!

How I Present Designs to Local Clients

January 31, 2014 by Amber Filed Under: #projectcoastalchic, design, local clients


So many times in the past, I have shared e-design projects that I have completed and have discussed how I go about completing virtual design boards. Since I am now moving into servicing local clients as well, I thought it would be fun to share a glimpse of what goes into meeting and presenting to clients, in person. Our first official time meeting is usually in their house, where we discuss the space and what the client would like to change. Before meeting, the client has already filled out the same form I give virtual clients. Having this information ahead of time helps me go into the initial meeting, knowing a little bit about the space and what they are looking for. {They don’t have to fill out the entire form, since most of the questions will be covered in person, such as the floor plan. But, seeing the space ahead of time gets the brain turning a bit faster for me! Also, it gives them an idea for what we will be discussing at the initial meeting, so they feel a bit more prepared themselves.} I bring along a bag filled with my tape measure, additional questions and graph paper to draw out the floor plan.

Local Client Project #projectcoastalchic
I take as many pictures as possible, so I remember the space from every angle. I also take close up pictures of fabrics, accessories that they would like to keep in the space. For this family room project, the client would like to keep the Waverly fabric valances on the windows. I immediately went to the fabric store and bought a half yard of this fabric, so I can take it everywhere with me and compare it next to other suggested fabrics for the room. Next, I get to work at home, drawing out the floor plan and putting together the inspiration board. This board, which will be presented and given to the client, shows my design vision, floor plan options and some specific pieces chosen for the room. One of my best investments has been a staple gun! I use that to staple pretty fabric to the plain white canvas board, to make the presentation look more warm and welcoming. For this presentation, I chose a creamy duck canvas fabric that resembles the color of the drapes we will use in the space. I think it’s great to cover the board with a fabric that also ties into the presentation and compliments the design! And now, it’s presentation time…
Luckily, she loved it and we are now moving onto the installation part of the process, which I find so exciting. I live vicariously through my clients and get just as much joy as them, seeing their space come together and click. It also helps to have amazing inspiration to draw from and show the client, such as Emily’s bookshelves and Courtney’s warm living room! 
With e-design, once the client likes the vision, I move forward with the design board and get the second virtual presentation ready. With local clients, it’s now all about going into the space and creating the vision! The shopping, sourcing and styling all come into play now, which is so much fun! 
So that’s a little sneak peek into my design process. I know it’s different for every designer, but I have found that this works for me.  ๐Ÿ™‚

  • « Previous Page
  • 1
  • 2
  • 3
Welcome!

Hi, I'm Amber... a wife, mom and interior decorator. I am the writer of Simple Dwellings and the designer behind Amber B Design. Blog topics are all things design, with the occasional DIY attempt! Thanks for stopping by Read more...

  • Bloglovin
  • Email
  • Instagram
  • Pinterest
  • Twitter

Blog Posts, Straight to Your Inbox

Popular Projects

A dining room with white walls and wooden table.
A black door with white curtains and a red chair
A staircase with black and white chevron pattern on the steps.

Blog Love

  • Addison’s Wonderland
  • A Thoughtful Place
  • Alison Giese Interiors
  • Amber Interiors
  • Bailey McCarthy
  • Caitlin Wilson
  • Chris Loves Julia
  • Classic Casual Home
  • Cottage and Vine
  • Design Indulgence
  • Dwell by Cheryl
  • Eddie Ross
  • Elements of Style
  • Emily A Clark
  • Emily Henderson
  • Gallery No Eight
  • Hi Sugarplum
  • House of Jade
  • Jana Bek
  • Juniper Home
  • Kate Marker Interiors
  • Lucy Williams
  • Monika Hibbs
  • Our Fifth House
  • Pencil and Paper Co
  • Rachel Parcell
  • Rambling Renovators
  • Pure Style Home
  • Sita Montgomery
  • Studio Mcgee
  • The Makerista
  • The White Buffalo Styling Co
  • the Zhush
  • Traci Zeller
  • Young House Love

Copyright Amber B Design © 2025 ยท Design by Britt Douglas