Amber B Design Studio

Interior Design & Decoration for the South Florida region

  • Home
  • About
  • Services
  • Portfolio
  • Blog
  • Press
  • Contact

E – Design Board Reveal & A Sweet Client Note

March 3, 2014 by Amber Filed Under: design, e-decorating, e-design, living room, personal design style


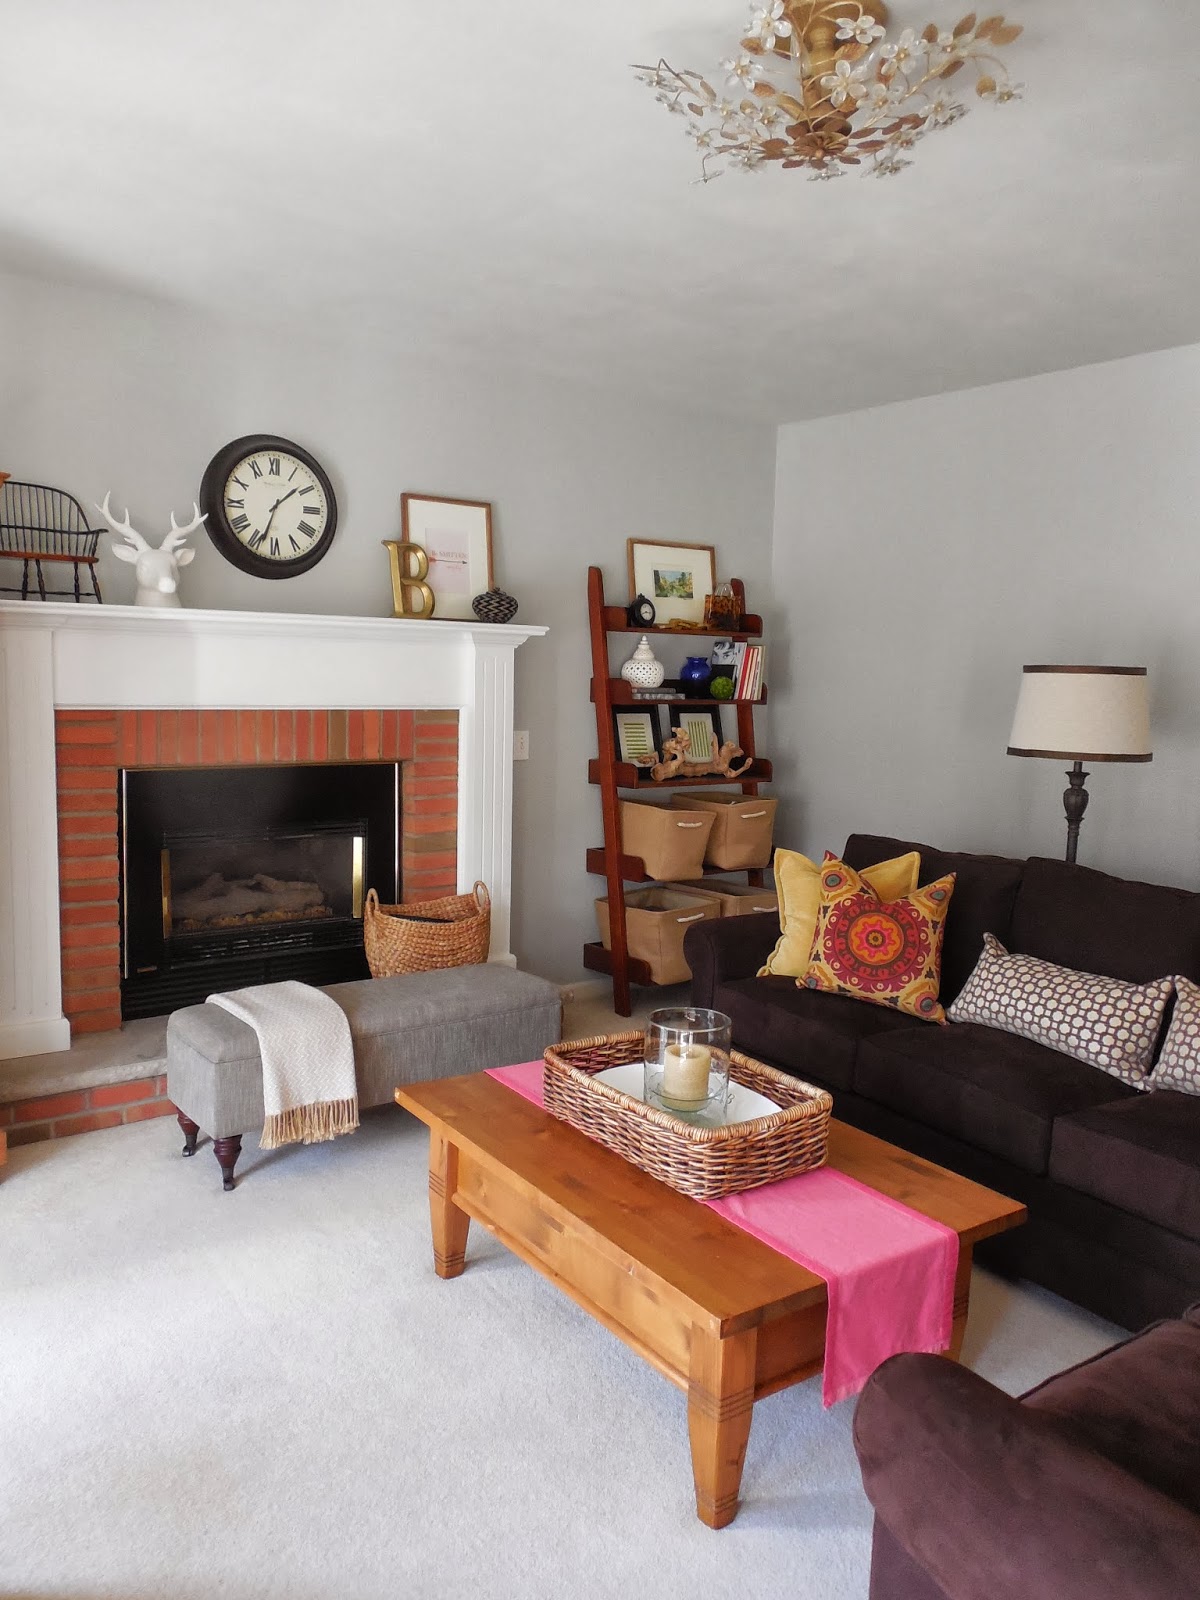
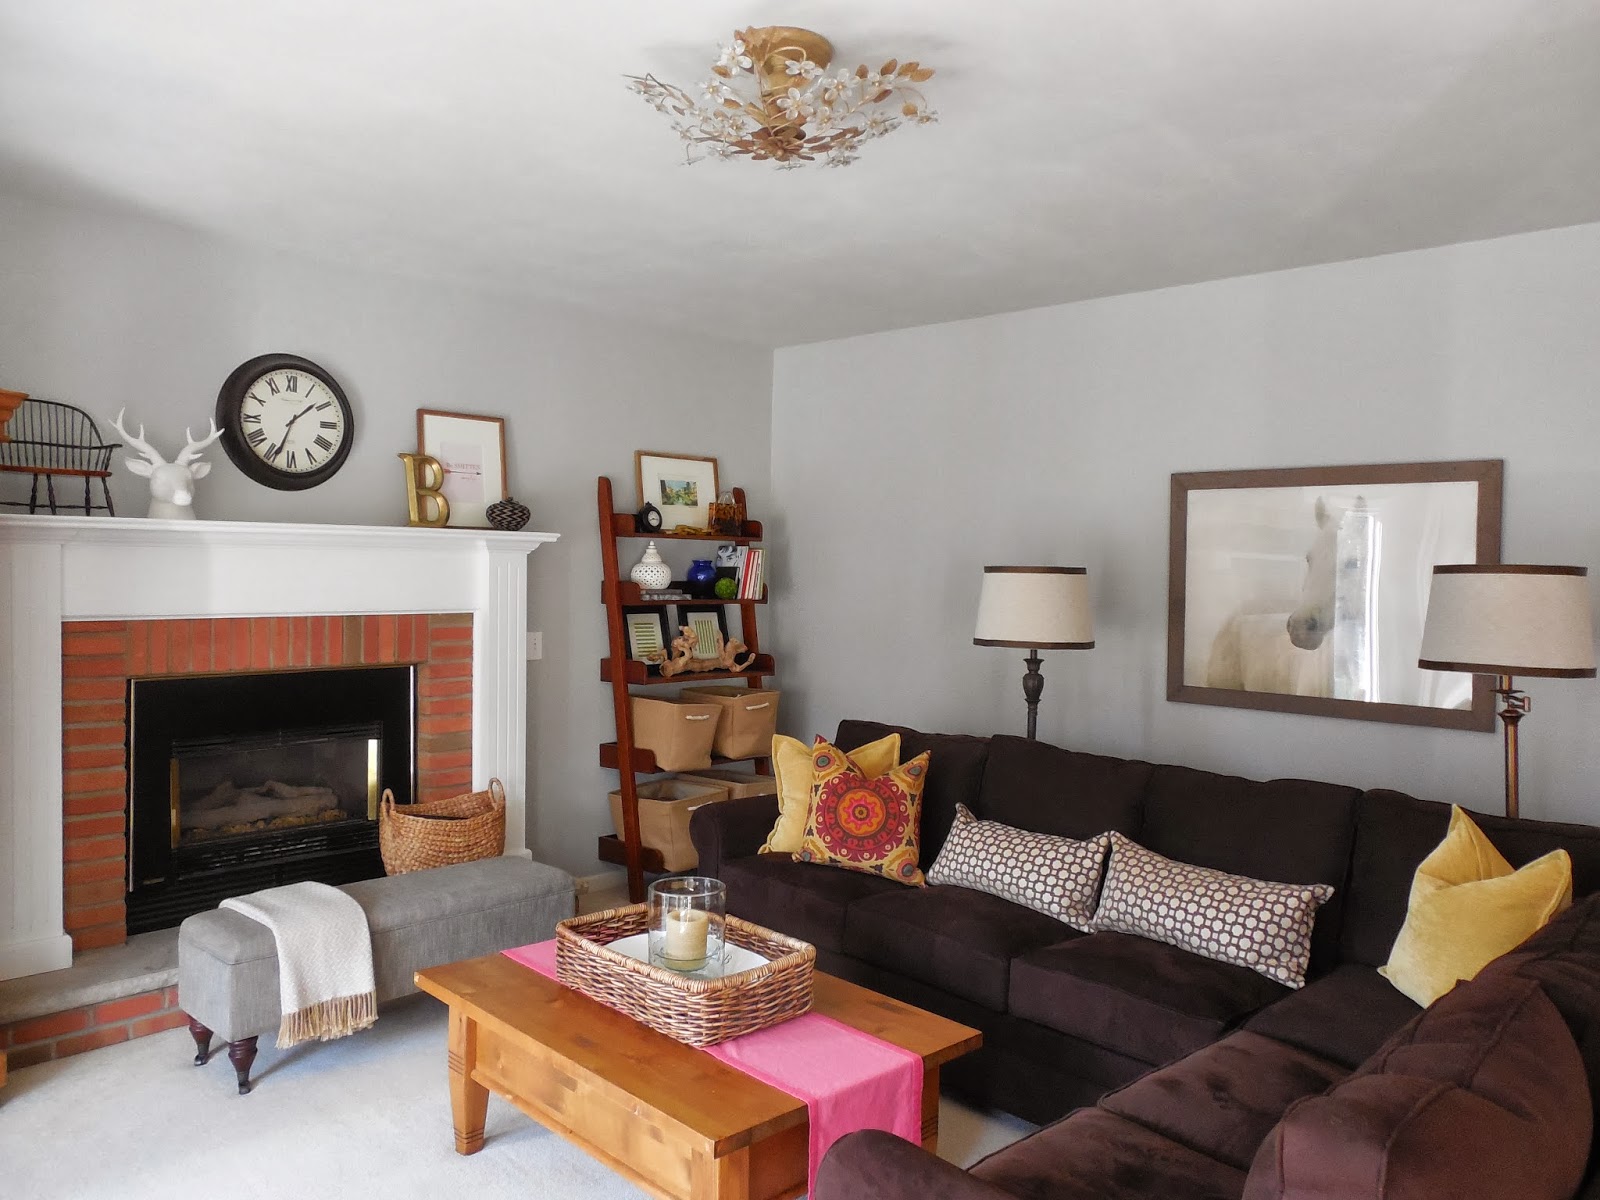
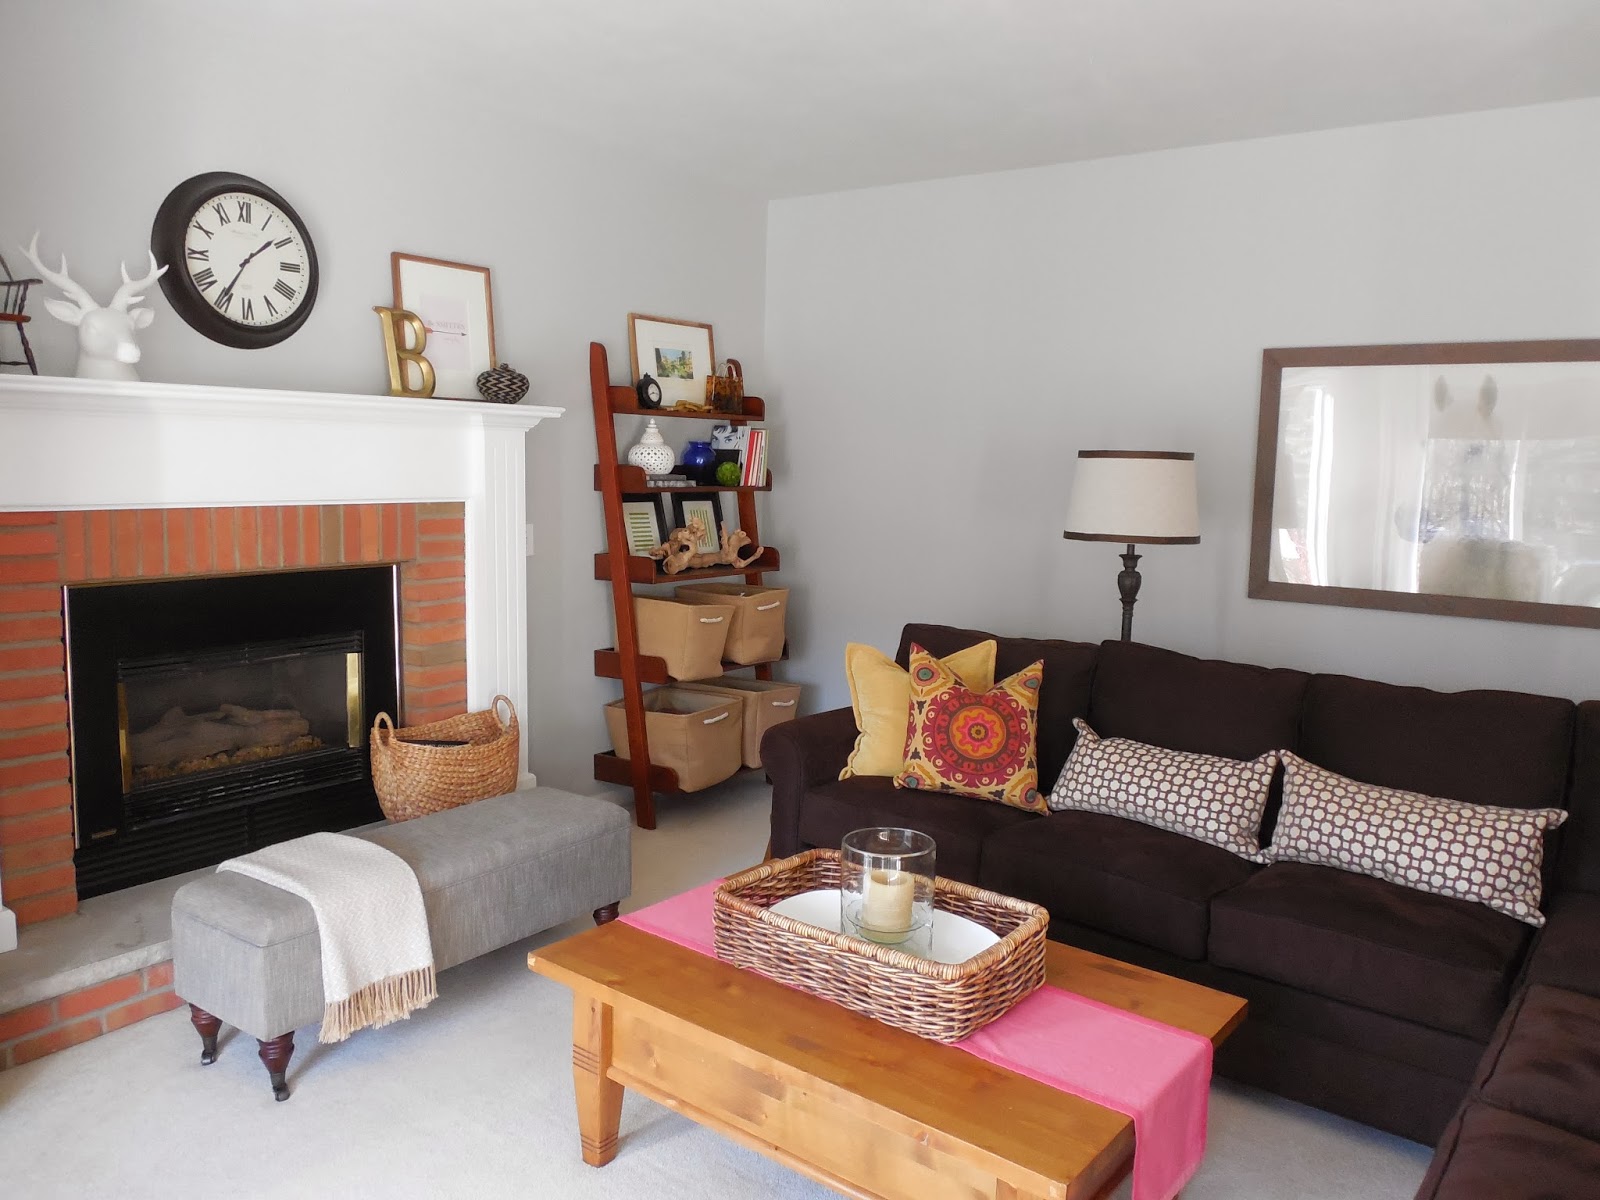
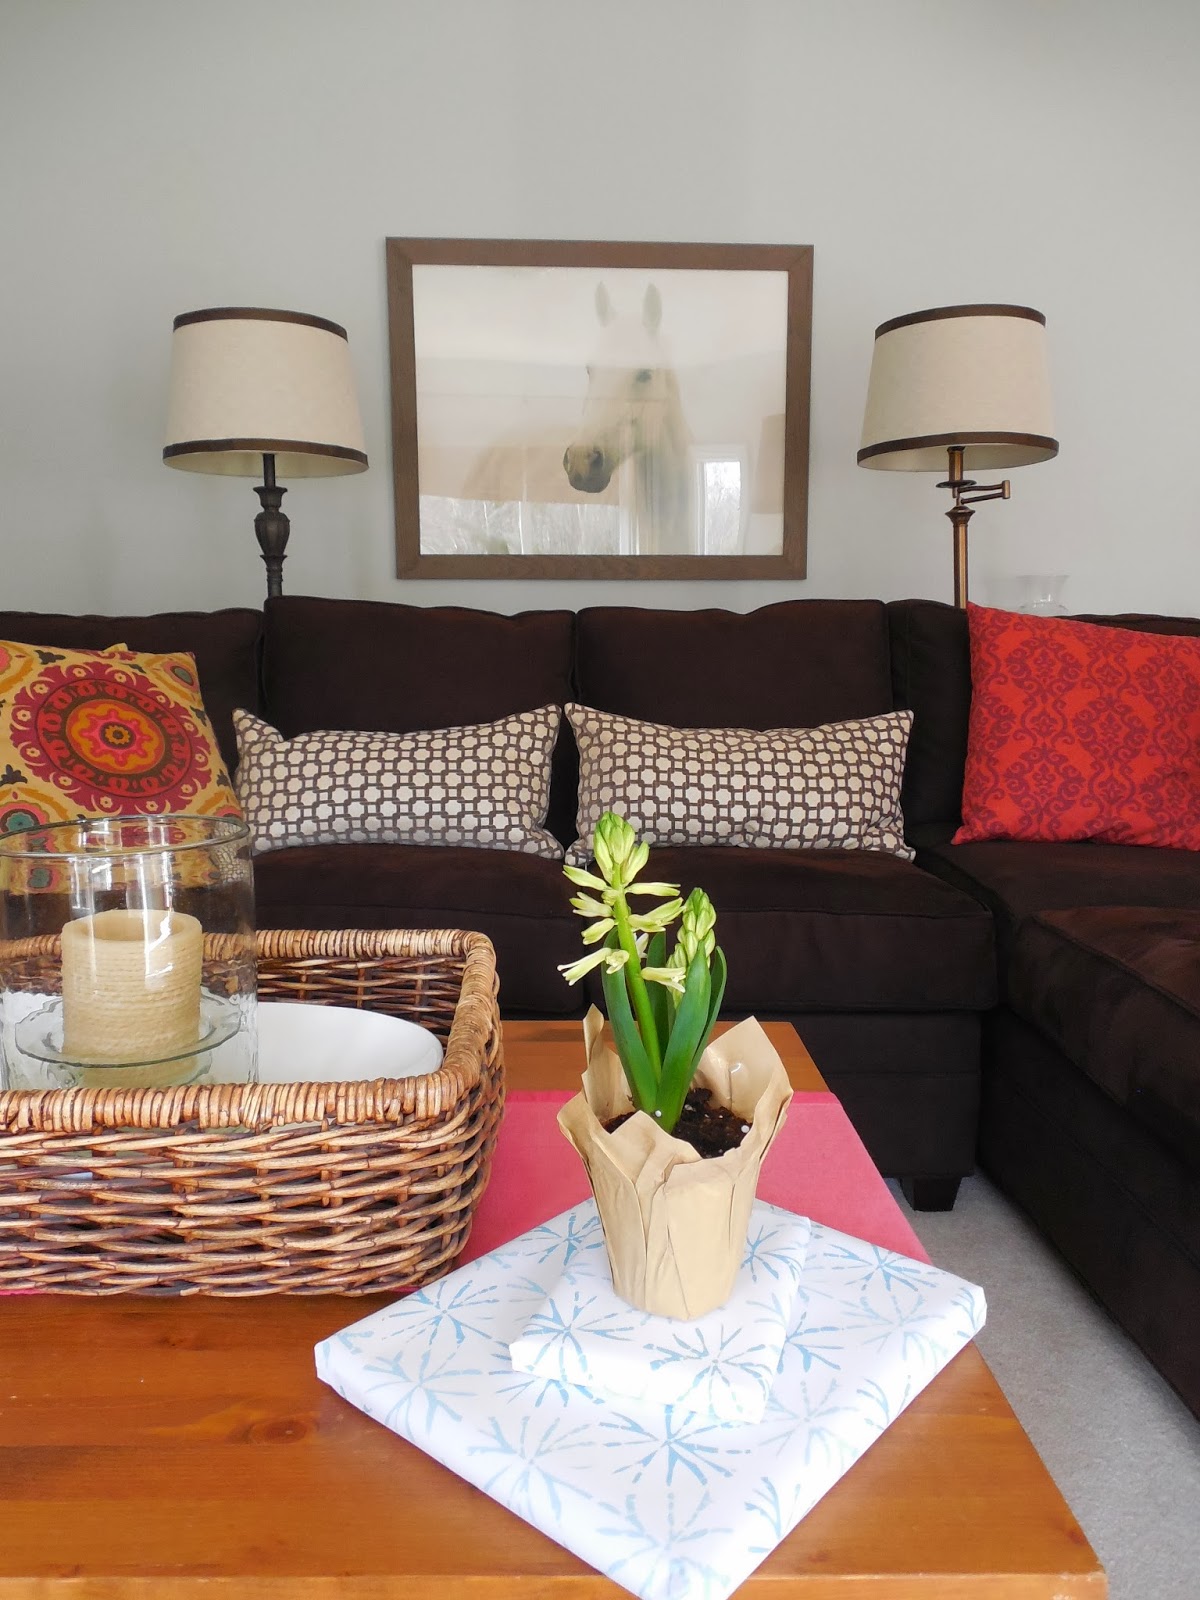
I am excited to share a completed e-design board project with you today! My client was looking for a living room space that mixed traditional with modern, neutral with pops of color. She is so excited with the outcome and I have to say, I am too!!

E- Design Board Reveal…


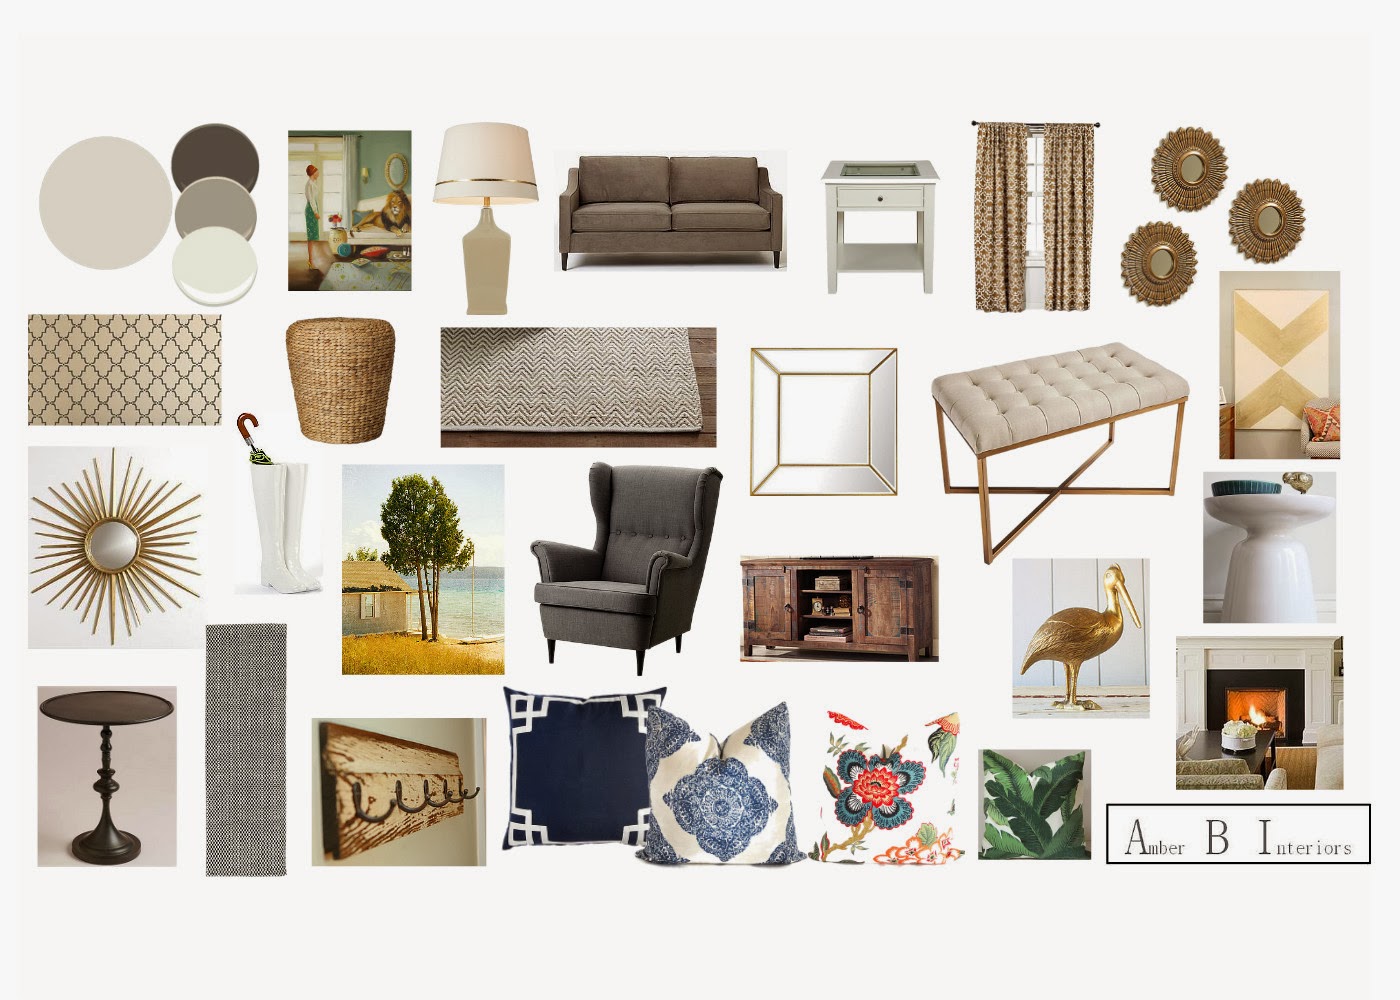
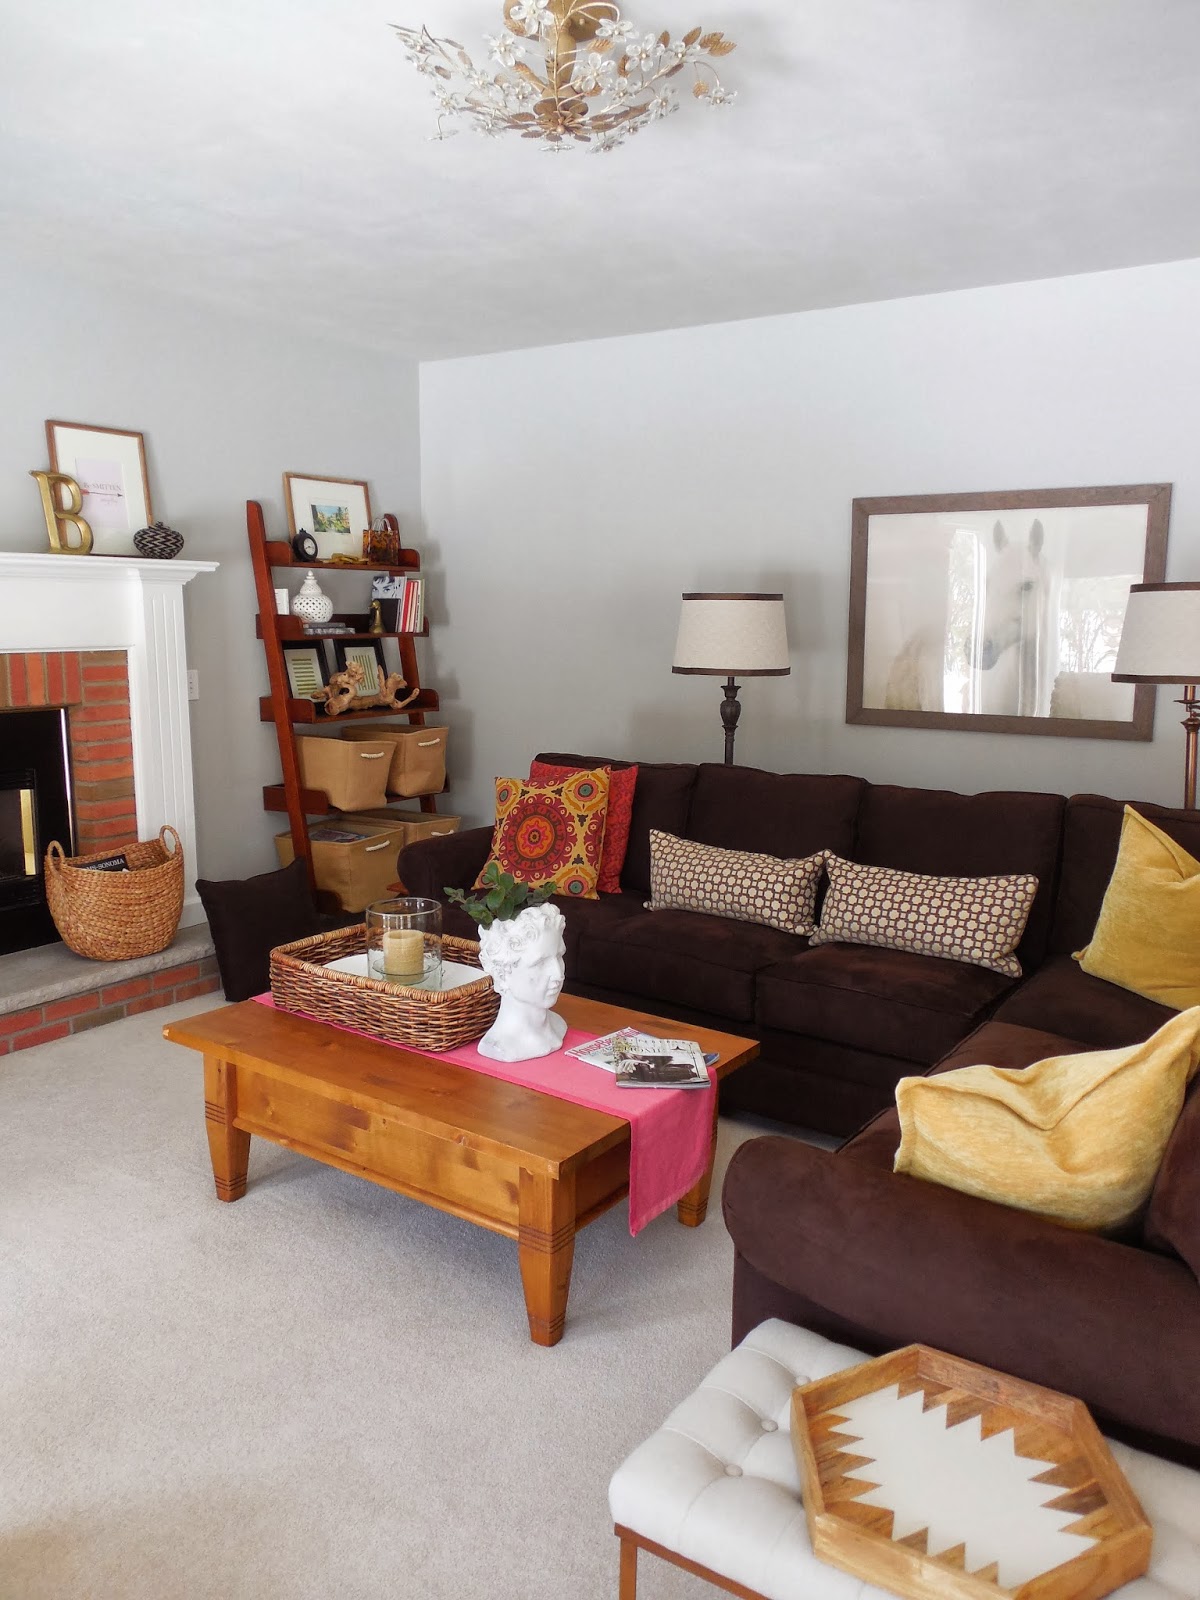
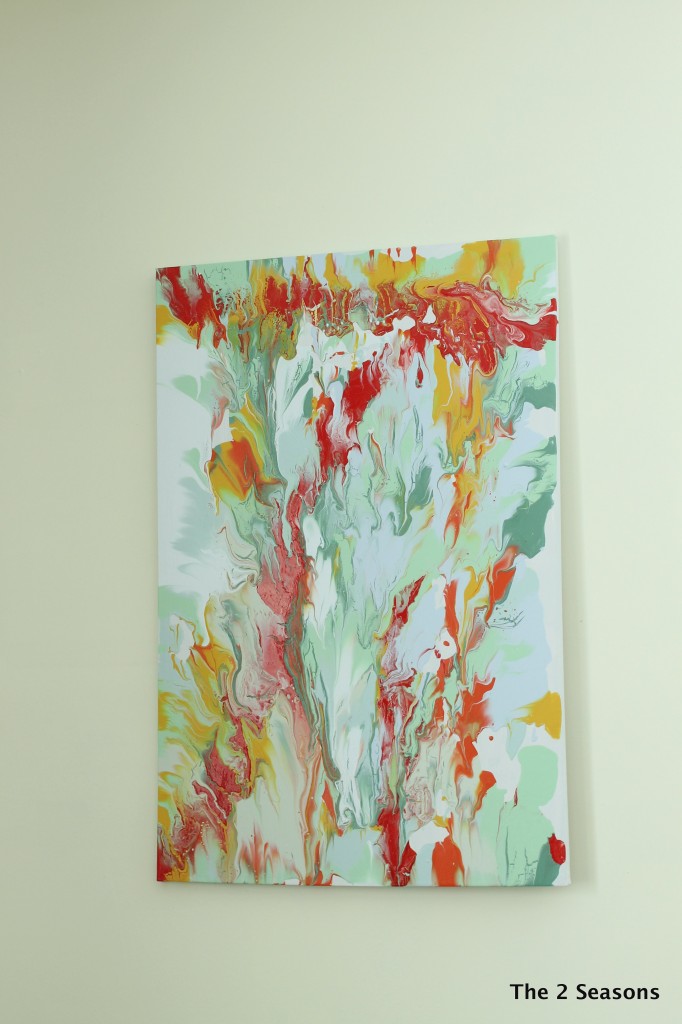
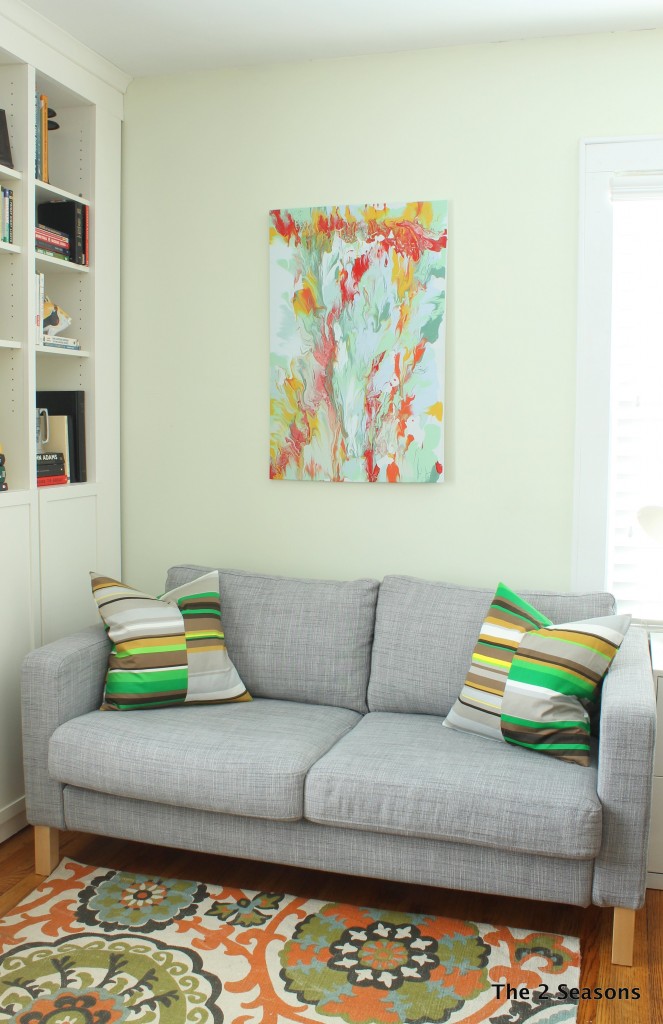
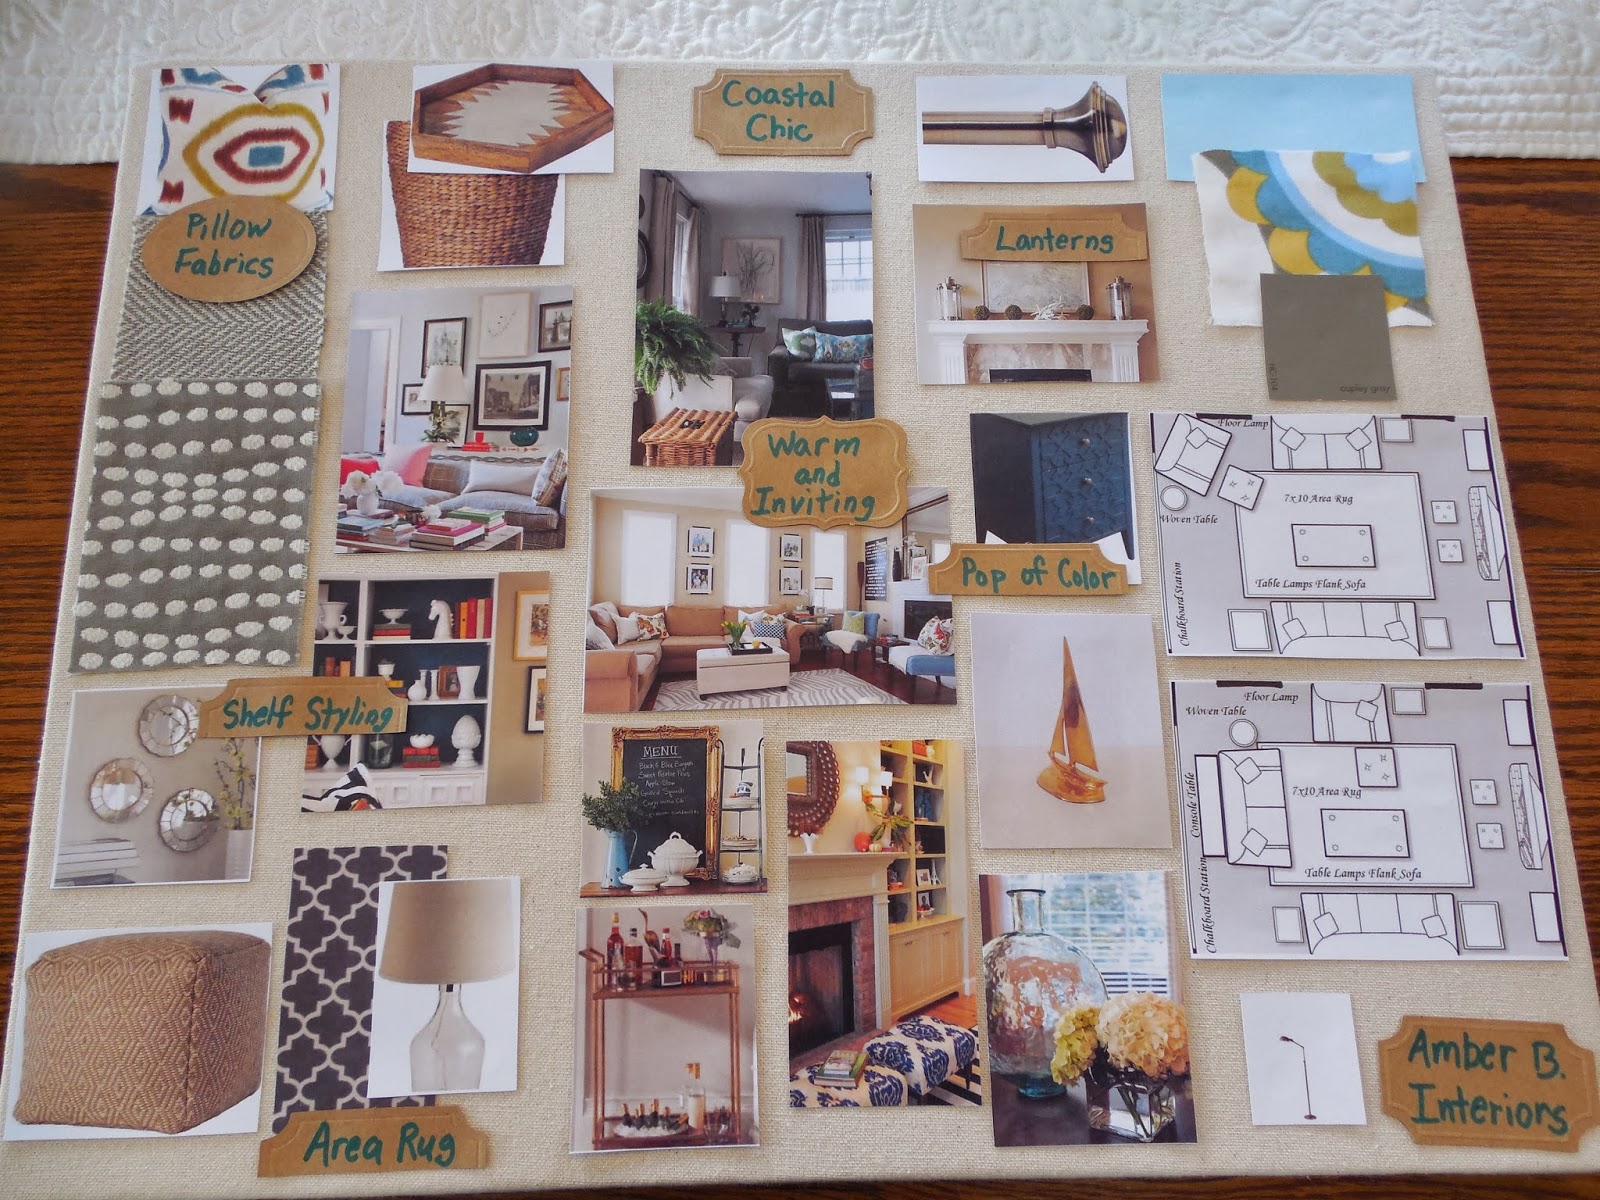
The living room sits right off of the entry, so we incorporated the foyer into the design, as well. All of the color inspiration comes from the floral pillow shown at the bottom of the board. With that color palette, I sprinkled blues and greens throughout the space. My client really loves the quirky, whimsical art print shown at the top left side of the board. I love having fun with design. I think it’s important not to take yourself too seriously when decorating your home. Have fun with it and inject your own personality into the space. I always love walking into a space that makes you smile!

My client was so excited with the design and wanted to share her thoughts on e-design with all of you…

It was like a very close friend who happens to be a talented designer stopped by my house one day and helped design my living room.  Only Amber never physically visits, everything was done via email!  Amber was able to design a space for me that was exactly what I wanted. 
Everything Amber  picked out was something  I would have picked  out if I knew what I was doing!  When she put the design board together I was blown away by all her selections. Amber didn’t leave one thing to chance.  She stayed within the budget  I gave her. All the sources  she cited  were wonderful and very familiar to me so even the shopping has been fun.
I’ve continued to ask Amber questions and she is always pleasant with a very prompt response.
If you are on the fence with this type of service jump in – it is an extraordinary value from a very talented designer. It is money well spent.  I think I have spent 10 times the price of her service on books and magazines just trying for the look that Amber gave me. 
I loved working with Amber so much that I gifted her design service to my daughter for her living room.  We are all excited to see what Amber does for my daughter’s living room.

Wow! Thank you so much to my client for taking the time and sharing her experience with working together. I am truly lucky to have such amazing, fun clients to share this experience with! She has already begun making purchases for the room and I can’t wait to share after photos, when it’s complete.

Changes to Our Family Room & A Guest Post

February 26, 2014 by Amber Filed Under: design, family room, guest post, personal design style


Even though it is still freezing outside, the bright sunshine reminds me of spring and gets me excited to make changes in our home. Even if it’s just moving some accessories from one room to the next or a new pair of pillows to add to the room’s color scheme, I am a happy camper. So here are some subtle, fun changes that recently went on in our family room…

Target can do no wrong lately with their Threshold line and Nate Berkus accessories. My new tray is a Nate Berkus beauty and the Threshold ottoman it sits under was a surprise from my hubby for Valentine’s Day!! This ottoman will end up all over the house, because it is so versatile! We can use it as a bench at our kitchen desk, a side table in our family room or a place to rest our feet. I love furniture pieces that have so many uses.

The man head plant has been moved from our dining room to the family room. Surprise, surprise… it’s also from Target! I really should do promo work for them. ๐Ÿ˜‰

Head on over to Jordan and Janette’s blog, The 2 Seasons, where I am guest posting today! My topic over there is also small changes with big impact. See you there!

Projects I am Working On at the Moment…

February 22, 2014 by Amber Filed Under: design, e-decorating, e-design, personal design style


I am happily moving along on client projects, both e-design and local. There is nothing that gets my creativity flowing more than figuring out a floor plan layout and design. I truly love every step of the process. Today, I am showing you the inspiration side of design. For me, it’s all about gathering ideas when starting a room design. And inspiration can come from anywhere… the colors from a book cover, nature, a fabulous art print or pinterest! Here is the direction we are heading on some of these rooms…

A Cozy, Vintage Inspired Cottage

via
Patterned Drapery
via

Neutrals With Nature
via

Whimsical Art… How cool is this???
via
Black Doors and Windows
via
So that is where I am headed with recent design projects and I couldn’t be more excited!! 
How about you… what gets your creativity flowing???

A Simple, Creative DIY Art Piece with Jordan!

February 20, 2014 by Amber Filed Under: art, design, DIY


I am so excited to have a special guest blogger here with us today. Jordan, from the blog The 2 Seasons, is here to share a very creative art project and a colorful way to fill a wall space in your home. Jordan shares a fun design/DIY blog with her mom Janette. Not too long ago, Jordan and I realized we lived near each other and share so many of the same interests! I can’t wait for you all to see this creative art project…

Hello, everyone! I am Jordan, the daughter half of the mother/daughter lifestyle blog called The 2 Seasons. My mom Janette and I have been writing our blog together for the past three years. I am so pleased that I discovered Amber and her blog. Plus, we found out that we live very close to each other, and we had the opportunity to meet in person. That was fun!


DIY Modern Art using leftover house paint

As a southern girl who now lives in central New York, I have learned the winters here are very long. I try to do things that will keep me busy, and this is the perfect winter-time project. We love color here at The 2 Seasons and making modern art during the gray months is one way to incorporate color into our traditional homes. My mom made a couple of modern art projects (here and here), and I followed to make my own. We have a blank wall in our study, and I definitely wanted to add some spring color in the form of DIY art. Some people say this isn’t art but that instead it is making home decor. Whatever it is called, it is a great way to create color and interest for your walls while the winter blasts away outside. Plus, it’s an automatic conversation piece.


DIY Modern Art using leftover house paint

We discovered the artist Cassandra Tondro and all of her amazing work. I found out she also had some Youtube videos that teach how to make your own art out of left over house paint. It looked like a fun project, and I decided to give it a try. I am happy to report that I had great success following her method, and I am about to share it with you.

Modern Art Set Up

To get started, you need a canvas, plastic drop cloth, old house paint, gloves. The first step is to find an area where you can spread out a couple of layers of the plastic drop cloth. I worked in my basement so the photos are not the best.

    Make your own modern art

Once the plastic drop cloth is on the floor, take your canvas and map its size. I just marked the sides/size with Frog tape. You can also use a felt-tip marker if you don’t want to use tape.

  Make your own modern art

Here is the plastic marked with the size of the canvas. This serves as the guideline for where the paint goes.

    Make your own modern art

The next step is to get your paint ready to go. Remove the lids and stir each can of paint so that it is well-mixed. Put on some fun music, and take your first color and start pouring. This is when you determine if you want to make a design and how you want your colors to blend and mix.

    Make your own modern art

The next couple of pictures all show me adding the color to area.

    Make your own modern art Make your own modern art Make Your own modern art Make Your own modern art Make your own modern Art Make your own modern art Make your own modern art

I had a lot of paint samples that I used. This project uses a lot of paint. The Habitat Restore sells house paint at a deep discount so if you need additional colors be sure to check out your Restore. Also, you can sometimes find discounted cans of mistake paint at Lowe’s and Home Depot.

    Make your own Modern Art

Once you are happy with your colors and design, gently place the canvas on top of the paint. You can do an undercoat on the canvas beforehand if you want, and allow it to dry first. That is a way to add an additional color to your creation.

    Make your own Modern Art

Take your hands and rub them on the canvas to get out any air bubbles and to spread the paint around and cover the canvas.

  IMG_6291

When you think you have covered the whole canvas, pull the canvas directly up from either a side or straight up. I pulled up from a side. Take it to an out-of-the-way area to dry for a couple of days. The colors need to dry and set so they won’t run when you hang it on the wall.


DIY Modern Art using leftover house paint

My canvas measured 24 x 36, but I also had a small canvas on hand. Since I had a lot of paint on the plastic, I decided to make another small creation using the same colors.


DIY Modern Art using leftover house paint

The possibilities are endless, and this would be fun for all ages.


DIY Modern Art using leftover house paint

The painting now has a home in our study and I LOVE it!


DIY Modern Art using leftover house paint

I would like to thank Amber for allowing us to guest blog for her today. We hope you stop by our blog and feel free to like us on Facebook or follow us on Pinterest.


Cheers!

That is definitely gorgeous art to me!! And I also love to put on some music when I paint. ๐Ÿ™‚ Thanks so much to Jordan for stopping by and sharing this amazing DIY paint project with us! Be sure to check out The 2 Seasons blog to see what Jordan and Janette are up to next!

My Dream Bathroom with Decor Planet

February 5, 2014 by Amber Filed Under: bathroom, design


If you have been a reader of my blog for a while, you may have seen my posts about wanting to renovate our bathroom. This is a project we hope to tackle within the next few years and my mind is constantly spinning with how I would like it to look! I have always loved a white bathroom, just like I love white cabinetry in a kitchen. I imagine loads of whites, grays and soft blues in this bathroom. I can just picture subway tile, chrome fixtures, glass knobs and a true spa like feel. When I was recently introduced to Decor Planet, a site that has everything you would need for a bathroom renovation, I was hooked! You can truly get luxury style at a discount with this site and if you live in the NYC area, you can pop in and see the choices for yourself in one of their showrooms. Since I am always putting together virtual design boards with e-design, I thought it would be fun to create a dream bathroom with items from Decor Planet!

My Dream Bathroom ……………………………………… 

vanity,  sconces,  mirrors,  rain shower head,   claw foot tub,  faucet

I could spend the day in this bathroom, if it were mine! I added a rug and some decor pieces to finish the space, but the main renovation pieces are all from Decor Planet! To view the pieces from the site that are on my board, click on the words below the design board.

There are endless possibilities with this site. Not only can you find loads of accessories to choose from for your bathroom, you can also read their blog for how to’s and advice on tackling projects yourself! I am now more excited than ever to get this renovation started.

Make sure to stop by Decor Planet and tell me your favorite bathroom accessory!

Decor Planet sponsored this post, but all thoughts and opinions are my own.

How I Present Designs to Local Clients

January 31, 2014 by Amber Filed Under: #projectcoastalchic, design, local clients


So many times in the past, I have shared e-design projects that I have completed and have discussed how I go about completing virtual design boards. Since I am now moving into servicing local clients as well, I thought it would be fun to share a glimpse of what goes into meeting and presenting to clients, in person. Our first official time meeting is usually in their house, where we discuss the space and what the client would like to change. Before meeting, the client has already filled out the same form I give virtual clients. Having this information ahead of time helps me go into the initial meeting, knowing a little bit about the space and what they are looking for. {They don’t have to fill out the entire form, since most of the questions will be covered in person, such as the floor plan. But, seeing the space ahead of time gets the brain turning a bit faster for me! Also, it gives them an idea for what we will be discussing at the initial meeting, so they feel a bit more prepared themselves.} I bring along a bag filled with my tape measure, additional questions and graph paper to draw out the floor plan.

Local Client Project #projectcoastalchic
I take as many pictures as possible, so I remember the space from every angle. I also take close up pictures of fabrics, accessories that they would like to keep in the space. For this family room project, the client would like to keep the Waverly fabric valances on the windows. I immediately went to the fabric store and bought a half yard of this fabric, so I can take it everywhere with me and compare it next to other suggested fabrics for the room. Next, I get to work at home, drawing out the floor plan and putting together the inspiration board. This board, which will be presented and given to the client, shows my design vision, floor plan options and some specific pieces chosen for the room. One of my best investments has been a staple gun! I use that to staple pretty fabric to the plain white canvas board, to make the presentation look more warm and welcoming. For this presentation, I chose a creamy duck canvas fabric that resembles the color of the drapes we will use in the space. I think it’s great to cover the board with a fabric that also ties into the presentation and compliments the design! And now, it’s presentation time…
Luckily, she loved it and we are now moving onto the installation part of the process, which I find so exciting. I live vicariously through my clients and get just as much joy as them, seeing their space come together and click. It also helps to have amazing inspiration to draw from and show the client, such as Emily’s bookshelves and Courtney’s warm living room! 
With e-design, once the client likes the vision, I move forward with the design board and get the second virtual presentation ready. With local clients, it’s now all about going into the space and creating the vision! The shopping, sourcing and styling all come into play now, which is so much fun! 
So that’s a little sneak peek into my design process. I know it’s different for every designer, but I have found that this works for me.  ๐Ÿ™‚

Using Bar Carts in Different Ways

January 24, 2014 by Amber Filed Under: #projectcoastalchic, design, entertaining, organize, personal


I have been working with a local client {#projectcoastalchic} to add some warmth and texture to her family room. When you first enter the family room off of the kitchen, there is one large wall that also sits next to a door to the garage entrance. I thought it would be pretty and fun to add a little entry spot/organization station for resting your keys, mail and anything else they may need. There are fun ways to make a station like this both functional and beautiful. I instantly thought of using the Threshold bar cart from Target!

Target Bar Cart
Not only can this be pulled out and used for entertaining guests, it will also be amazing to make this an organization station! We will be hanging a framed chalkboard above the cart, so the family can write down grocery lists, practice/game schedules and anything they need to know before heading out the door. When they have a large dinner party, this amazing cart on casters can be easily rolled into the kitchen/dining area for drinks and appetizers. It is without a doubt that bar carts are no longer a trend, but here to stay! Here are some creative ways to use this versatile furniture accent piece:
via 

via 

 via

Here are fun ways to use them when not entertaining:

 via

via
I think I may need to pick one up for myself! I love any and all carts, especially when they are brass!
What about you… do you think this trend is here to stay???

My Statement Chair With One Kings Lane

January 22, 2014 by Amber Filed Under: chair love, design, one kings lane, personal design style, this piece has history


I was thrilled when a representative from One Kings Lane reached out to me to discuss the topic of statement chairs. This was right up my alley, since I have always considered myself a chair person. I love and appreciate so many different styles and when antique or market shopping, I always make a straight line to the furniture! This amazing site features a home decor resource guide that introduces you to the history of statement chairs from any design era you can imagine!  I have decided to show one of my favorite chairs in our house… the timeless and classic Windsor chair. My chair is a modern version and is a reproduction, but its homespun, traditional quality still shines through. During the height of the more ornate furniture designs, like Baroque, England introduced this humble and classic piece that is still so popular today.

Rather than being a centerpiece in the room, it is an accent and is part of our dining room set. I think what I love most about a Windsor chair is the ability to mix it with modern decor, to give it a fresh, new take on a classic piece. Although it’s a timeless shape routed in tradition and simplicity, it can also appear more modern against a table with clean lines. I paired our Windsor chairs with modern pieces, by adding a clean lined hutch and dining table to the room and also by bringing in contemporary art and accessories. I have often thought the chairs would look amazing if painted a bright color. {Maybe a rich teal/blue color!}

The most important thing to do with any furniture in your home, is to have fun with it and make it your own! Thanks to One Kings Lane for including me in this series and reminding me about one of my favorite furniture pieces in our home!

New Changes in Our Family Room {or Basement??}

January 21, 2014 by Amber Filed Under: basement, design, family room, personal


You may have seen some of my previous posts about renovating and adding livable square footage to our basement. We are making it an additional space to relax, play and spend family time. On Instagram, I mentioned an ottoman that I loved from Target. I knew it would be a great piece to use as a coffee table and rest our feet in the basement. Mike, my husband, checks in on my blog and instagram for gift ideas {what a guy} and surprised me with that ottoman for Christmas!! I love it so much and it is so versatile, that I haven’t even put it in the basement yet! I have been enjoying it on our first floor family room and also wanted to keep it out when I do some entertaining next month. Eventually, it will make its way in the basement, which will be a much needed accessory down there, too.

{love the casters!!} 

Ottomans this size can work in almost any space! They are great for the foot of the bed, coffee table {with tray}, in front of the fireplace, etc. The possibilities are endless! I am sure this furniture piece will have a home all over the house, throughout the years.

How about you… do you have a furniture piece in your home that would work anywhere??

How to Turn a Digital Pattern into Wrapping Paper!

January 17, 2014 by Amber Filed Under: blog review, design


When a representative from Pattern Pod reached out to me and said I could choose from their gallery of digital prints and make it into something amazing, I jumped at the chance. Pattern Pod is an on line company that allows you to transform digital patterns into almost anything from wrapping paper to fabric! They work along with Spoonflower to make those dreams a reality. First, you find a pattern you love and purchase the digital image through Pattern Pod. Then, you visit the Spoonflower site and choose what you want to do with your uploaded pattern! The pattern pod site has so many different patterns to choose from and some come with an option to also change the colorway. I decided to choose a pattern and turn it into wrapping paper!

The paper came no nicely packaged! I quickly opened it up to check out my pattern. I chose Pattern 46 in Aqua. I thought it looked like delicate snowflakes, which is perfect for any gifts given throughout the winter months. The paper is sturdy and made of very good quality. I quickly got to wrapping for some parties coming up in the near future.

{A little closeup to show how nice the corners came out!}


I would not pride myself on being the neatest present wrapper, so for the gifts to come out as good as they did, that means the paper was amazing to work with! I am so happy that I found out about this company. There are so many ideas and ways to make the patterns come to life. I would love to one day line the back of my bookshelves with one of their patterns and turn a pretty pattern into a new pillow fabric! You can also use the patterns for digital use, such as enhancing the look of your social media pages and blogs.

To purchase a pattern and start imagining the possibilities, visit their site HERE!!

Then, turn that pattern into something amazing over at Spoonflower!

  • « Previous Page
  • 1
  • …
  • 11
  • 12
  • 13
  • 14
  • 15
  • …
  • 26
  • Next Page »
Welcome!

Hi, I'm Amber... a wife, mom and interior decorator. I am the writer of Simple Dwellings and the designer behind Amber B Design. Blog topics are all things design, with the occasional DIY attempt! Thanks for stopping by Read more...

  • Bloglovin
  • Email
  • Instagram
  • Pinterest
  • Twitter

Blog Posts, Straight to Your Inbox

Popular Projects

A dining room with white walls and wooden table.
A black door with white curtains and a red chair
A staircase with black and white chevron pattern on the steps.

Blog Love

  • Addison’s Wonderland
  • A Thoughtful Place
  • Alison Giese Interiors
  • Amber Interiors
  • Bailey McCarthy
  • Caitlin Wilson
  • Chris Loves Julia
  • Classic Casual Home
  • Cottage and Vine
  • Design Indulgence
  • Dwell by Cheryl
  • Eddie Ross
  • Elements of Style
  • Emily A Clark
  • Emily Henderson
  • Gallery No Eight
  • Hi Sugarplum
  • House of Jade
  • Jana Bek
  • Juniper Home
  • Kate Marker Interiors
  • Lucy Williams
  • Monika Hibbs
  • Our Fifth House
  • Pencil and Paper Co
  • Rachel Parcell
  • Rambling Renovators
  • Pure Style Home
  • Sita Montgomery
  • Studio Mcgee
  • The Makerista
  • The White Buffalo Styling Co
  • the Zhush
  • Traci Zeller
  • Young House Love

Copyright Amber B Design © 2025 ยท Design by Britt Douglas


Loading Comments...