Happy Monday! I’m here to announce the stencil winner! Thank you so much to all who entered and the new followers of this blog! After going to the random generator, the winner is…
Lucky #17- Faith, who said:
Faith said…
Interior Design & Decoration for the South Florida region
by Amber Filed Under: Uncategorized
Happy Monday! I’m here to announce the stencil winner! Thank you so much to all who entered and the new followers of this blog! After going to the random generator, the winner is…
Lucky #17- Faith, who said:
Faith said…
by Amber Filed Under: blog award
A big thanks to Beatice, from her blog The Crafty Bee for recently giving me the Versatile Blogger Award! I truly appreciate it! I really love her blog header:
Isn’t it pretty?? Definitely stop by her blog– she recently finished a coffee table project that turned out great! So here is the blog award:
The rules for this award are to share some things about yourself, that people may now know:
1. I love to run! There’s something therapeutic and fun about it. I love putting on the tunes and looking at the outdoor scenery. I prefer running outdoors instead of a treadmill. That has never appealed to me that much. I ran track in high school and a bit in college.
2. Fall is my all time favorite season. I love the leaves changing and the crisp, cool air. I also love being able to take out the fuzzy, warm sweaters.
3. One of my best friends from college is getting married next fall. They are planning a rustic, chic wedding in a beautiful barn. I cannot wait to see it all come together!
4. I love the holidays and can’t wait to share wonderful memories with my family! They mean the world to me and make me smile daily!
Thanks again, Beatrice, for this award! I pass this ward on to all of you wonderful bloggers out there who always share inspiring work!
And don’t forget that today is the last full day for the stencil giveaway! The winner will be drawn tommorow morning!! Enter here!
by Amber Filed Under: fashion friday, why works series
Welcome to the series Why This Works… where I highlight a designed space and talk about why (I think) it works so well. This week’s space is Hilary Swank’s living room and was seen in Elle Decor. The space was designed by Mark Zeff.
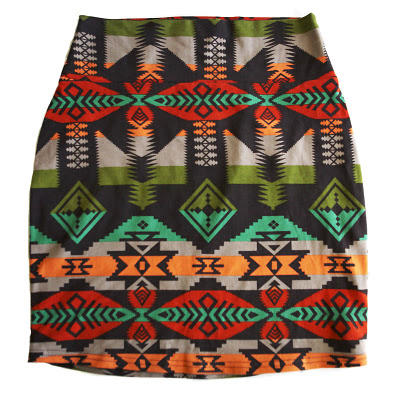
And since today is also the Fashion Friday series, I wanted to show you an outfit I put together for a recent blog challenge. Anna, from her blog A Newfound Treasure posed the challenge on her blog to design an outfit around this skirt:
Stop by her blog post here to see what I came up with, as well as many other stylish outfits!
by Amber Filed Under: blog room series
Welcome to the series If My Blog Was A Room… where I pose the challenge to think of your blog as an actual space. What would that space look like? I am so excited to have Rene here, from her design blog Cottage and Vine. Rene is a very talented interior decorator who beautifully blends traditional with modern. I am inspired by her projects and am super excited to see what her blog room would look like! Here is her pretty blog header:
And here is what she came up with-
Hello to all of Amber’s readers! I am René from the Cottage & Vine blog and I am happy to be invited to be a part of this fun series. Well, I say fun, but honestly, it isn’t easy to pick one room that says it all – so I picked two. Thank you Amber for this therapy session. I think I needed that ;).
When I first started my blog the name that came to me was Cottage & Vine. “Cottage” to me means fresh not shabby. Think equal parts of rustic and chic, a mix of old and new, in a hi-low approach. “Vine” comes from my love of gardening and the organic elements that I like to incorporate into our home. If my blog was a room, it could easily be the entry in the above image. I think it shows what my blog is all about. Painted & natural wood, organic elements, and an eclectic mix are all things that I feature on Cottage & Vine. I would like to throw a colorful rug in there somewhere though.
I want my blog to be a place where people can hang out and feel comfortable. At the same time, I hope that visitors are intrigued and inspired.
Thanks so much for having me today Amber!
I am definitely inspired, Rene! Thanks so much for being here. I loved hearing the story behind your blog name. And these images definitely remind me of your blog! The ikat ottomans with that mirror over the mantel is amazing! If you’re not a follower already, definitely stop by Rene’s blog– you’ll be so happy you did!
Have you ever seen the beautiful artwork from Laura Trevey? Her artwork has been featured in countless shelter magazines, she is the writer behind the very popular blog, Bright, Bold and Beautiful and her watercolor paintings and prints are so versatile and beautiful! She is able to capture a flower so vividly, while also painting abstract art, homes, nature and whimsical animals. Here is a sampling of her gorgeous designs (and some of my favorites!):
Her pieces come in a range of colors for all rooms and styles. If you haven’t checked out her etsy shop, go here! It will be hard for you to choose just one!
And stop by tomorrow for another installment of the Blog Room Series!
by Amber Filed Under: Uncategorized
Are you ready for this amazing giveaway? I am so excited to announce this today- The wonderful, amazing Royal Design Studio is sponsoring a stencil giveaway for one lucky reader! In my post yesterday, I showed my dining room, where I tried my very first stencil project. It was definitely worth it and completely changed the look and feel of the room. I’m so excited that you get a chance to try out a stencil for free, from this amazing company! Royal Design Studio will allow the lucky winner to select any of their stencils $50 and under and pay the shipping! Here is a look at their fabulous stencils:
by Amber Filed Under: diy stencil, fall fix ups
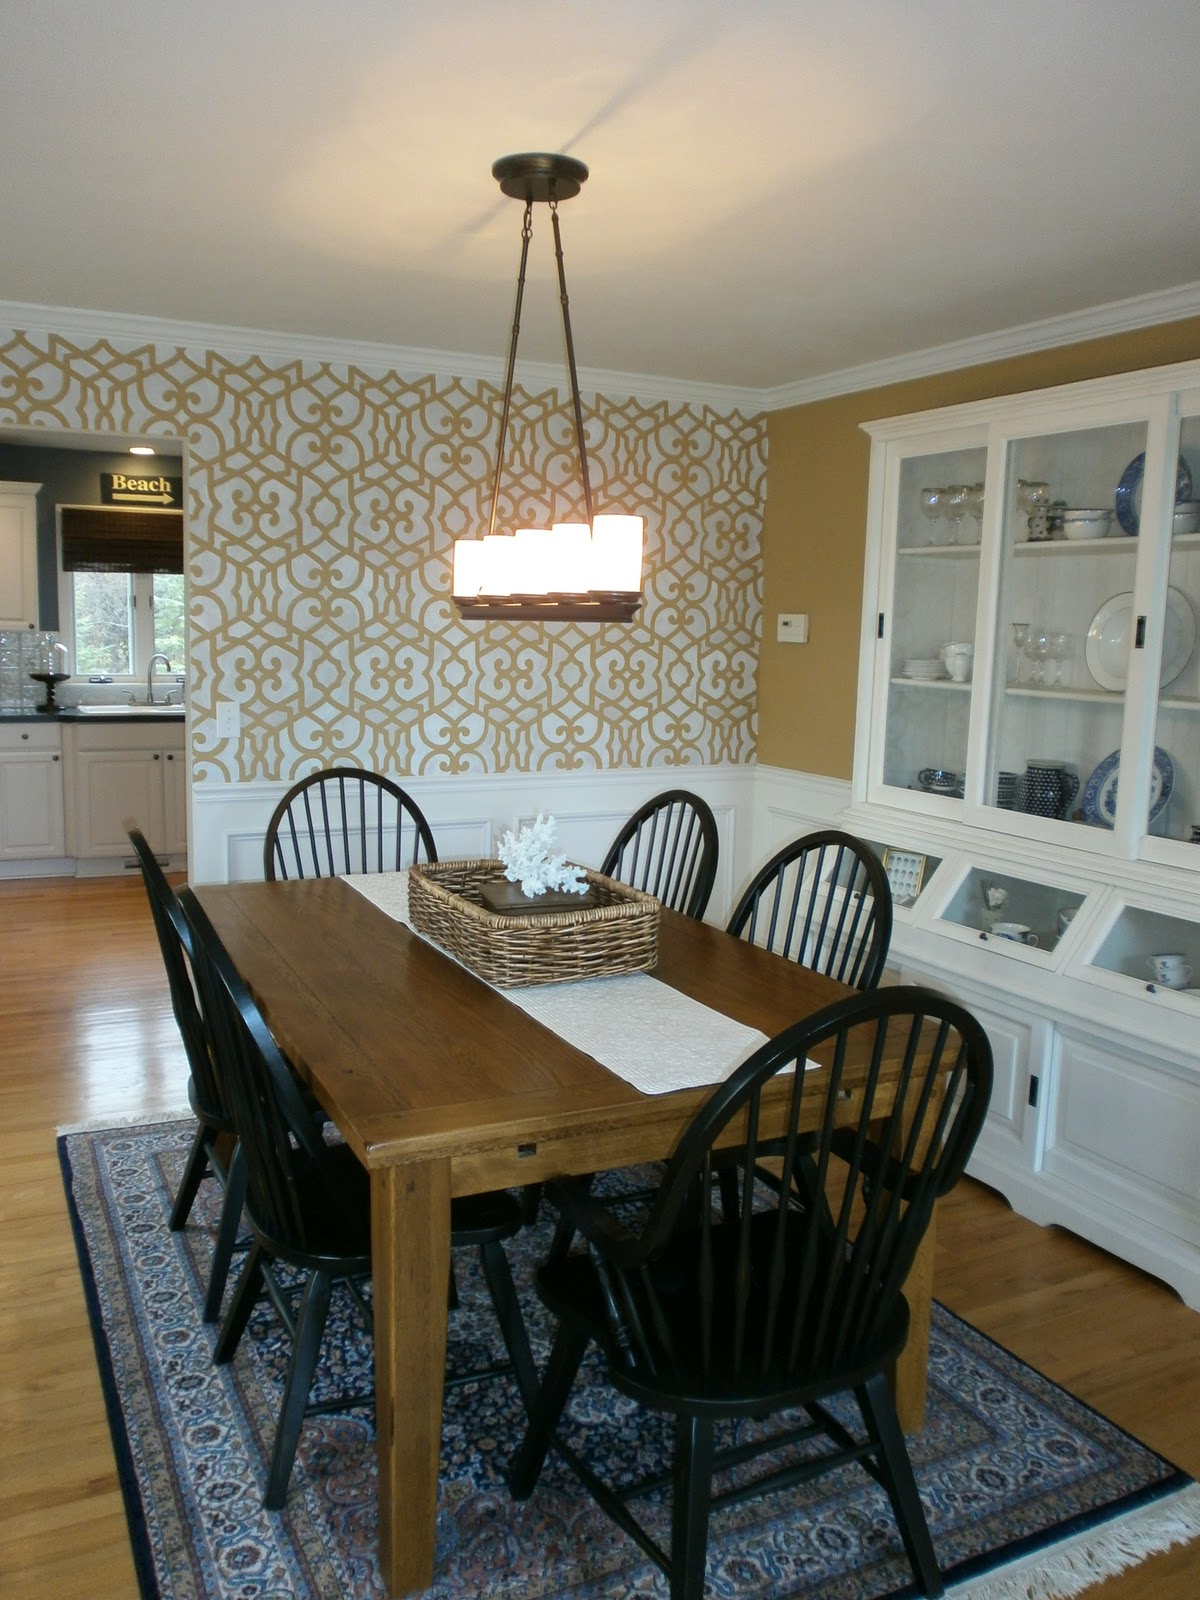
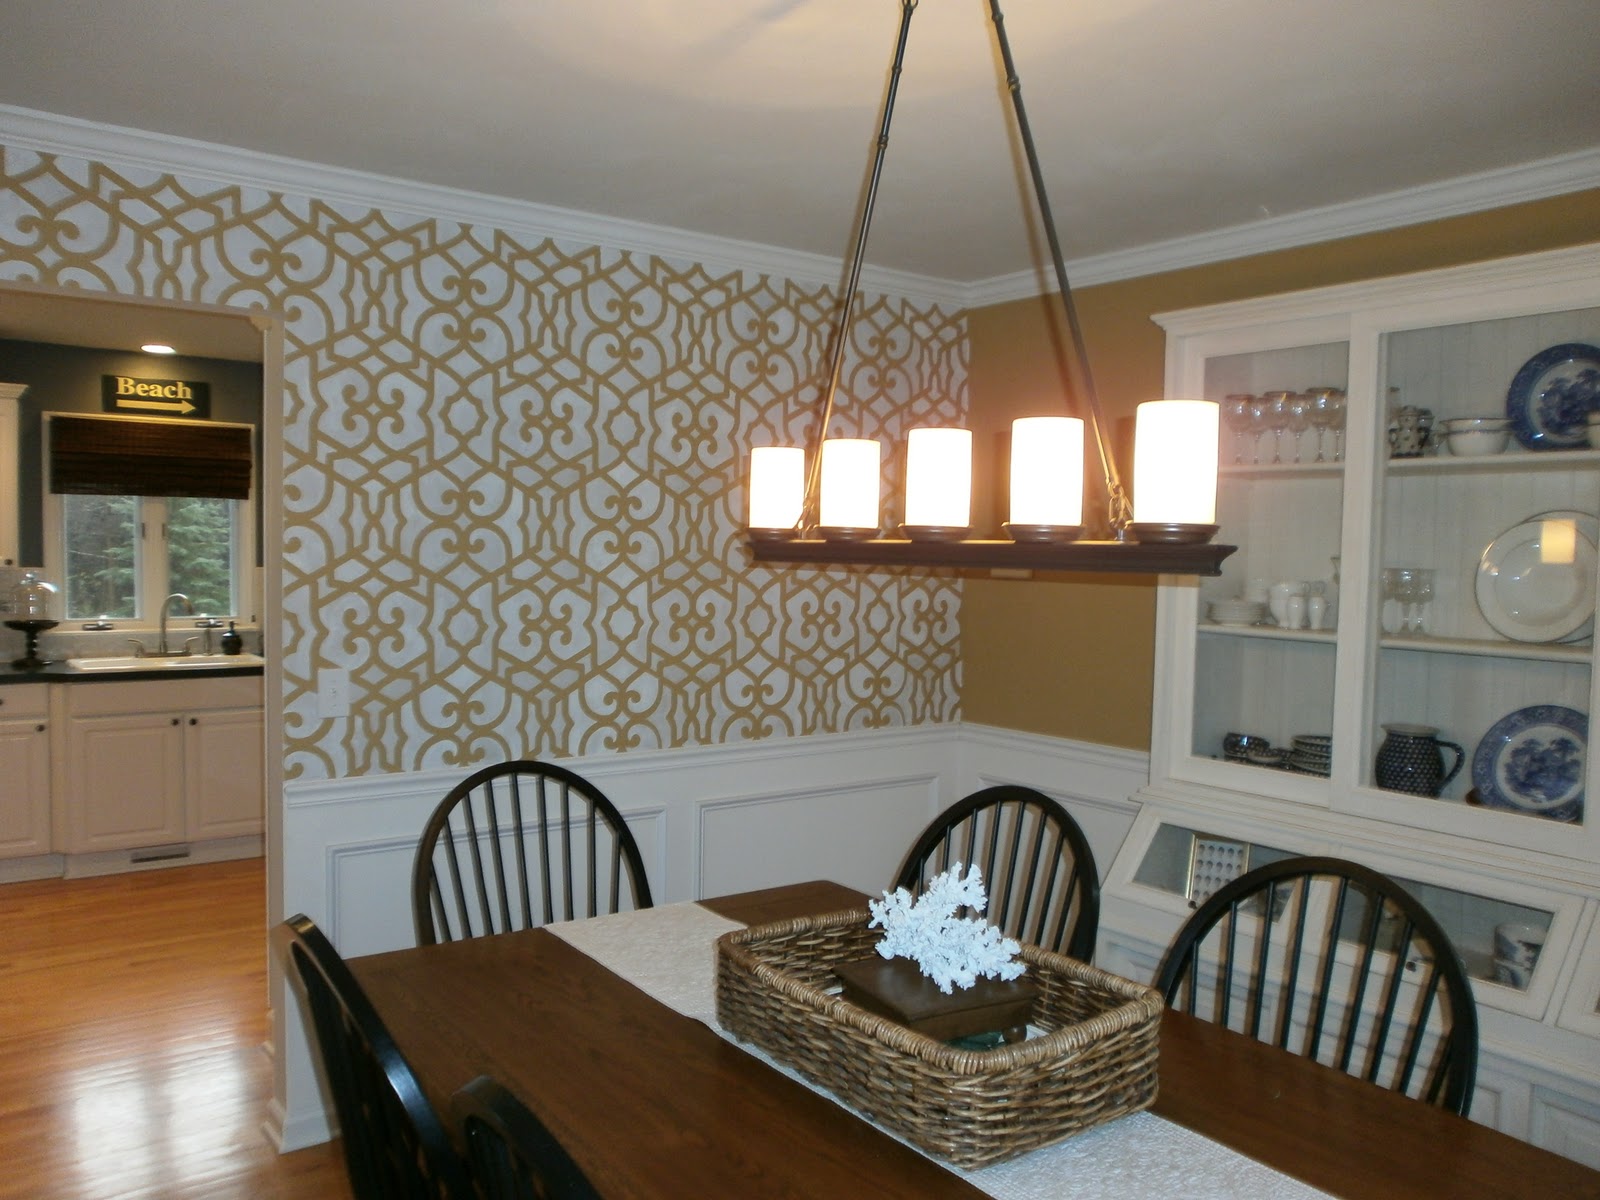
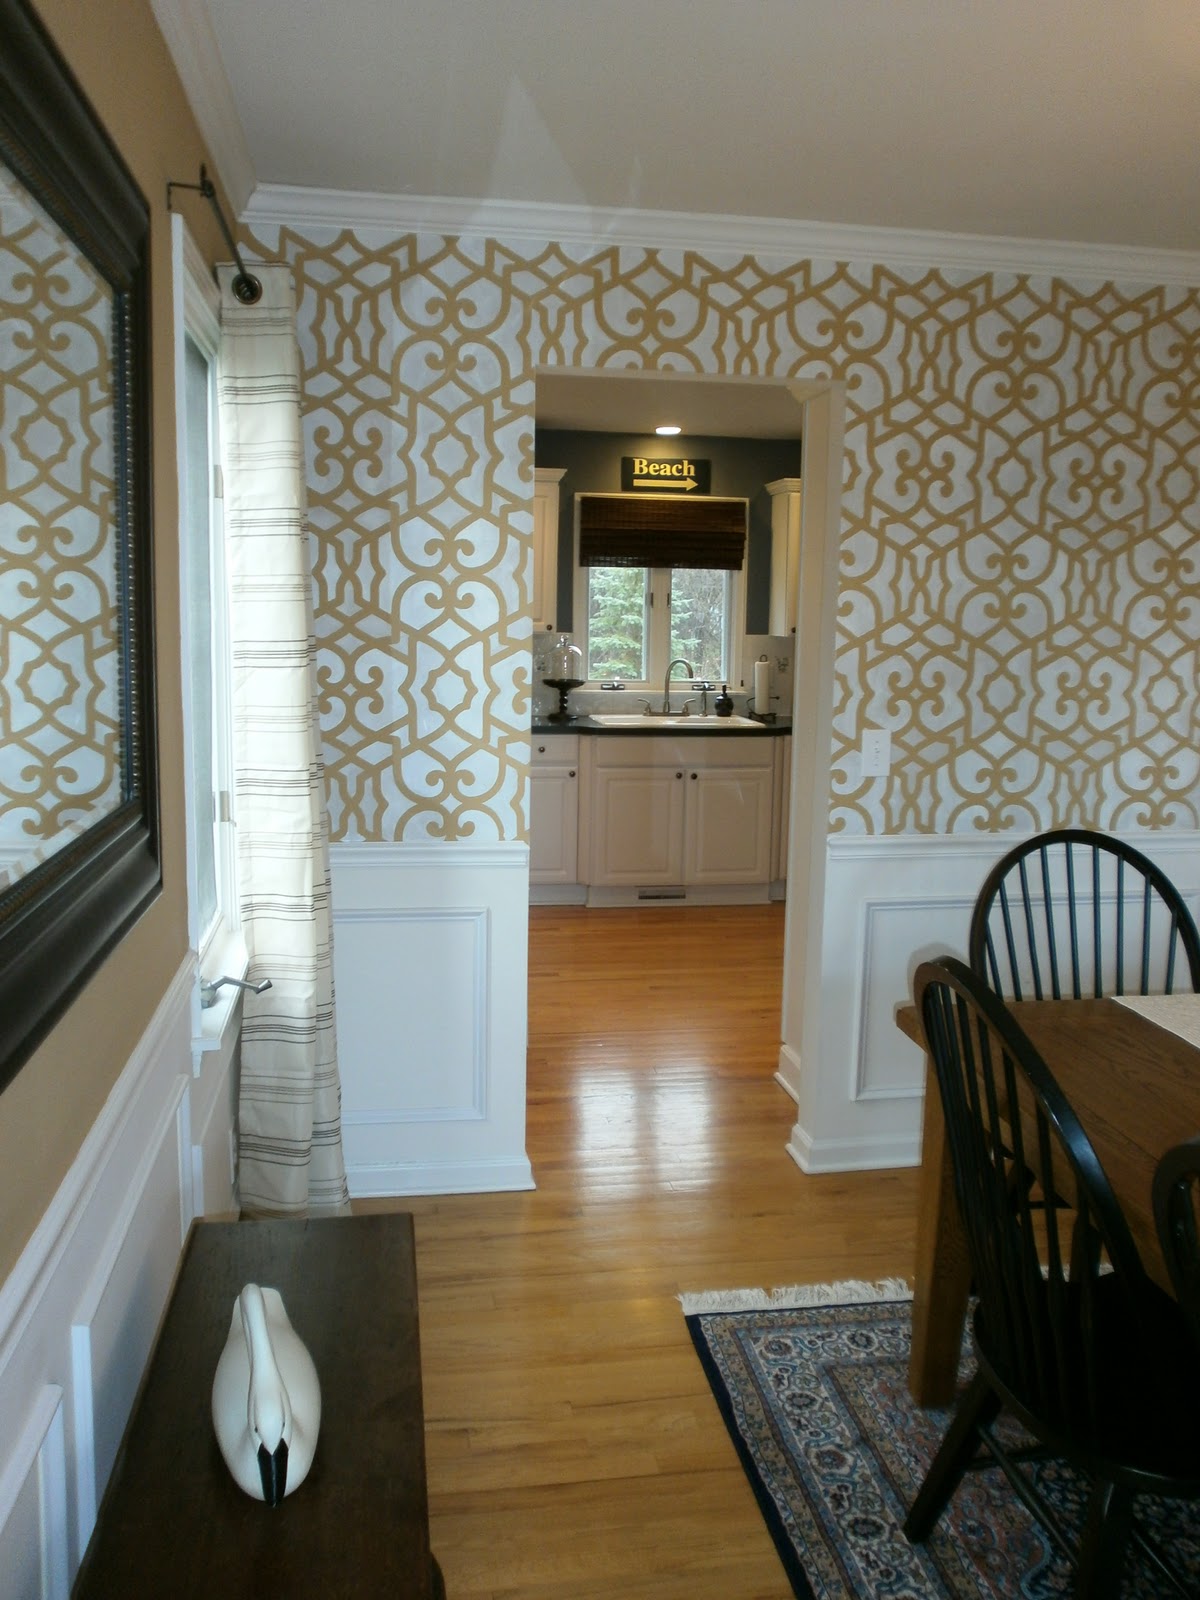
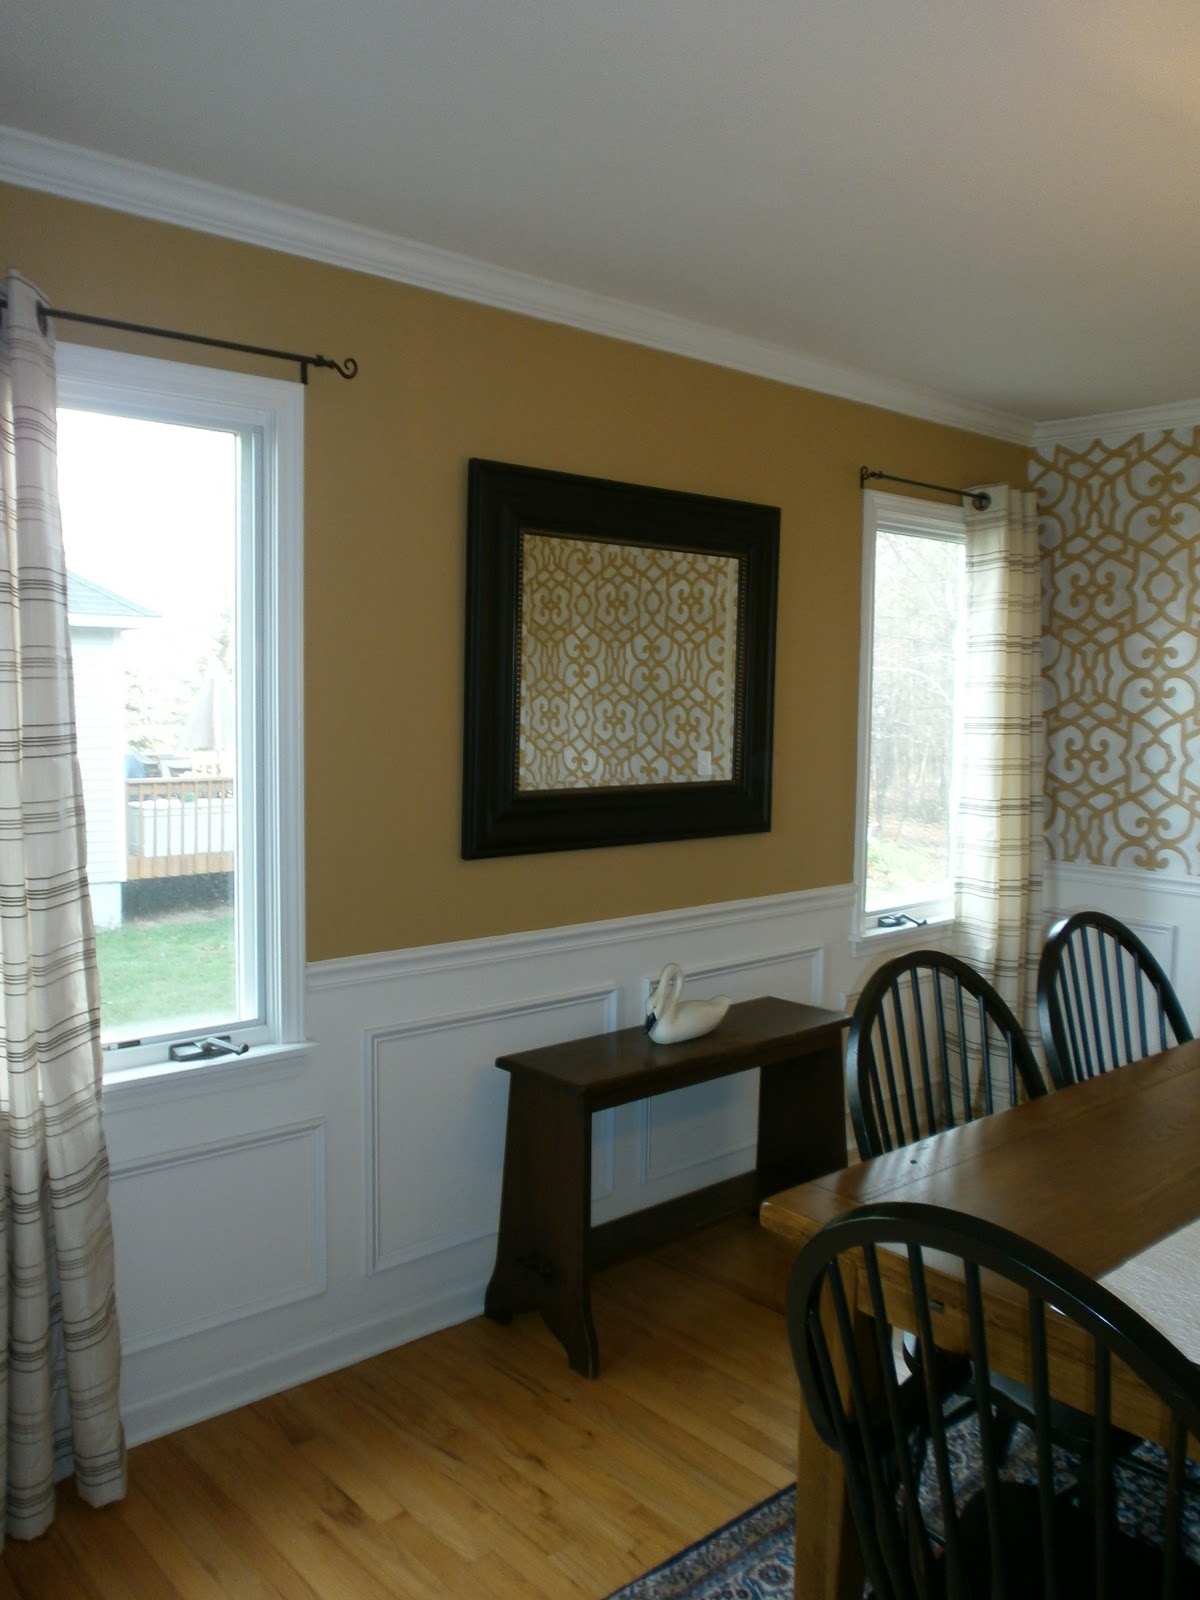
Happy Monday! I am so excited to share this project with you today. I just wrapped up my first stencil project on a wall in our dining room. I have wallpapered before, as you can see here, but never stenciled. I was very excited when I was contacted by Royal Design Studios to do a stencil review, where I could choose my own pattern and create the project however I choose! I was definitely ready to try it, as I have always wanted to see what a large, graphic stencil would look like on my wall! I chose a main wall in our dining room for the stencil treatment. The bones of this space are traditional, and I wanted to infuse some modern elements. So when searching for the right stencil, I know I wanted a large, bold print that read more modern in style. I chose a moroccan print called Large Chez Sheik. This print looked beautiful on the computer and even more amazing in person! Here is what the space looked like before:
Before:
Another before with newer accessories:
And now for the afters: (Get ready- there’s a lot!!)
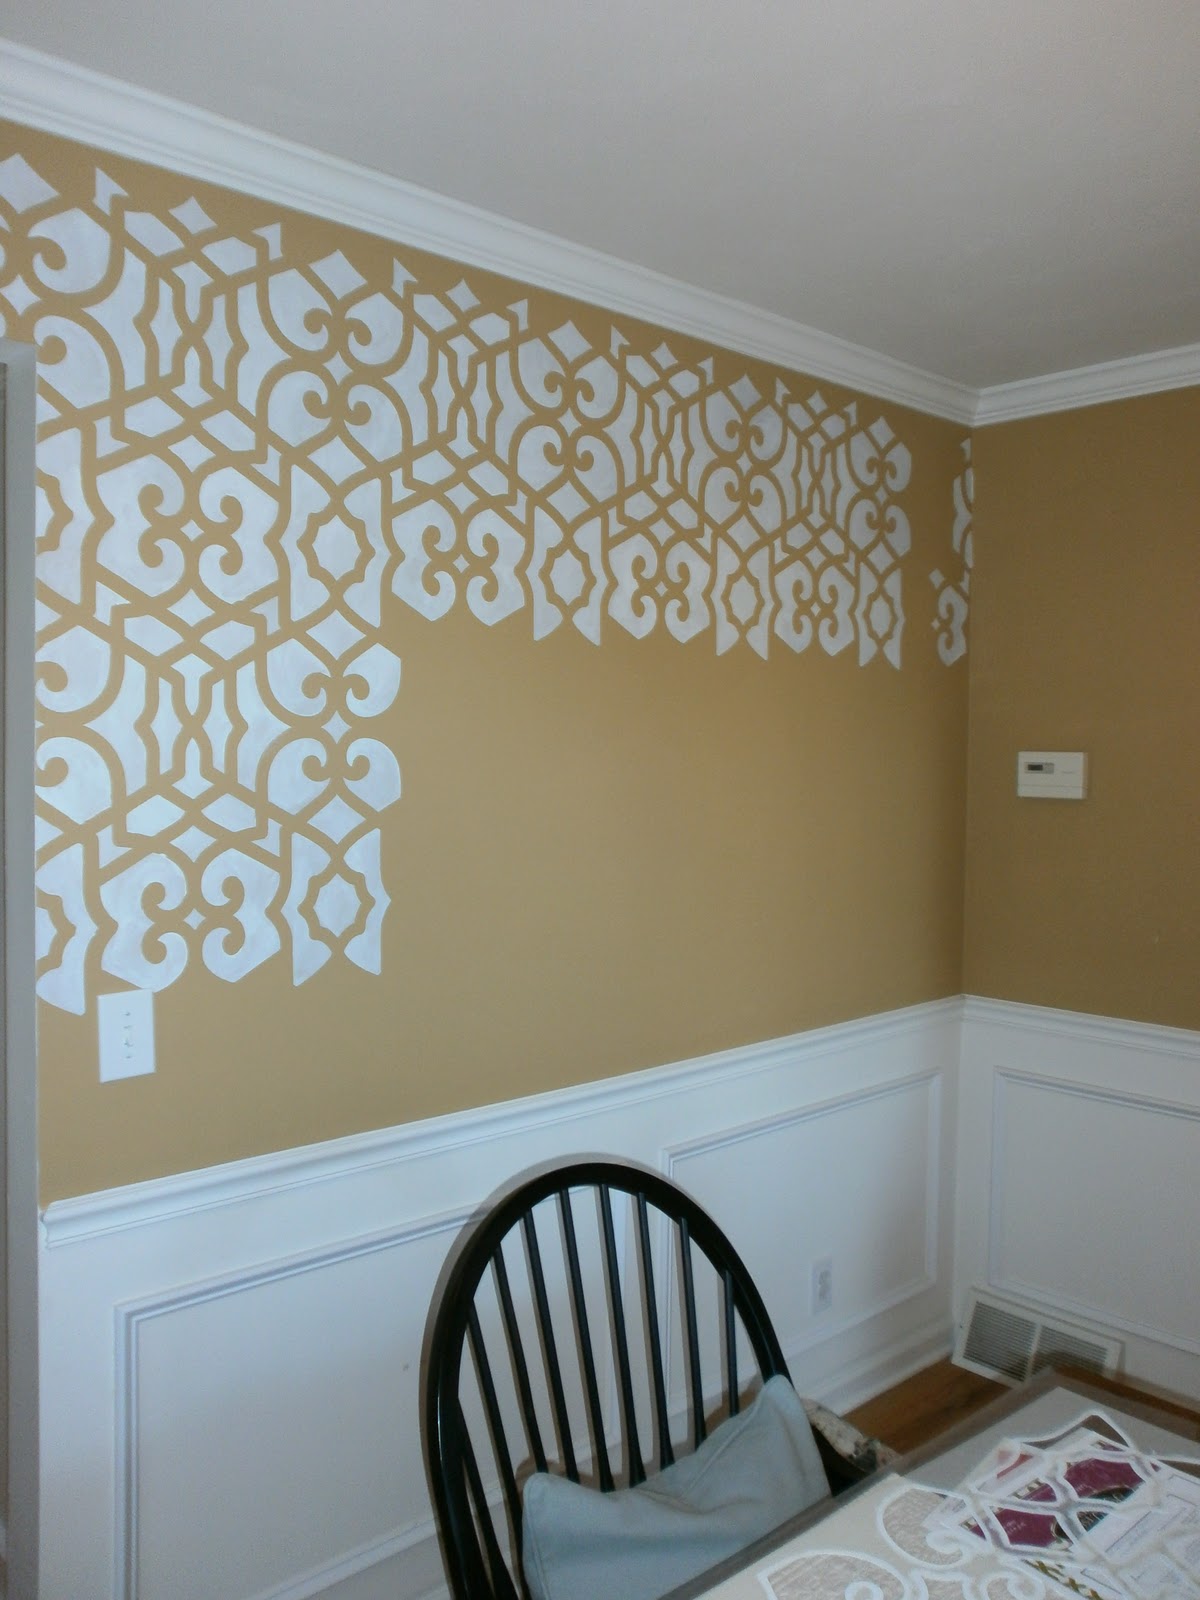
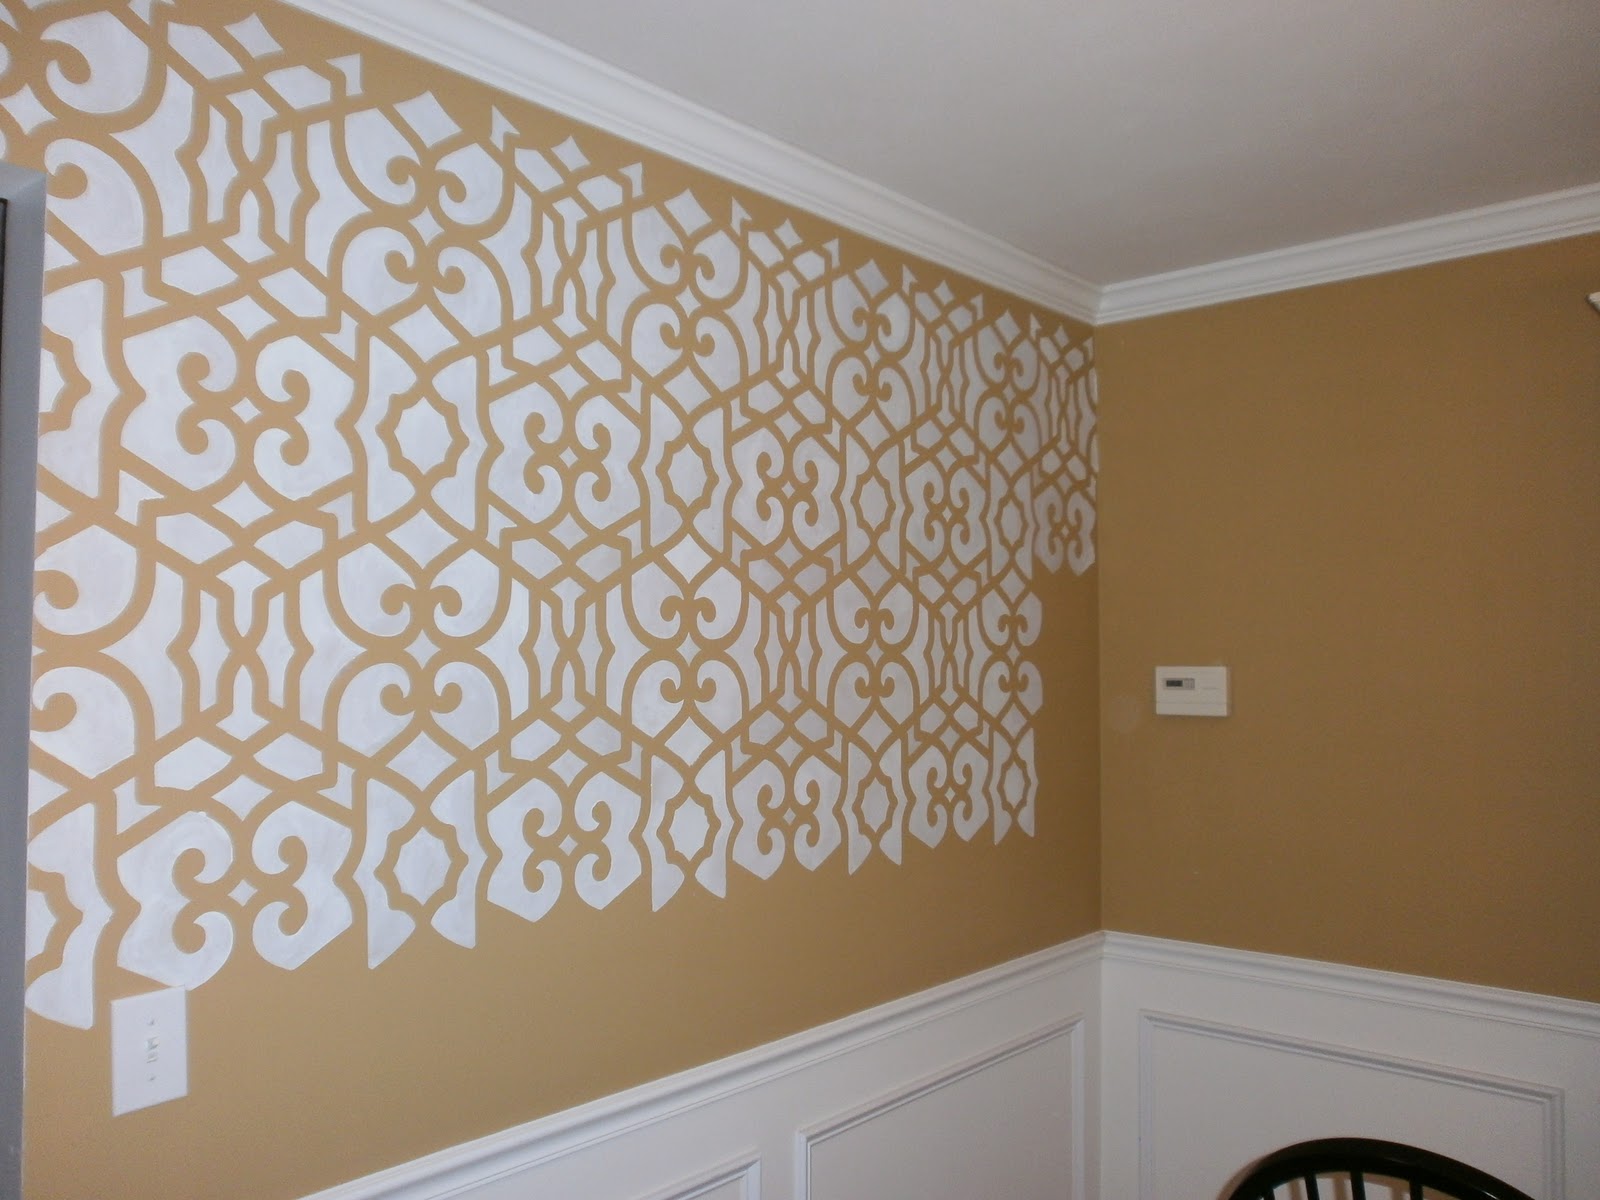
I am so appreciative to this amazing company for giving me the courage to try my hand at stenciling! Now, let’s get to the details of this project and my honest opinion on stenciling! Truthfully, I am soooo glad I tried it! It was time consuming, but so worth it in the end! For me, stenciling is definitely doable for a partial wall. It gave the space a focal point that it didn’t have before. For those that might not want to tackle a wall, stenciling is great for details, like dressers, tables, behind bookcases and drapery. Here are some during shots of this project:
During:
What I used for this project:
– Creamy white semi-gloss paint that I already had for the room’s trim work.
– A stencil brush for the smaller patterns and a small paint brush for the larger patterns.
– Blue painter’s tape. (You could also used spray adhesive, but I already had the tape and it worked great!)
– Drop cloth (just in case!)
– Small bowl for paint.
– Lots of paper towels for rubbing off extra paint on brushes.
I started at the top of the wall, so I could get my initial stencil patterns straight and lined up with the crown molding. I added the painter’s tape to the edges of the stencil and began with only the small stencil brush. I wanted to make sure I wasn’t using too much paint in the beginning. You can always add more paint later, but it’s much harder to remove it! Once I was confident in the amount of paint I needed on the brush, I began to add the small paint brush for the larger patterned areas. This made the project move along much quicker. Just make sure you take off as much of the paint as you can, from the brush! If it bleeds through the stencil, you have a bigger problem on your hands!
When stenciling, I would try to paint from the outside of the stencil in, helping to keep the pattern in place. If I was going to move my stencil to the right for the next set, I always made sure to stencil that side first. That way, the paint would be dry when I had to overlap. The stencil comes with pre-cut dotted lines, so you are always on track for matching up your stencil. It leaves no margin for error! I left the corners and trickier areas for the end of the project, to make sure the back of the stencil was completely dry when I had to move and bend the stencil. I just took a break at that time! I only used one coat for this stencil. The shading does look darker in some areas, but that just adds to the character of the treatment. (Hopefully) it gives the wall some depth and character. With a bit of the darker wall color showing through, it almost gives the white paint a silvery effect, which shimmers when the lights are on! In time, I will do some touch ups, but they are very minimal and can be done at some point! Overall, it was pretty easy to use!
Thanks so much to Royal Design Studios for their generous idea! Their site also has very helpful tips for your stencil projects! And stay tuned… there will be a chance for you to win your very own stencil soon!
I’m linking this up to the wonderful blog, Savvy Southern Style, for her Wow Us Wednesdays!
by Amber Filed Under: why works series
Happy Friday and welcome to the series Why This Works… where I highlight a designed space and discuss why I think it’s amazing! Today’s living room space is worldly, modern, eclectic and traditional. It’s a great blend of some of my favorite styles. Enjoy!
The white walls give a neutral backdrop, allowing the unique blend of furniture and accessories to stand out. This mix of traditional and modern seating give this room a designed over time look and makes the space feel eclectic and unique to the homeowners. I think the choices in seating are very creative, pairing this large, leather chesterfield sofa with a mid century modern occasional chair. The small sofa has clean, modern lines and is covered in white, allowing the pillows and rustic side tables to take center stage. The mix of modern with rustic is one of my favorite pairings, and is done so well in this room. The dramatic world map art on the wall and globe accessories give the space a sense of history, charm and warmth, while the bold, arched floor lamp is a nod to modern design. The space also has a whimsical feel, with the vingettes behind the white sofa and to the right of the image, allowing you to feel relaxed and not make the space feel contrived. The two area rugs in the room give the space a layered look and warms up the hard surface flooring. The coffee table is large and works well paired with the dramatic seating in the space. The scale of the table flows well with entertaining, making it easy for people to find a space for their drink! Overall, this space works!
What are your thoughts???
I have been following Lauren’s blog, Pure Style Home since I started my own blog. I have always loved her sense of style and appreciation for decorating with natural materials. I am so excited to see that she has opened her own textiles line and is sponsoring a huge giveaway on her blog! 2 lucky winners will receive 2 yards of fabric from her new line. The best part of it, is that you get to choose the fabric design you want to win! Here are some of my favorites:
by Amber Filed Under: blog room series
Just lovely! And here is what she came up with-
Hi there! I was so excited and terribly flattered when Amber asked me to be a part of this terrific series “If my blog were a room”. Well, I got a little carried away and couldn’t just stop at one room! I knew this would be fun and when asked me to participate I was only too happy to oblige.
I immediately knew how I would want my rooms to look if my blog were an actual room or house. To fully convey the vibe, I have included a mini house…..just a few key rooms and elements that really resonate with me. A few words to describe each sets the tone so welcome to the mini house at “The Enchanted Home”………