Amber B Design Studio

Interior Design & Decoration for the South Florida region

  • Home
  • About
  • Services
  • Portfolio
  • Blog
  • Press
  • Contact

Mixing Up Frame Finishes on Your Gallery Wall

November 4, 2013 by Amber Filed Under: design, e-decorating, e-design, gallery walls, personal design style


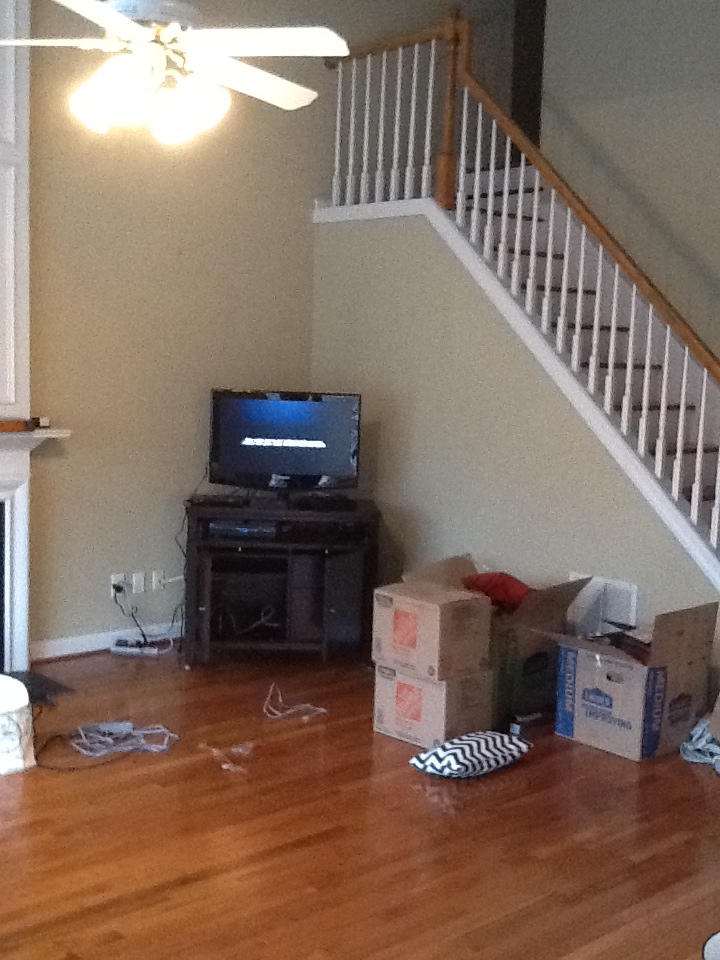
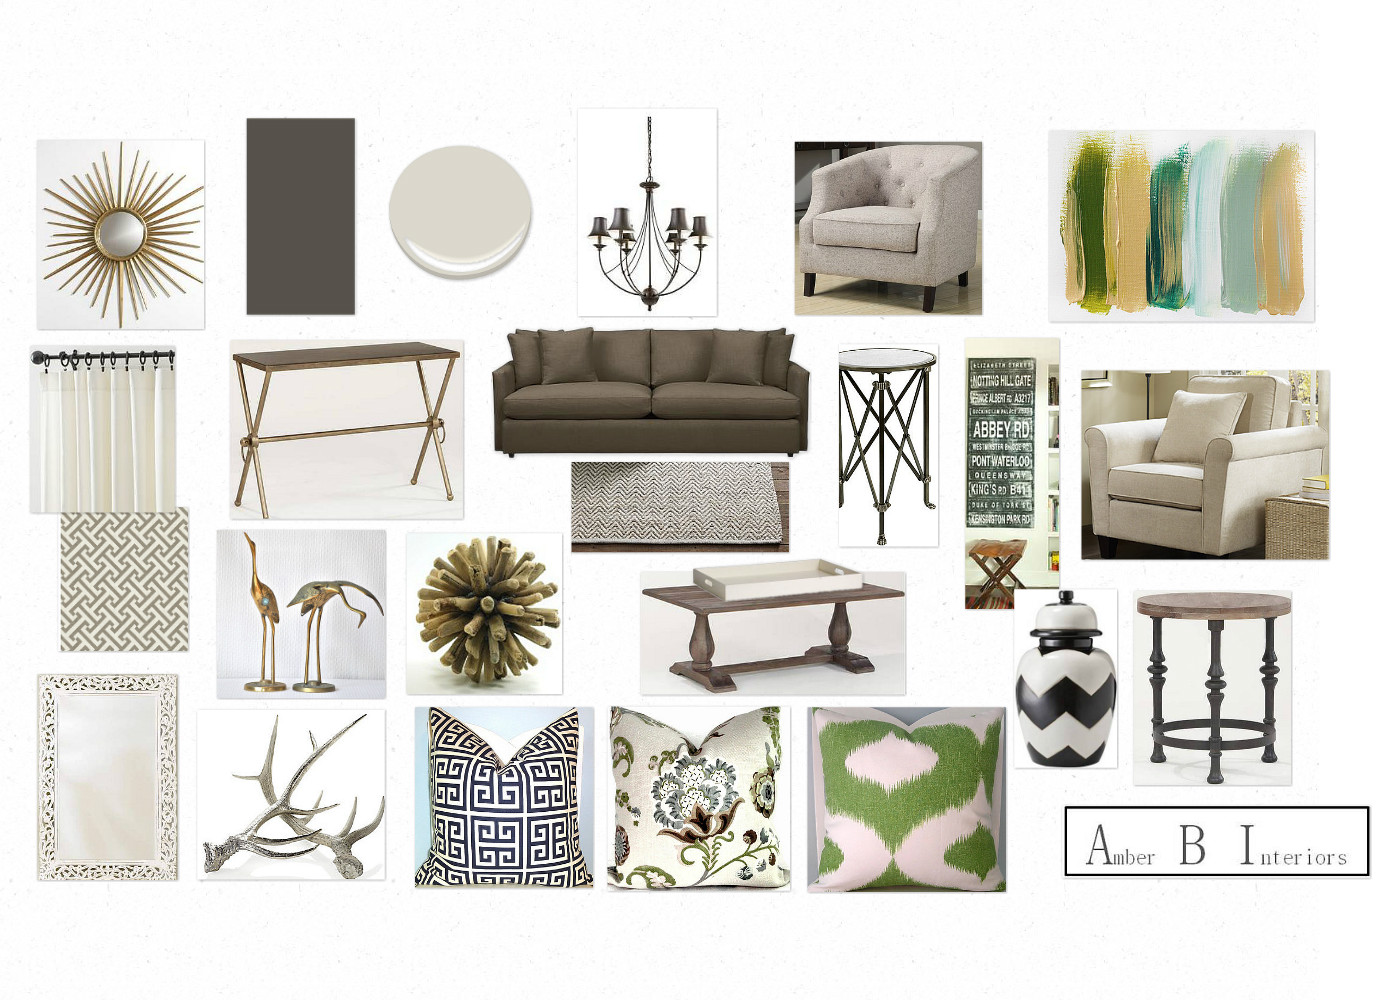
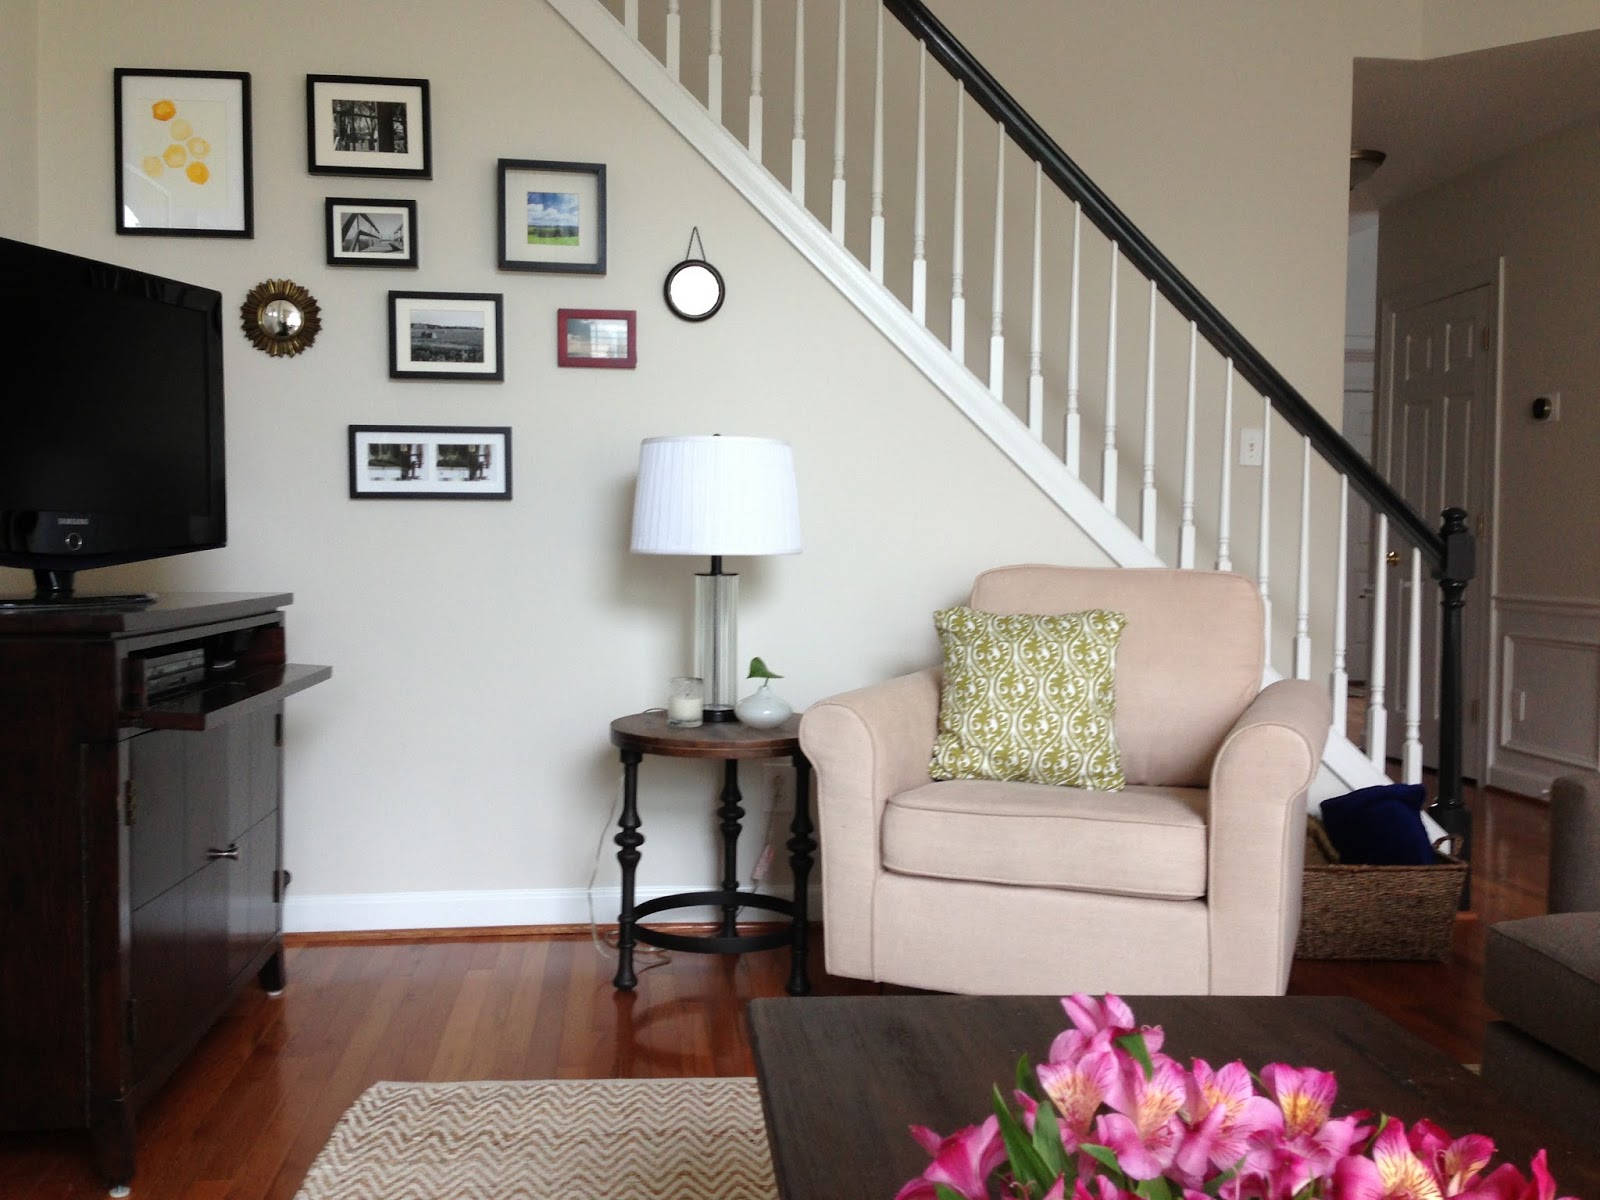
I was recently discussing this topic with a client for her gallery walls in her living room. In her space, we will be adding a couple of art/photo collections on her walls and I suggested to mix it up with different frames for a collected look. I thought it would be a great topic to bring up here on the blog, because I feel there are times when matching frames are necessary and other times when mixing it up is just right!

When to Mix Up Your Frames

via
via
via
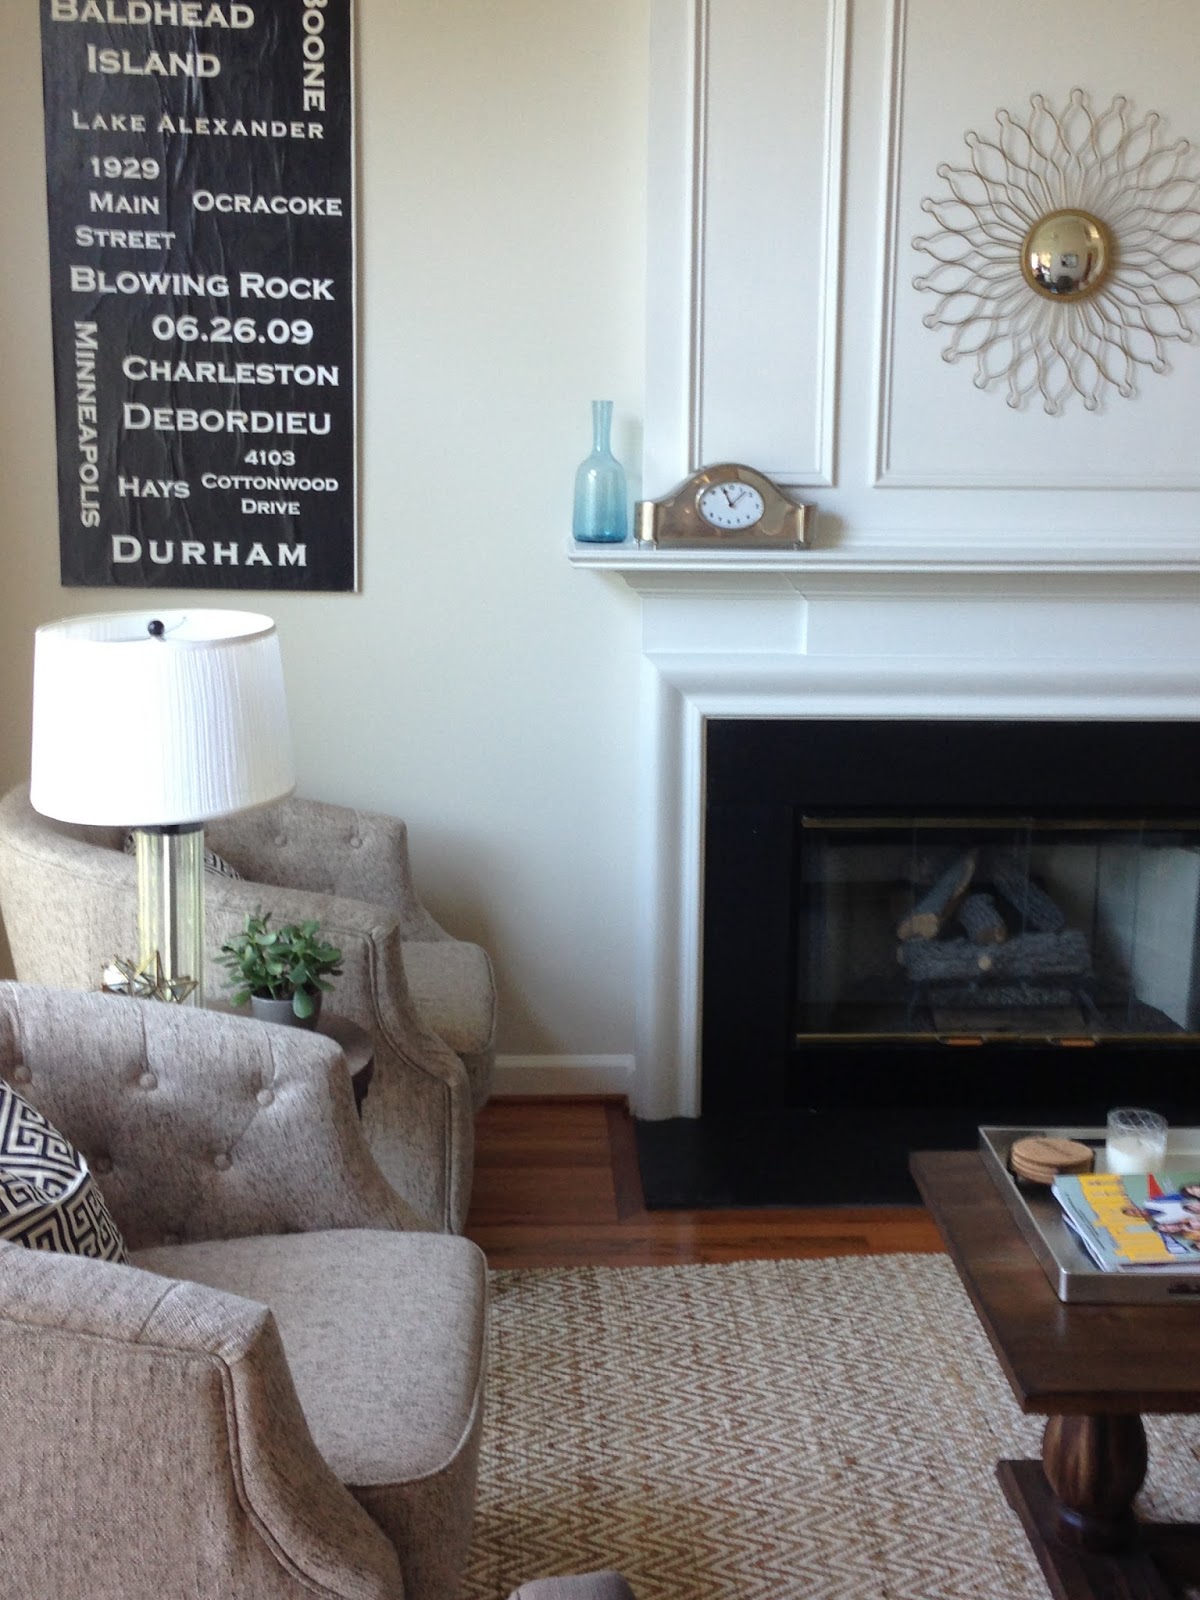
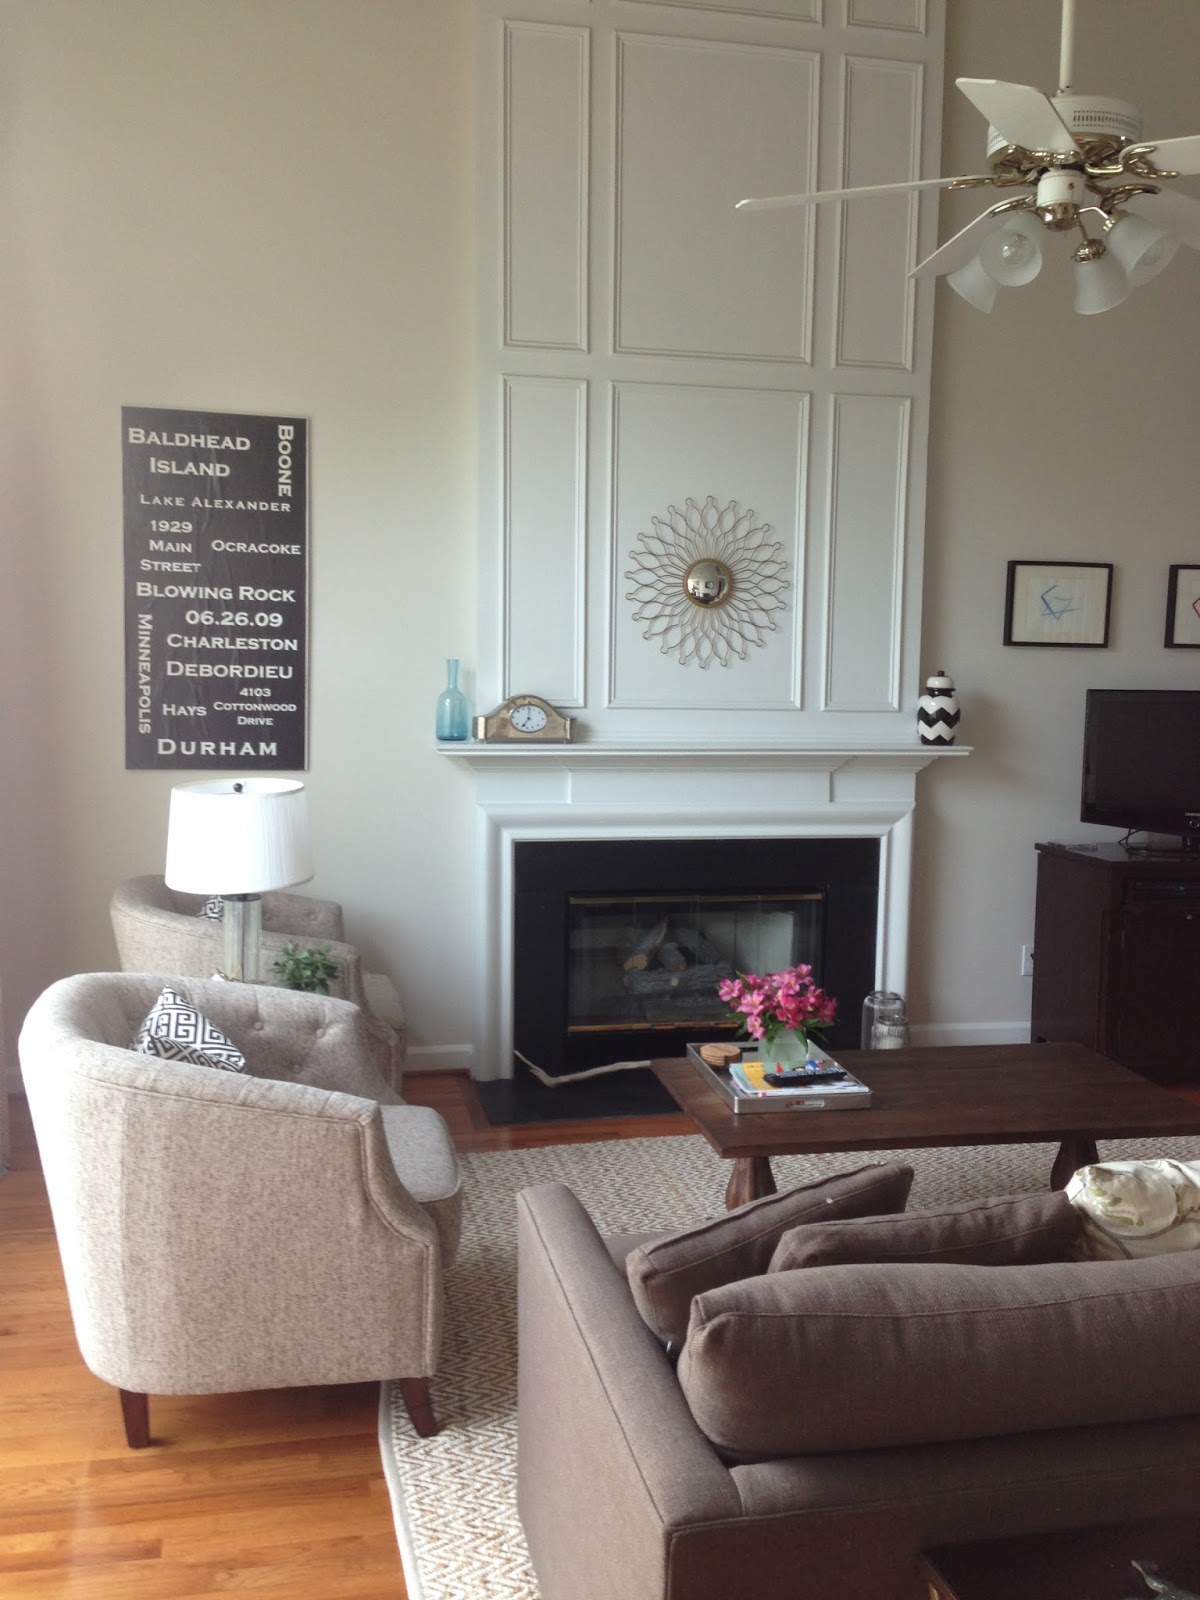
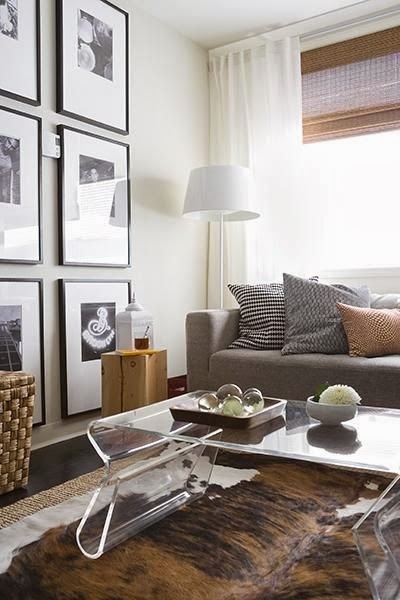
When you have an eclectic space and you are trying to fill it with art in an asymmetrical way, mismatched frames are great! Or like the last above image, filling a corner wall with framed pieces looks great when the frames are mismatched.
via
via
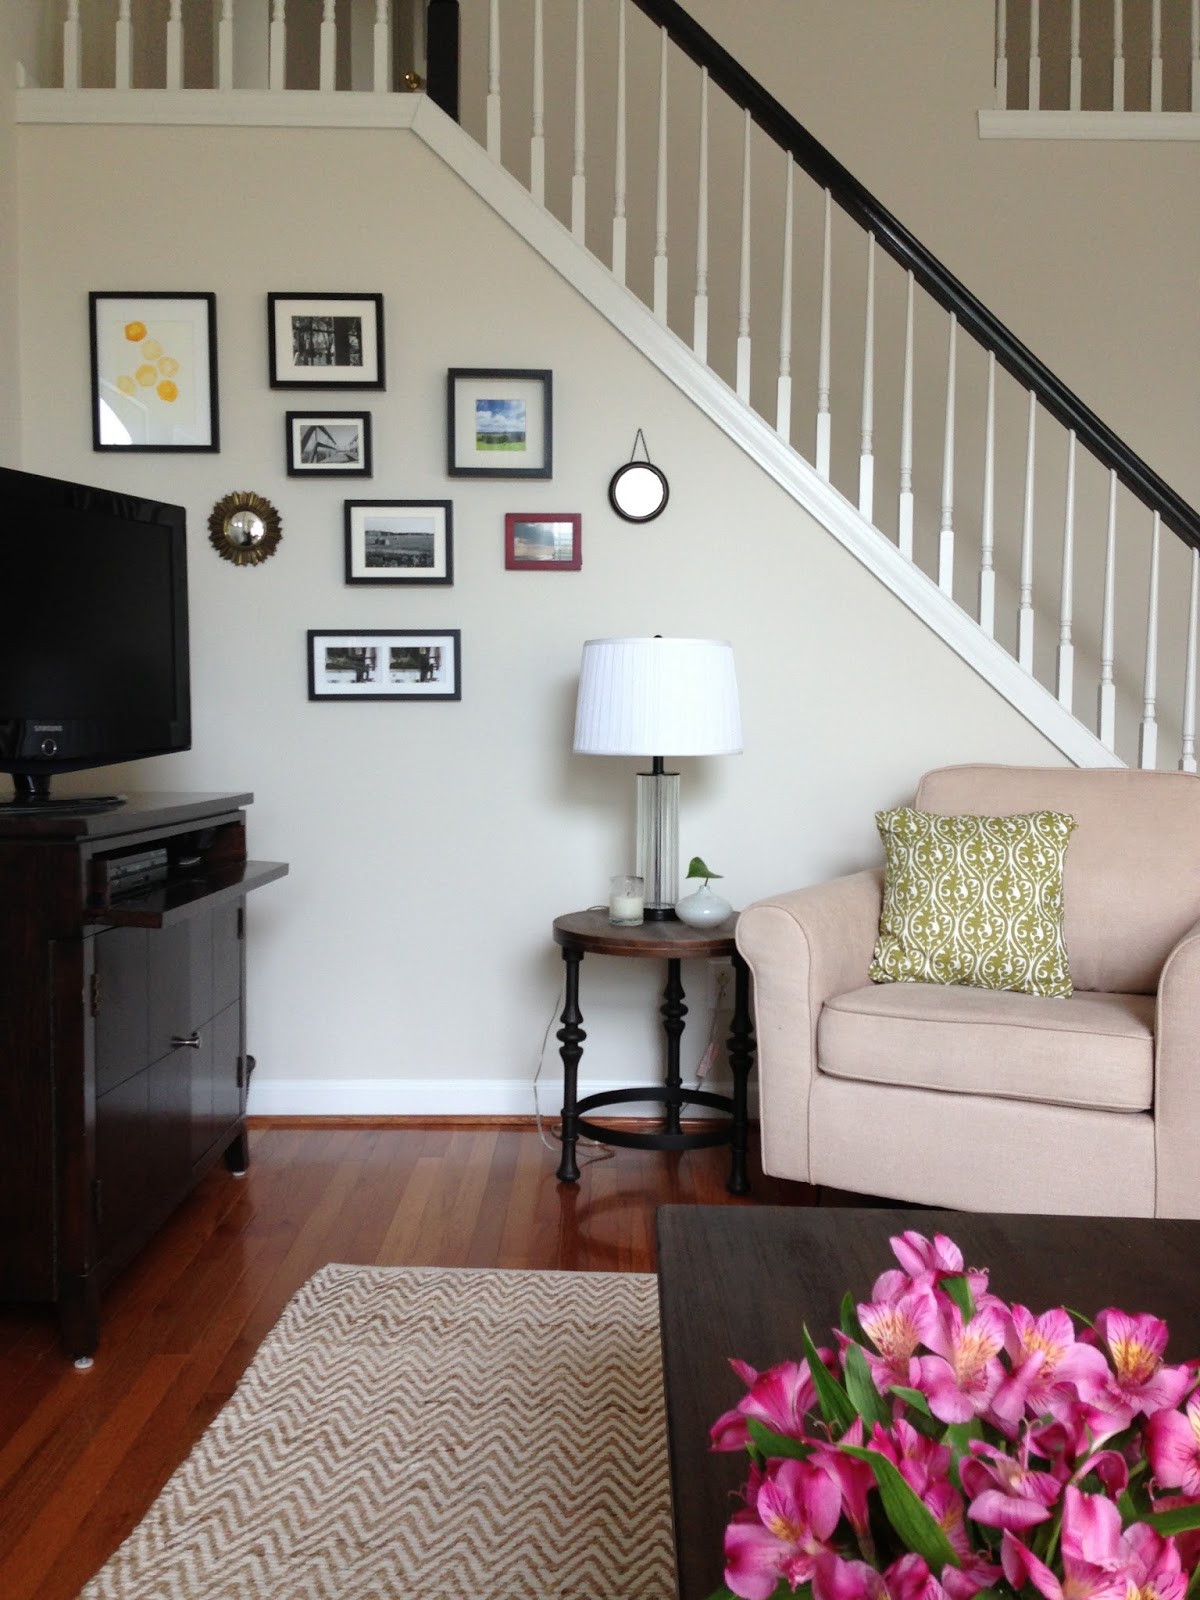
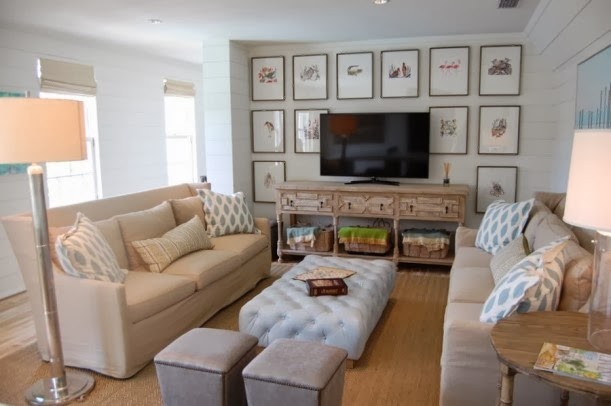
When art is hung around a television in an asymmetrical way, mismatched frames are great! For my client, this is what we’re going to try and I can’t wait to see the result! There are also times, however, when I think matching frames are necessary. For this client, for example, we are also working with matching frames in another collection in the space. 
When to Match Your Frames

via
via
via
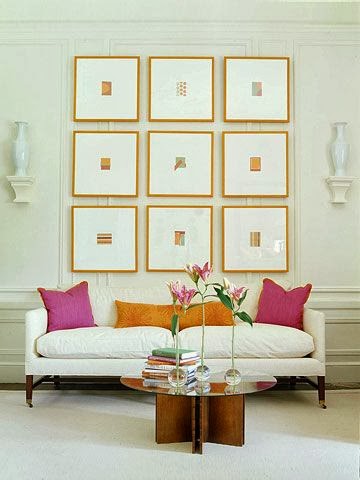
Matching frames are key when you are doing a symmetrical wall arrangement and would like a clean, simple look to your wall.  A collection of similar photos and scale, like the gallery wall directly above, gives continuity to the art.
I mentioned earlier that we will doing a mixture of matching and mismatching frame collections in my client’s living room. I also feel it’s important to blend the two in one space, as opposed to having every arrangement symmetrical or every arrangement with the same frame finish. We will be doing a symmetrical gallery wall of family photos, that will be hung in a grid like pattern. For this, we will be using the same frame to bring a neat, orderly look to the arrangement. When there is a blend of the two styles, it makes the space unique and personal! 
So that’s what is on my mind this Monday morning!
How about you… do you like to match or mismatch your frames? Are you a symmetry person or like a little asymmetry when hanging art?? Do tell!!

{E-Design Before and After} The Home’s Exterior

October 23, 2013 by Amber Filed Under: before and after, design, e-decorating, e-design


When I receive after photos from a client, I get all giddy inside! These before and afters are amazing, since the homeowners did a wonderful job putting the plan into action. This was a new one for me, since it was the first time working on the client’s exterior of the home. I was excited and ready for the challenge! Here are the before shots of their home…

Before


The clients were deciding whether or not to paint the brick. I loved the idea and showed them some options, but we also considered waiting a while and just working on new accent colors, landscaping and some accessories. My clients ended up staying with the brick as is, which worked out great! Here is the plan I came up with…

The Design Plan


With some design boards, a picture speaks louder than words. When my blog friend Jane posted about her friend’s house that was for sale, I knew this would be the perfect inspiration for my client’s home. The image I am referring to is on the top right corner of the design board. You should also check out the rest of the post… great before and afters!! The landscaping and welcoming feel were just right and conveyed what we were trying to achieve in this project. And here are the amazing afters…

After


They did a fabulous job! New paint and a few key accessories truly can take a space to the next level. I am so proud of them for their hard work and executing the plan so well. A special thanks to my clients for allowing me to share these photos with you!  ๐Ÿ™‚

I am happy to announce that I am featured on the Anthology House blog today, in a customer spotlight post. Amy and Alyse run the amazing etsy shop, Anthology House and they are featuring my design business today. They are my sponsors and friends and I would love for you to stop by and say hello!

Designing a Room Around Inspiring Art

October 9, 2013 by Amber Filed Under: art, design, e-decorating, e-design


When I begin with a room design, I don’t necessarily start the same way, every time. The client might already have that one special piece to build the room around. Maybe I become inspired by fabric and design the room around that. When one of my recent clients came to me to help design her teen daughter’s room, I found some great art pieces that helped pull the room together. After that, the rest was history! Here are the inspiring art pieces that helped make this room complete…

via
via
via
Can these art pieces be more beautiful and whimsical?? I am in awe of each of these artist’s talents! Not only are the prints lovely, they each hold special meaning in some way, to the client. They also pull the room’s color palette together and help to bring the client a stylish place to create. I am feeling inspired and hope she will, too! 

{The First Layer} A Client E – Design Project

September 3, 2013 by Amber Filed Under: design, e-decorating, e-design, personal design style


Over the summer, I worked with a client to develop her great room into something better suited for her and her family. They love their home and so do I, but it needed to be lighter and brighter with some modern touches. Most of their interior, including the ceiling, walls and floors are wood. We needed to add some contrast and take away some of that wood overload, so that you can truly appreciate the home and its beauty. Let’s take a look at the plan…

The Plan 

This client wanted to just start with the first layer… before we even get into the furniture and accessories, she wanted to lay the initial groundwork and choose the wall color, ceiling color, floor stain, drapery panels and wood stove. They have the space for a wood burning stove, which I thought was so much fun! I got to work, selecting a more modern stove, darker stain for the floors and a lighter color palette for the walls. This board ended up looking more like some of the inspiration boards I do for clients when I want to get a feel for their style. This board helps lay the groundwork for what’s to come in the future. I chose to include interiors that spoke to their style, showed texture, layering and an overall warmth, which they were craving for their home. I proposed they paint the wood walls the top left color on the board and the window trim would be the smoky black color. The fireplace trim would be the creamy color to the right, which compliments without competing with the walls. {Just to explain, I am not against keeping some of the wood walls in their original form, throughout the rest of the home. In some spaces, I am all for staining the wood walls a darker color and working with what you have. But for this particular area, we were looking to lighten the walls. In future rooms, I can picture bedrooms or the entry way with dark stained wood walls. It would be very rustic chic!} I suggested they choose a gray toned brick around the wood stove and lay that out in a herringbone pattern. It would be a chic, subtle way to add texture. The stove surround would be a black stone and would anchor that side of the room. Owning and caring for dogs is their passion, so the brass bookends on the top right of the board gives a glimpse into future accessory pieces. The gorgeous interior on the center right side of the board was designed by Lauren and gives a great example for how we can add layering and texture to their home. I was so excited that my client loved the design! It actually made my week when she wrote and said…

The part that is so special, so validating, so meaningful, really has turned out to be your ability to see the heart & guts of our home.  — you and I are a terrific match. I was absolutely elated to go through the pictures and read your advice.

Wow, that’s really what it’s all about! I truly love what I do and when I have the opportunity to work with such special people, it makes it all worth while. I can’t wait to see how this space comes together. ๐Ÿ™‚

To help create a space together that you love, click HERE to get started!


{E-Design} We’re Going Outside!

July 3, 2013 by Amber Filed Under: design, e-decorating, e-design, outdoor


A little while back, one of my former clients reached out to me again, asking if I could help her with the exterior of her home. This is my first time working with a client on an outdoor space, so I was up for the challenge. The timing is actually funny, since I just helped a neighbor choose exterior paint colors for her siding. So when my client e-mailed, I thought… did you just talk to my neighbor??? ๐Ÿ™‚ Paint colors show up differently outside, since there is the sunshine and outdoor elements to consider. Darker colors show up a bit lighter outside. But when you work with amazing colors that are tried and true and always work, how can you go wrong?? Here is Option 1…

The Plan Option 1 ………………………………………….

{Click on board to make larger}
My client has a brick ranch and she is considering painting the brick. The above board shows the options for painting the brick. I suggested the brick be painted the medium toned gray seen on the top left corner of the board. The shutters would be the deep gray/black, the trim would be the pale gray/white and the door the sea foam blue color. A palette of grays with a pale blue is a bit unexpected and fun. Here is Option 2, where they don’t paint the brick…
The Plan Option 2 …………………………………………
{Click on board to make larger}
This option basically stays the same, but the front door color changes. The teal blue/green seen on the top left of the board would be the choice. It would work really well against the red brick they have, bringing that pop of color. When I suggested landscaping, I found this amazing house from my blog friend Jane (seen on the top right of the option 2 board.) Her friend is selling his house and the front yard landscaping is wonderful inspirartion for my client.
I can’t wait to see if my client decides to paint the brick or not! What would you do???

Creating a Floor Plan With Flow

June 12, 2013 by Amber Filed Under: design, e-decorating, e-design, floor plan


In a recent post, I revealed a before and after of my client’s living room. It is a very large space and my client had the sofa and media stand already, but needed the rest of the furniture to pull the room together. Since her existing sofa is quite long (93 inches long, to be exact), we needed to make it work while also creating flow and making the space functional for everyday use. In design, I truly believe form follows function and you need the space to first work for you and your family. Once a workable layout is established and scale is evenly proportioned, it is then that we can add the pretty design aspects. In a living room space where you gather with friends and family and watch television, the main seating (when possible) should face the TV. I have tried changing our family room’s layout where the TV is not parallel… and that lasted one week! After the neck cramps came from turning your head all of the time, I realized there needed to be a way to create a floor plan that was aesthetically pleasing and the most functional. So, that is what I tried to do with this client’s living room. We lucked out in this floor plan, because the best spot for the television was also on the fireplace wall. The main sofa was able to face both, allowing the fireplace to look more like the focal point. Here is the floor plan I came up with for this space…

Floor Plan 

The sofa would have fit on the window wall where you currently see the two chairs side by side, but it would have made television viewing difficult. It also would have made that side of the room heavy, with the long sofa pushed off to one side of the room. With the above floor plan, the main seating is front and center, able to enjoy the fireplace as well as the television. The accompanying chairs are sprinkled throughout the space, with a mixture of symmetry and angled seating. Another thing to consider when creating a floor plan is the space between seating. There has to be around 18 inches between arrangements to be able to comfortably move throughout the space. I also need to consider table space in proximity to the seating. Every place you sit should be able to have a nearby spot to rest your drink, book or a pretty vase of flowers. To remind you again, here are some shots of the completed room with its new floor plan…

After

So that’s a peek into what I think about when creating a workable floor plan with function and flow. (Say that five times fast!)  ๐Ÿ™‚

A Client’s Before and After {The Living Room}

June 7, 2013 by Amber Filed Under: design, e-decorating, e-design, living room, personal design style


To say that I am excited would be an understatement. One of my e-design clients, who I worked with over the winter, just sent me beautiful after photos of her space. I am so proud of her and the way she executed the design plan. Her and her husband had just moved into a new home and were looking to decorate and furnish their living room. They already had a beautiful brown sofa from Crate and Barrel and a few accessories, but needed to complete the space with additional accessories, art, more seating and tables. Here are some before pictures of the space…

Before

This space is beautiful and flooded with natural light. It has large, gorgeous windows and amazing ceiling height. The items that stayed were the new sofa, TV stand and table lamps. My client wanted a modern/traditional space with pops of subtle color. To keep the space interesting, I layered in texture, different metal finishes and modern accessories paired with traditional furnishings. Here is the design plan I came up with…

The Plan {click on design board to make larger}

And here are the afters, and the amazing way she brought this e-design plan together…

After

I love how my client has put this space together!! She did a great job implementing the design plan. They are still on the fence about replacing the ceiling fan with a large chandelier. I can understand that, since summers get very warm and function has to take priority. So, we are in the process of thinking of new sleek ceiling fan options. I will indlude another post soon, with descriptions of the layout and how she brought this amazing space to life.

Happy Weekend !!

{E-Design Progress} The Painted Desk

May 16, 2013 by Amber Filed Under: design, e-decorating, e-design, painting


In a recent post, I showed the wonderful progress my client has made in her office. She already had most of the existing furniture pieces and was looking to add some modern touches through paint and accessories. To recap, here is the design board I came up with…

 The Plan {click on image to make larger}

One of the things we wanted to do in this space was paint her desk. It was a deep espresso finish that also matched the desk chair. We wanted to lighten up the space and a great way to do that is through paint. Here is what her desk looked like before…

Before

There are various dark wood tones in this room, so by painting the desk a lighter color, it brought a new bright, airy feel to the room. I chose a creamy gray/white color. She plans to use the other colors on this swatch for rooms throughout her home, so we kept it cohesive and stuck with a color from the same color strip. We also painted the bench legs in the same light color, too! Here is an after shot of the newly painted pieces…

After

There are still some accessories to add and paintings/art to move around, but we are so excited about this amazing progress! Never underestimate the power of paint for any space! Thanks so much to my client for allowing me to share these pictures.

Have you taken out your paintbrush lately??

{E-Design} Progress Pictures

May 8, 2013 by Amber Filed Under: design, e-decorating, e-design


My clients are the best! My last post showed an office design board that was completed recently. My client has already hung the chandelier and added some of the new accessories! Here are the progress pictures…

Office Progress

This space is already beautiful to begin with, with the tall ceilings, crown molding and great existing furniture pieces. I just came in to add some modern fun, with gold accessories and hints of texture. The first picture shows the stunning new coral chandelier. I love that it draws your eye up, allowing you to fully appreciate the height of the ceiling. Her existing wall art that is currently behind the desk will move to the dresser wall and will be a gallery of art with her burlap corkboard. The middle photo shows the grand, new ginger jar! I love the large scale of this piece. We have created a pretty desk vignette with her small ginger jar and a new gold vase. This vase holds pencils well and any small office supplies she may need. The desk and bench legs will also undergo a makeover with creamy white paint in a glossy finish. I love how this space is coming together!

I have also worked with this client to add some modern elements into her dining room. She has a pretty bar cart that we decided to revamp with a deep charcoal paint. After adding a new tray, vase and fresh flowers, this side of the room is so cheerful!

Dining Room Accessorizing

She did such a great job bringing the plans together in these spaces! Thanks to my client for letting me share these amazing progress pictures.

To work together to create a space you love, click on my ‘design services’ page at the top of my blog to get started. I have some spots left open for June!

{Office E-Design} Adding Hints of Gold and Sparkle

May 6, 2013 by Amber Filed Under: design, e-decorating, e-design, personal design style


It is no doubt that the gold/brass trend is here to stay for a long time. I wrote a post a while back for Design Shuffle about this trend, and I’m happy to see that it’s still going strong. So when my e-design client wanted to update her office with some modern accents, I quickly thought about using some gold accessories! I also took into account the style in her nearby rooms, as it’s important to create flow in your home. Each room will be a bit different, but when they can all be tied together through a common theme, there is continuity and it all makes sense. Here is the accessory board I came up with…

The Design Plan {click on image to make larger}

She is very excited about the plan! I can’t wait to see it all come together.

  • « Previous Page
  • 1
  • …
  • 3
  • 4
  • 5
  • 6
  • 7
  • …
  • 10
  • Next Page »
Welcome!

Hi, I'm Amber... a wife, mom and interior decorator. I am the writer of Simple Dwellings and the designer behind Amber B Design. Blog topics are all things design, with the occasional DIY attempt! Thanks for stopping by Read more...

  • Bloglovin
  • Email
  • Instagram
  • Pinterest
  • Twitter

Blog Posts, Straight to Your Inbox

Popular Projects

A dining room with white walls and wooden table.
A black door with white curtains and a red chair
A staircase with black and white chevron pattern on the steps.

Blog Love

  • Addison’s Wonderland
  • A Thoughtful Place
  • Alison Giese Interiors
  • Amber Interiors
  • Bailey McCarthy
  • Caitlin Wilson
  • Chris Loves Julia
  • Classic Casual Home
  • Cottage and Vine
  • Design Indulgence
  • Dwell by Cheryl
  • Eddie Ross
  • Elements of Style
  • Emily A Clark
  • Emily Henderson
  • Gallery No Eight
  • Hi Sugarplum
  • House of Jade
  • Jana Bek
  • Juniper Home
  • Kate Marker Interiors
  • Lucy Williams
  • Monika Hibbs
  • Our Fifth House
  • Pencil and Paper Co
  • Rachel Parcell
  • Rambling Renovators
  • Pure Style Home
  • Sita Montgomery
  • Studio Mcgee
  • The Makerista
  • The White Buffalo Styling Co
  • the Zhush
  • Traci Zeller
  • Young House Love

Copyright Amber B Design © 2025 ยท Design by Britt Douglas