Amber B Design Studio

Interior Design & Decoration for the South Florida region

  • Home
  • About
  • Services
  • Portfolio
  • Blog
  • Press
  • Contact

How To Create a Custom Look When Hanging Drapes

January 21, 2013 by Amber Filed Under: design, DIY, personal design style


I have always loved browsing through magazines and seeing how beautiful custom drapes look and how effortlessly they hang on the rod. Love the idea, just not the cost of custom drapes. So, I tried to come up with a way to hang my drapes to give them that custom, pinch pleat look. I’m sure this is nothing new and there are probably so many other great ways out there to do this, but here’s mine…


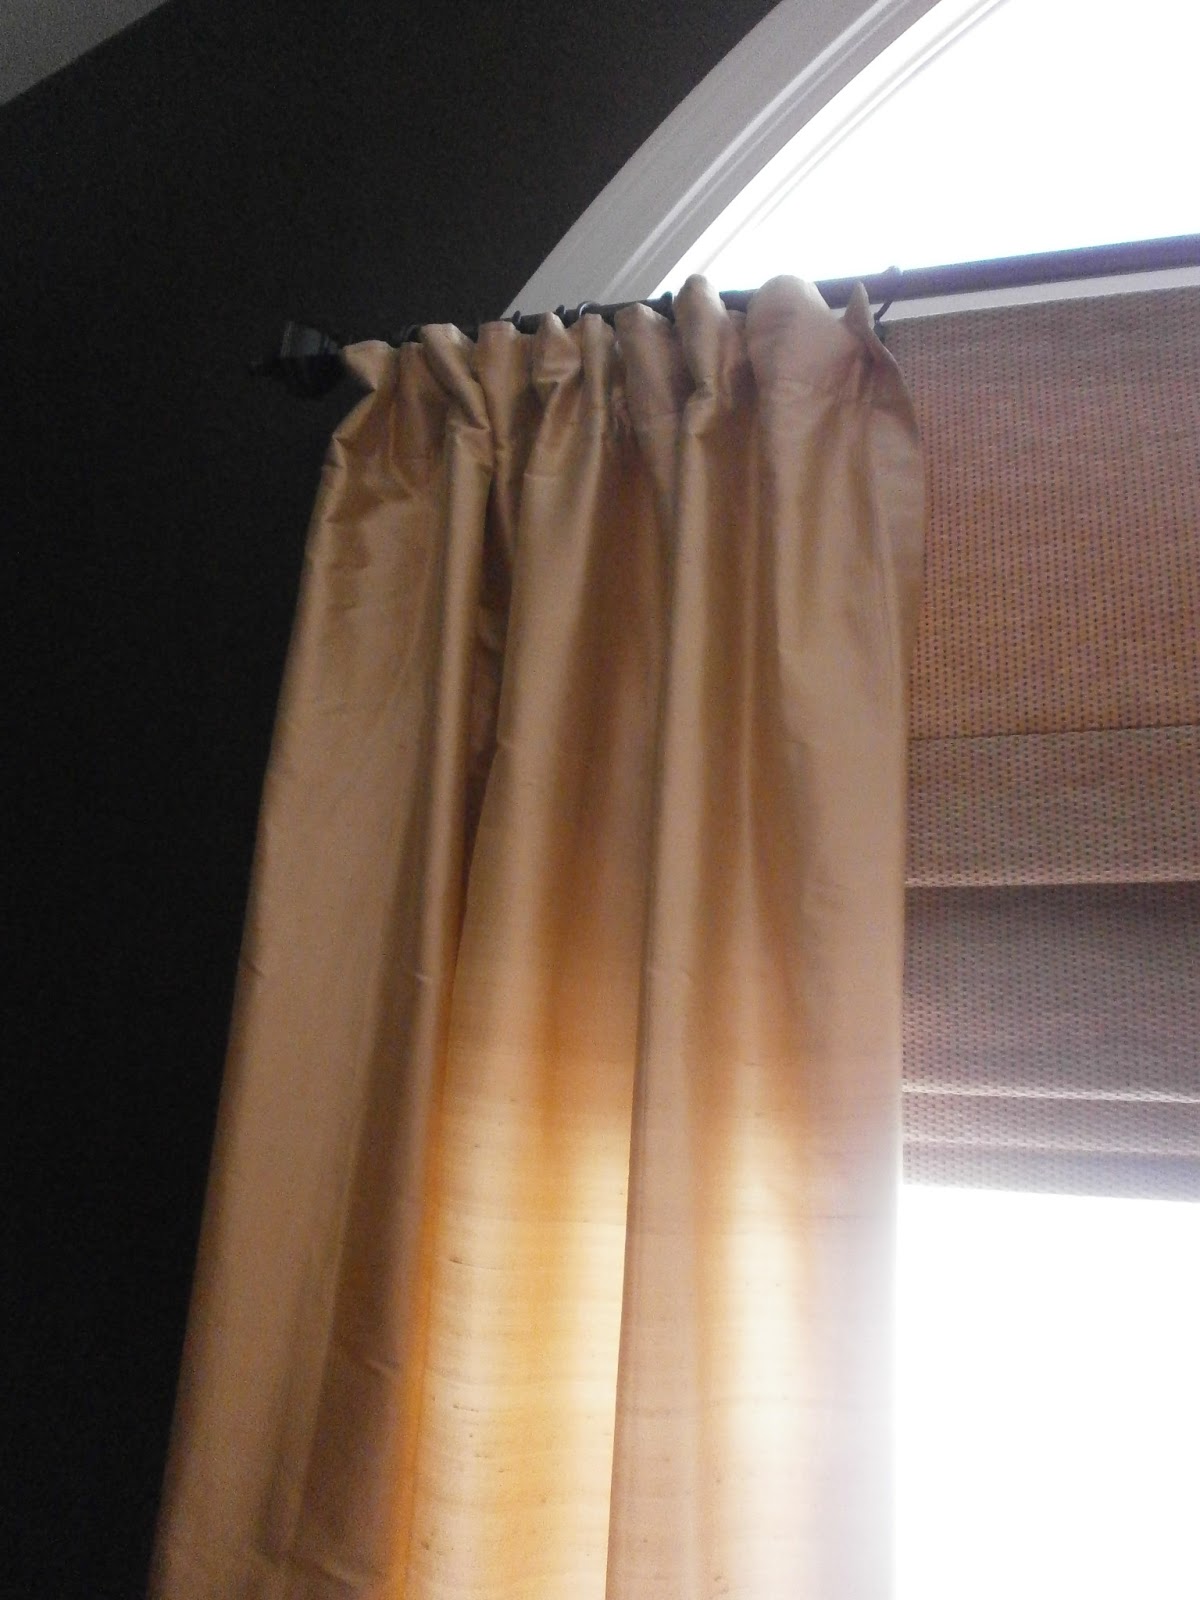
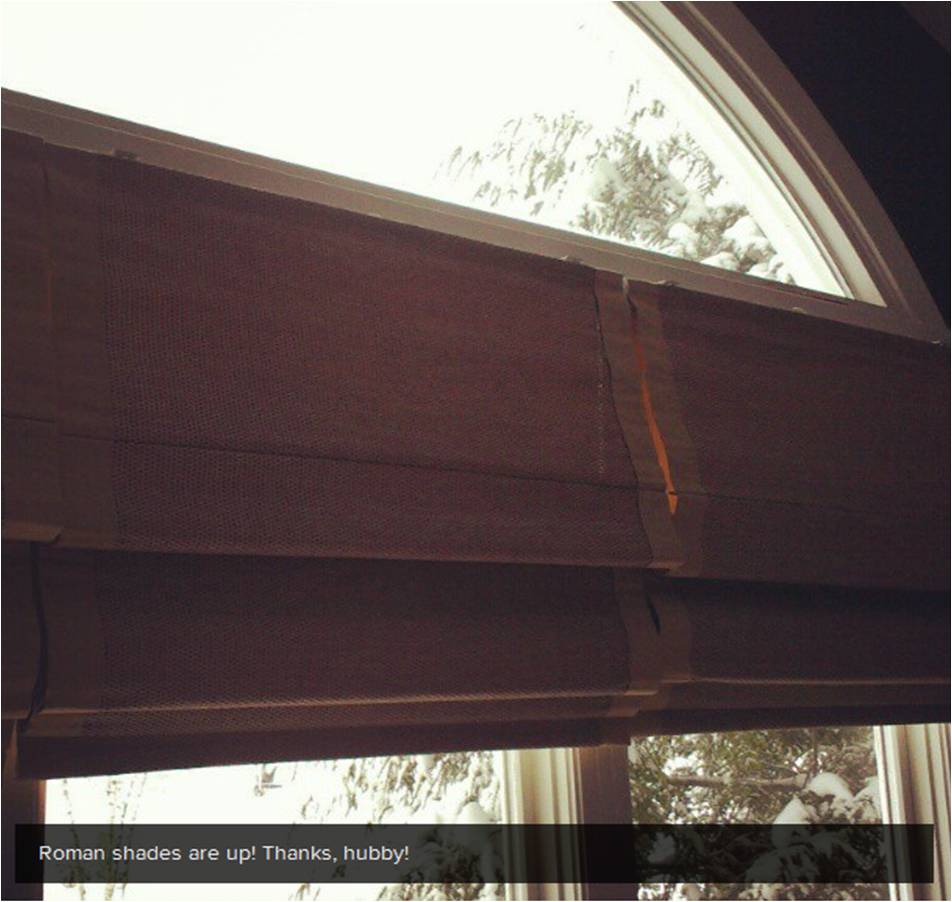
These are dupioni silk drapes bought from JC Penney about 7 years ago. I wanted to make them look more polished and they also puddle on the floor a bit, so my new trick helped in both areas. I took drapery clips and pinched the back of the fabric, while clipping in place. I clipped them in place about a half an inch down from the top, helping to bring the fabric off the floor a little. I also used 11 drapery clips for each panel. The panels are about 54″ in width and 11 works out great! The odd number allows the clips to be evenly spaced throughout, creating a more unified look. That was my mistake in the past. Take for example, my kitchen curtains…

Trying to save money, I only bought a pack of 7 rings for each panel. See the result… floppy curtains! When these kitchen panels get four more rings each, we’ll be in business! Here is my breakdown for ya…

– If your panels are 54″ wide, go for 11 curtain rings!
– 50″ wide panels, go for 9 rings!
– Stay with odd numbers!
– If your curtains are a bit too long, try this method before taking out the sewing machine!

DIY: Painting A Ceramic Tile Backsplash

January 17, 2013 by Amber Filed Under: design, painting, painting a tile backsplash, painting ceramic tile, painting grout, painting tips


Well, the project is complete! I know you might be wondering if this was worth it and if I’m glad I did it… the answer is yes!! I was so excited to modernize my tiles a bit and go for a cleaner, more updated look.  My tiles were white, which was great, but they had flowers scattered throughout the backsplash.

Before

 (This is an old picture with our previous wall color.)
And here is the tile, all painted and flowerless!
After

I can’t even remember which tiles had the flowers! Here is a breakdown of the materials needed and some helpful tips:
– Scouring pad to lightly sand the tiles and smooth out the flower design. The flower tiles were a little bumpy where the design was, so I just used a Scotch Brite green scouring pad, and it worked fine.
– Microfiber dust cloth to remove the dust from the tiles after sanding.
– Blue painter’s tape and drop cloths to protect your counters. I made sure to tape after the grout, so I could paint the grout that met the counter. That way, it’s all uniform and looks realistic.
– 2″ paint brush (Don’t go cheap with this! Choose the best!)
– Small roller brush (Choose one that doesn’t shed and has a small pile. You don’t want to get paint trapped inside a fuzzy roller, causing a messy paint job.)
– A special bonding primer that bonds to glossy, special surfaces. The clerk at the paint store said this was the best option. (I always use Benjamin Moore paints for all of my projects!) Here is a close up picture of the primer:
Once you have two coats of this primer, your paint will stick very well. It will also be long lasting. My mom said it best:  With this primer on, you’re on the same playing field as your walls. Well said! Now, my paint will be washable, scrubbable, like any wall! 
– Color Matched Paint with a sheen.
To get the exact color match, I took one of my cabinet drawers to the paint store. They can color match it exactly. As we all know and I have learned the hard way in the past, there are a million different shades of white paint! The clerk mixed my color with this paint.
Helpful Tips:
– Once your counters are protected and materials are out, start with the paint brush and prime the grout, first. Use a little paint on the brush, to make sure you don’t full in the grout lines too much. It’s better to do thin layers a couple of times, rather than one goopey layer. (Is goopey even a word? Spell check says no!) In the end, you want to make sure your backsplash still looks like tile and not fiberboard, trying to be tile.
– Wait 24 hours before applying the actual paint. This is important, because the bonding primer needs to fully dry and cure. I was so tempted to just finish in one day, since all of the materials were out. But, patience will pay off.
– When you start your painting the next day, lightly sand the tile again with the scotch brite pad. For some reason, my primer made little bubble marks on some of the tiles. I was so nervous about that! Don’t worry, the sanding will help that and now- no bubbles!
– All in all, make sure you do at least 2 coats of primer and 2 of the paint. It’s a pain in the neck and can be tedious, but then you’re done!
Wow, this is a novel! It was a lot of work, but worthwhile projects always are.  ๐Ÿ™‚
Total cost for this project… $48.00! In the future, I’m sure we’ll replace it with something different, but I will enjoy this for a long time.
So how about you… would you try it??
I am linking this project up to Savvy Southern Style:

Painting Ceramic Tile {The Primer is On!}

January 16, 2013 by Amber Filed Under: budget saver, design, painting, painting a tile backsplash, painting ceramic tile, painting grout


Well… what’s done is done! I have started my painting project in the kitchen. Now, no turning back! A while ago, I posted about re tiling our backsplash and choosing a grout color. Well, I have taken this project into my own hands and decided on something entirely different. I have never liked our flower design on some of our backsplash tiles. I like that the tile is white, but the flowers made the backsplash more dated. White subway tile would be ideal, but I’m all about working with what you’ve got in 2013! There will be more details to follow, but as a money saver, I decided to paint the tiles with a special primer/ paint that adheres to tile! Here is an update, all primed and ready for the topcoat…

Sorry that the picture is grainy. It’s a phone picture on a cloudy day. After two coats of primer, I can hardly see the flowers! Yay! I had to let the primer cure overnight, so I will be back at this in a little while. We also have white cabinets, so I brought a kitchen drawer into the paint store to get a color match. I can’t wait to show completed pictures!

Have you ever painted tile?? Would you ever be as crazy as me and try it??

Creating Contrast in Your Rooms

January 14, 2013 by Amber Filed Under: design, paint colors, painting, painting tips, personal design style


I received an e-mail recently from a reader, asking about my dining room transformations and how to choose the best color in your space. I thought it would be a great post to present on the blog and open up the discussion with all of you! My original paint color in the dining room was Bungalow Gold by Eddie Bauer. While I enjoyed the color for a while {7 years, to be exact!}, I needed a change. So, I decided to stencil one wall, after receiving a free stencil for a product review.

While the stencil was fun and something new, I still wasn’t feeling it. I realized the main reason why, was because there was not enough contrast in the room. The oak floors blended with the table, which blended with the walls. I have been meaning to make some of my spaces lighter and brighter, and I knew this was the room to start! This space did not need another warm tone… it had too many, already. What this space needed was some contrast. It needed a cooler color in the blue/gray/green family. Fast forward to my decision… and we have Halo, by Benjamin Moore. I love that it appears almost white when the sun is shining, yet provides that cool tone of gray/green that this room needed. I know I have already shown the dining room reveal here, but I thought it was also worth mentioning why this color was chosen and how to achieve contrast in your home. Here is the new paint color:

For me, adding a cooler color helped to break up all the similar tones, and I am so much happier. The paint brush can be put down, for now!

How about you, do you like more of a contrast, or similar tones throughout?

What’s New at Joss and Main

January 11, 2013 by Amber Filed Under: design, personal design style


If you haven’t shopped here before, Joss and Main has great items at amazing prices. If you see something you love, you have to act fast, because sales run out in hours and days. Here are some of my favorite items currently for sale and still in stock {last time I checked!}

 Sophie Floor Pillow
Zyanya Box Set
Elmore Storage Basket
Voyage Chest
Sussex Club Chair {Set of 2}
Fordwich Rug
Preserved Boxwood Set 
I could go on and on! I actually just purchased a new bamboo print ottoman cube before the holidays and love it! If you are not a member of this free flash site, sign up HERE! The items shown above will no longer be on sale after this weekend- some end as early as Saturday!
Happy Shopping!!
 

My Blog is 2!

January 10, 2013 by Amber Filed Under: blog birthday, blogging


The week has flown by and I almost forgot my blog birthday! This little ‘ol blog turned two on the 8th. I have loved every minute of the experience and connecting with all of you! Thank you for stopping by… whether you make Simple Dwellings a daily read, stop by for a quick chat every now and then or are a first time visitor… I thank you!! Dreams have come true, as I started Amber B Interiors through this blog and all of the amazing experiences along the way. Thanks to my clients for trusting me with their homes and allowing me to show you my design vision. Without having this post sound too much like an acceptance speech for the Oscars,  ๐Ÿ™‚ I will leave you with this pretty celebration image…

Source: thesweetestoccasion.com via Nikita on Pinterest
Have a Great Day!!

Let’s Get Organized in 2013!

January 9, 2013 by Amber Filed Under: organize, personal design style


Oh, where do I begin with this subject??? There are always so many organizational tips and ideas floating around in my head. Why haven’t they come to fruition yet? For me, I know that organizing involves taking everything out, sorting it and trying to put it all back together with style. {Sounds exhausting!} Although I don’t really set New Year’s resolutions, I know that this has to happen in the new year! So… how will this happen without a high level of stress?? A little at a time. When I focus on one project at a time, the stress melts away. First up, tackling the office with a new bulletin board of design inspirations…

Source: housebeautiful.com via Tiffany on Pinterest

Ok, now I don’t feel as bad when my desk has a lot of stuff on it.

Next up, paint the back of my hutch a fun color…

Source: emilyaclark.blogspot.com via Amber on Pinterest

I love how the accessories pop against a darker backdrop.

This year, I would love to paint a chalkboard wall on the side of my cabinet…

Source: breakfastatyurmans.tumblr.com via Maggie on Pinterest

Champagne on the grocery list? I like their style!

Organize my closet…

Source: decorpad.com via Kate on Pinterest

Has anyone tried color coding their clothes? I love the look on bookshelves, so why not?!?

Which reminds me, organize and color code our books…

Source: blogs.babble.com via Tara on Pinterest

This will take me a while, but now that it’s in writing, I will be more determined than ever to complete this list! And I promise to blog about the successes {and stresses} along the way!  ๐Ÿ™‚

2012 – A Year in Review

December 31, 2012 by Amber Filed Under: holiday


What a year it has been! At this time of year, when you are in between holidays and wondering when to take the Christmas decorations down, you {or at least I} tend to reflect on the happenings of the year and how to improve the next. I think the best way to move forward is by remembering where you have been… each and every circumstance and occurrence molds you and shapes who you are. For me, I want to focus on the accomplishments and successes, so to be able to start 2013 on the right track.

Source: Uploaded by user via Amber on Pinterest

A while back, I wasn’t quite sure where to take this blog. I knew I wanted to be involved in design in some way. There were times I thought I was wasting my time with my dreams, or it wasn’t for me. But this quote is so true. Sometimes, dreams come more slowly than anticipated. I sometimes wish I could have a crystal ball and see into the future… but what fun would that be? This year, I’ve tried to take risks with my business and put myself out there more. If you don’t try, you will always wonder what if?? I am so happy I did that and thankful to my supportive family for believeing in me! Also, a huge thank you to my clients, who have trusted me with their homes and supported my design vision for their space! It’s amazing how these clients have become like friends. I have been so lucky to have found amazing people to work with. I am not sure what 2013 will have in store, but I’m along for the ride!

To switch gears a bit, I did have fun with some projects this year! {Don’t you just love when ‘to do’ lists are completed?!?} Here’a bit of a review…

Repainted our dining room
Painted our interior door black
Added coastal charm with floating frames
Joined instagram and have been loving the photo editing!
I won’t make a resolution list and vow to eat better, work out more and read more books, because it’s not going to happen!  ๐Ÿ™‚ What I will do, is try to take risks, relax a bit more and enjoy the ride.
Happy New Year and Thanks for Reading!!

Happenings on Instagram

December 30, 2012 by Amber Filed Under: Uncategorized


I am now on Instagram! It has definitely become a fun new addiction. Follow along at AmberBInteriors. Here are some recent design ideas and happenings around the house…

{The silk drapes are now also up! I show that on instagram!}
As many of you savvy bloggers already know, instagram is such a fun way to share what you’re up to. I love the different special effects you can do with the pictures. I will mostly use instagram to show design updates from clients as well as my own home. If you’re on instagram, leave a comment with your page and I’ll follow along! Follow me at AmberBInteriors. You can also go to my sidebar on the right and visit my page there.
See you there!

Product Review – New Glasses from Firmoo!

December 30, 2012 by Amber Filed Under: Uncategorized


Over the past year, I have noticed my eye sight getting worse. Every time I couldn’t see things as clearly as before, I kept reminding myself that it was time for an eye exam and new glasses. It must have been my lucky day, because the amazing eyeglass company, Firmoo, e-mailed and asked if I would like to review their product and receive new prescription glasses. I jumped at the chance! I was so happy to find about this company, because I was ready to pay at least $150 on new glasses! I went and had a quick eye exam at the eye doctor and then went to the Firmoo site to browse my options! I was so excited to find so many different frames to choose from. I knew I wanted new black framed glasses and there was a huge selection! This is what I ended up selecting…

{This is me trying to be cool and serious – not working so well!}  :)

The type of frame I chose can be found HERE. I was a little nervous that I wasn’t able to try them on in person, but Firmoo offers the next best thing. Not only can you see multiple images of your chosen frame on models, you can also upload your own photo to virtually try them on! I was also worried that I didn’t fill out my prescription correctly and they would be a blurry mess when I put on the glasses. I was so excited to try them on and see that they were a perfect match. I loved the style, the fit and how crisp everything looked. I could see again!  ๐Ÿ™‚ Firmoo offers prescription and non prescription glasses and sunglasses. Since I wanted mine with a prescription, I just needed to fill out the necessary information that was already given to me when I had my eye exam.

The glasses came quickly and well packaged. The package included a soft case, hard cover case and a smudge cloth for cleaning. It also included the tools to tighten any loose areas of the glasses, when needed. I was so happy with my decision and I would highly recommend using Firmoo for any eye wear!

Now comes the fun part for you…

How do you take advantage of this great deal??

Firmoo offers a First Pair Free program! The only payment will be the shipping! And if you are not happy with the glasses, you can receive a refund/exchange. Why not give it a try?!?

Prescription glasses can be so expensive, so this site was right up my alley. I loved the trendy selections to choose from and the ease of use with the site. Now, I just have to work on my model pose!  ๐Ÿ™‚

  • « Previous Page
  • 1
  • …
  • 29
  • 30
  • 31
  • 32
  • 33
  • …
  • 69
  • Next Page »
Welcome!

Hi, I'm Amber... a wife, mom and interior decorator. I am the writer of Simple Dwellings and the designer behind Amber B Design. Blog topics are all things design, with the occasional DIY attempt! Thanks for stopping by Read more...

  • Bloglovin
  • Email
  • Instagram
  • Pinterest
  • Twitter

Blog Posts, Straight to Your Inbox

Popular Projects

A dining room with white walls and wooden table.
A black door with white curtains and a red chair
A staircase with black and white chevron pattern on the steps.

Blog Love

  • Addison’s Wonderland
  • A Thoughtful Place
  • Alison Giese Interiors
  • Amber Interiors
  • Bailey McCarthy
  • Caitlin Wilson
  • Chris Loves Julia
  • Classic Casual Home
  • Cottage and Vine
  • Design Indulgence
  • Dwell by Cheryl
  • Eddie Ross
  • Elements of Style
  • Emily A Clark
  • Emily Henderson
  • Gallery No Eight
  • Hi Sugarplum
  • House of Jade
  • Jana Bek
  • Juniper Home
  • Kate Marker Interiors
  • Lucy Williams
  • Monika Hibbs
  • Our Fifth House
  • Pencil and Paper Co
  • Rachel Parcell
  • Rambling Renovators
  • Pure Style Home
  • Sita Montgomery
  • Studio Mcgee
  • The Makerista
  • The White Buffalo Styling Co
  • the Zhush
  • Traci Zeller
  • Young House Love

Copyright Amber B Design © 2025 ยท Design by Britt Douglas