Amber B Design Studio

Interior Design & Decoration for the South Florida region

  • Home
  • About
  • Services
  • Portfolio
  • Blog
  • Press
  • Contact

{DIY} Backing Shelves With Wrapping Paper

March 25, 2013 by Amber Filed Under: design, DIY, shelf styling, style Leave a Comment

In my last post, I mentioned that I was looking for a floral paper to use for the back of my secretary shelves. After reading Emily’s suggestion to try a bright floral, I knew this would be a great option for the room. The wood is a very dark mahogany which I love, but the accessories were getting lost in the space.

Before the Paper

I didn’t want to choose anything permanent, because I didn’t want to ruin the wood finish on the antique piece. How can I make this paper removeable without compromising the wood underneath? Blog friend Pam suggested using double stick removeable poster tape. I went to Jo Ann fabrics, and did just that! While I was out, I thought I might browse through their fabrics to see if I could find something to line the back of the shelves with. I did find some great fabrics, but didn’t want to spend $20-$40 on something that I might want to switch out later. {By the way, did you know that Jo Ann Fabrics now sells an HGTV line of fabrics? They are pricey, but beautiful! I think I’ll wait for a great sale!} So back to the drawing board. I left with the tape and decided to go into Target, since they usually have pretty cool wrapping paper. And there it was- a beautiful vintage looking wrapping paper for $3.99! I immediately loved it and decided this was the one! And if I didn’t love it on the desk, at least it would be great for wrapping presents. Here is the paper and tape I found…

The Materials

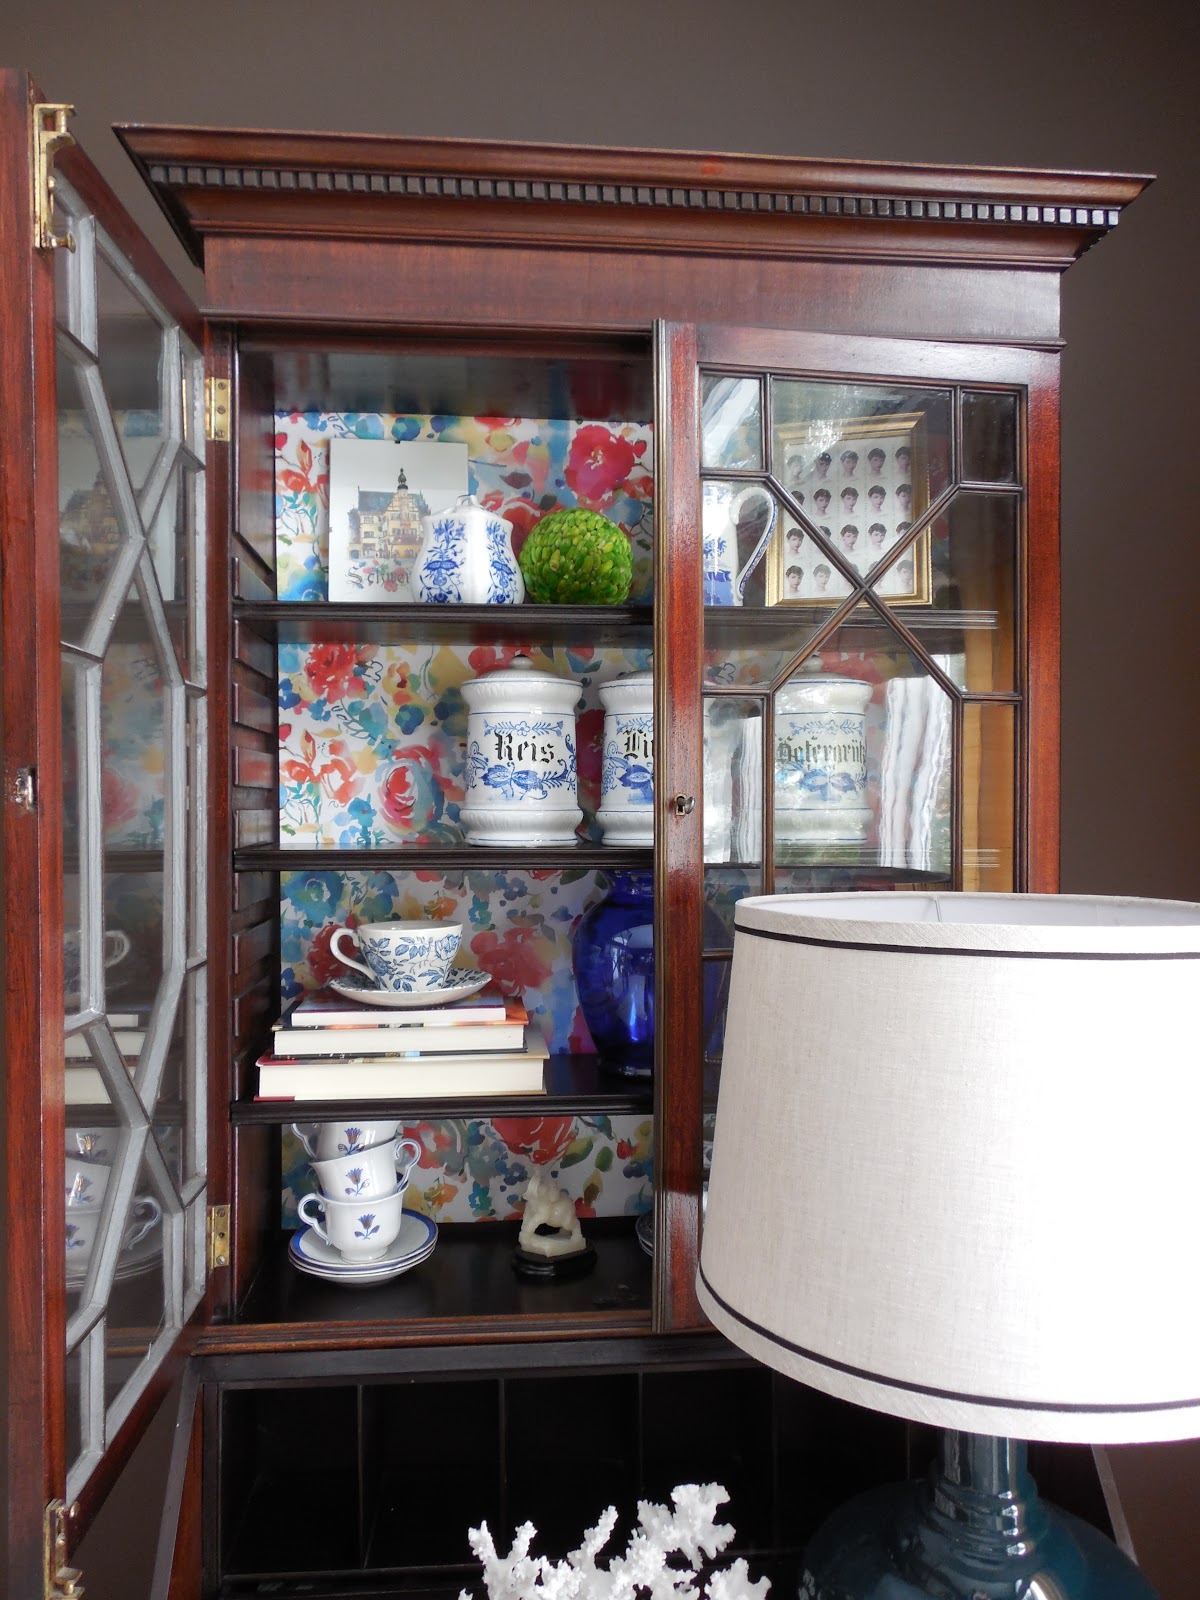
Since this paper has a white background, I knew it would brighten up the dark wood and make a difference in how the accessories stand out. Luckily, the shelves slide right out, so it was easy to place one large piece of paper on the back of the shelves. Here is the process..

Without the Shelves

I needed about a 2×3 piece of paper for this project. I cut it to size and made minor adjustments to the paper before attaching the tape to the back of the desk. I placed about 9 pieces of double stick tape to the back of the desk, making sure I got the corners and the center. When the shelves are put back into place, I knew that would also hold it well.

Attaching the Tape

Those little square pieces you see are the double stick tape. It was great to work with, because if I didn’t get the paper in the exact spot I wanted, it was easy to remove and start over. {Which happened about 3 times!} Here is the paper all ready and wating for the shelves…

Paper is Up

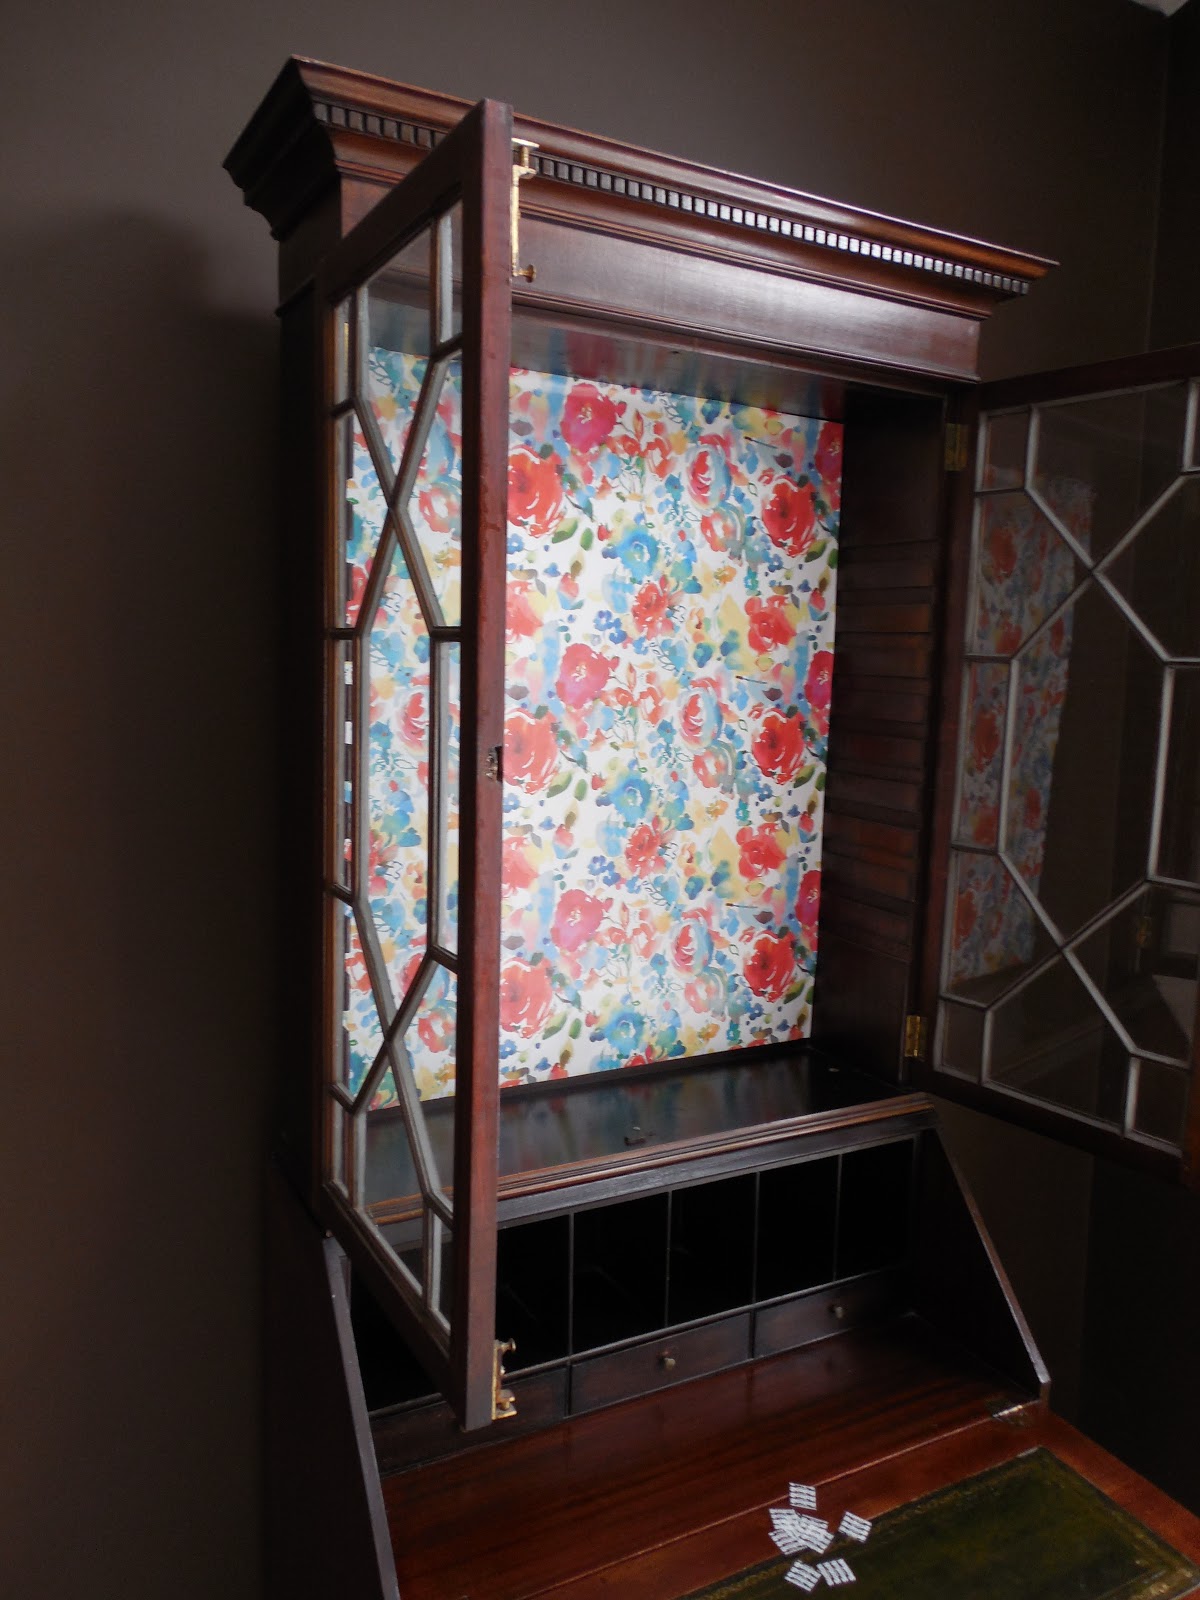
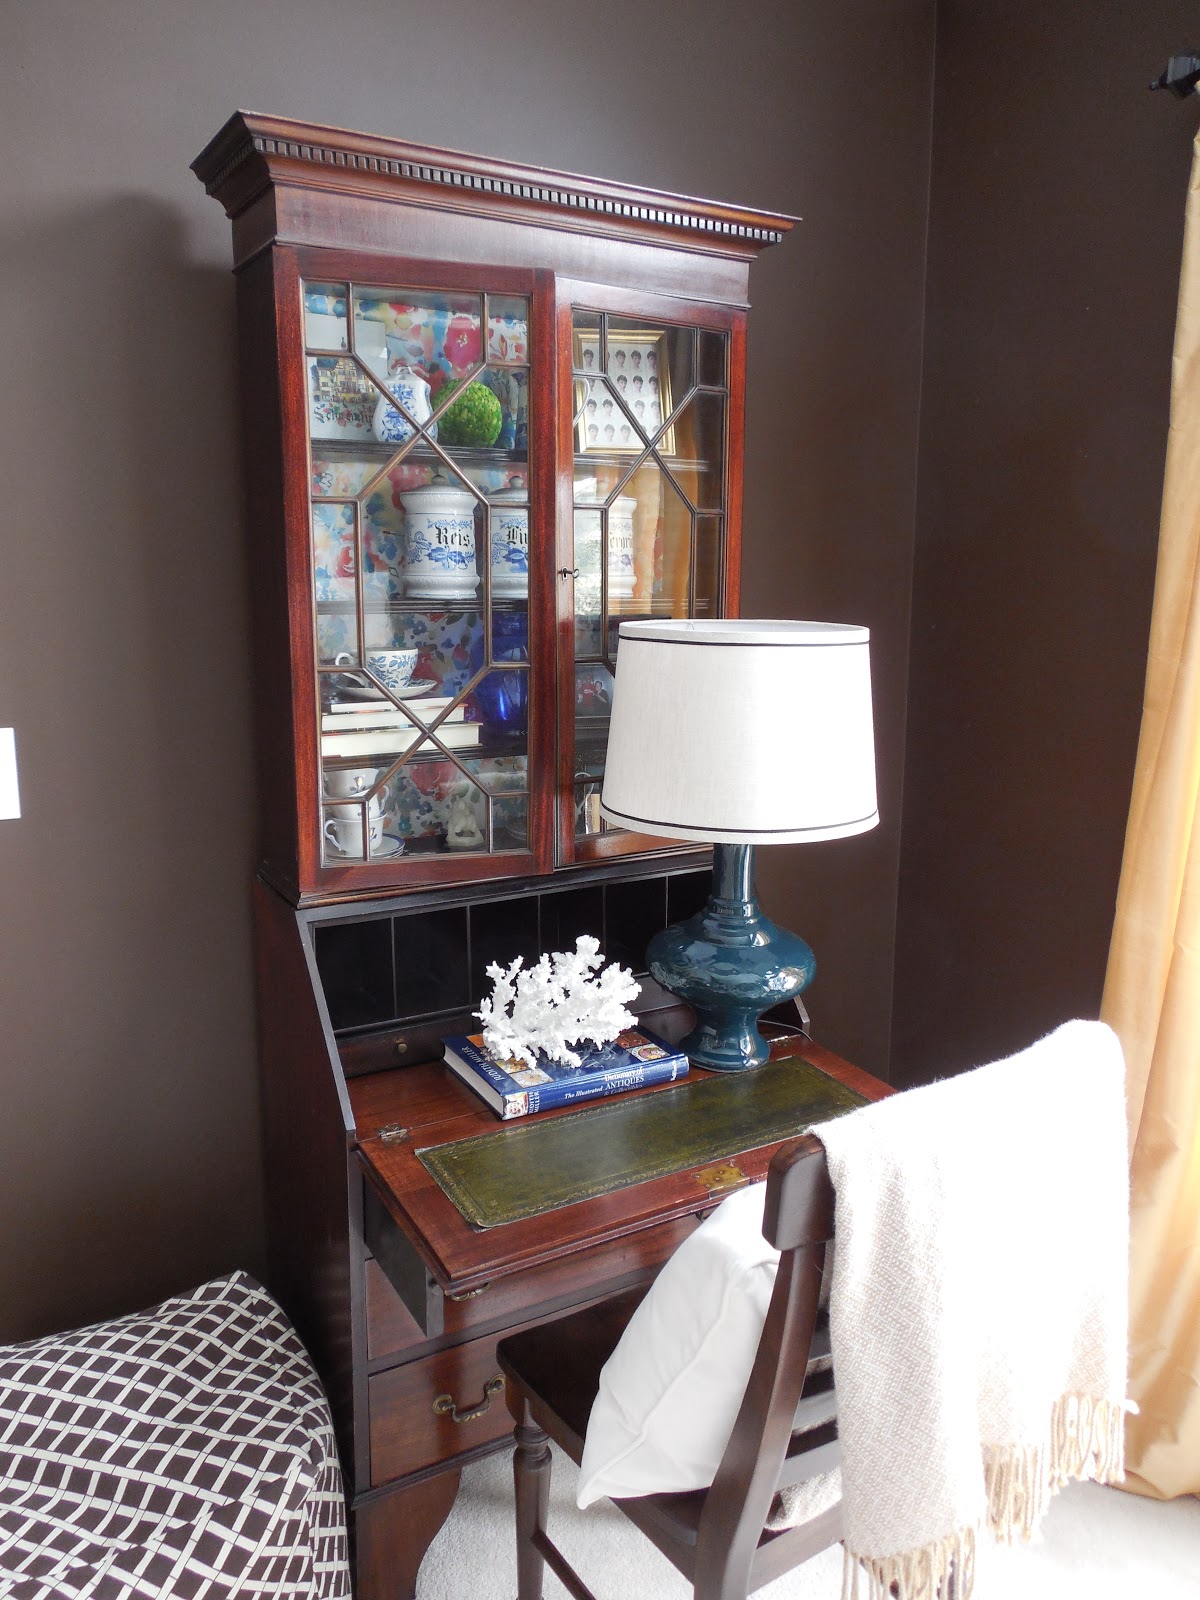
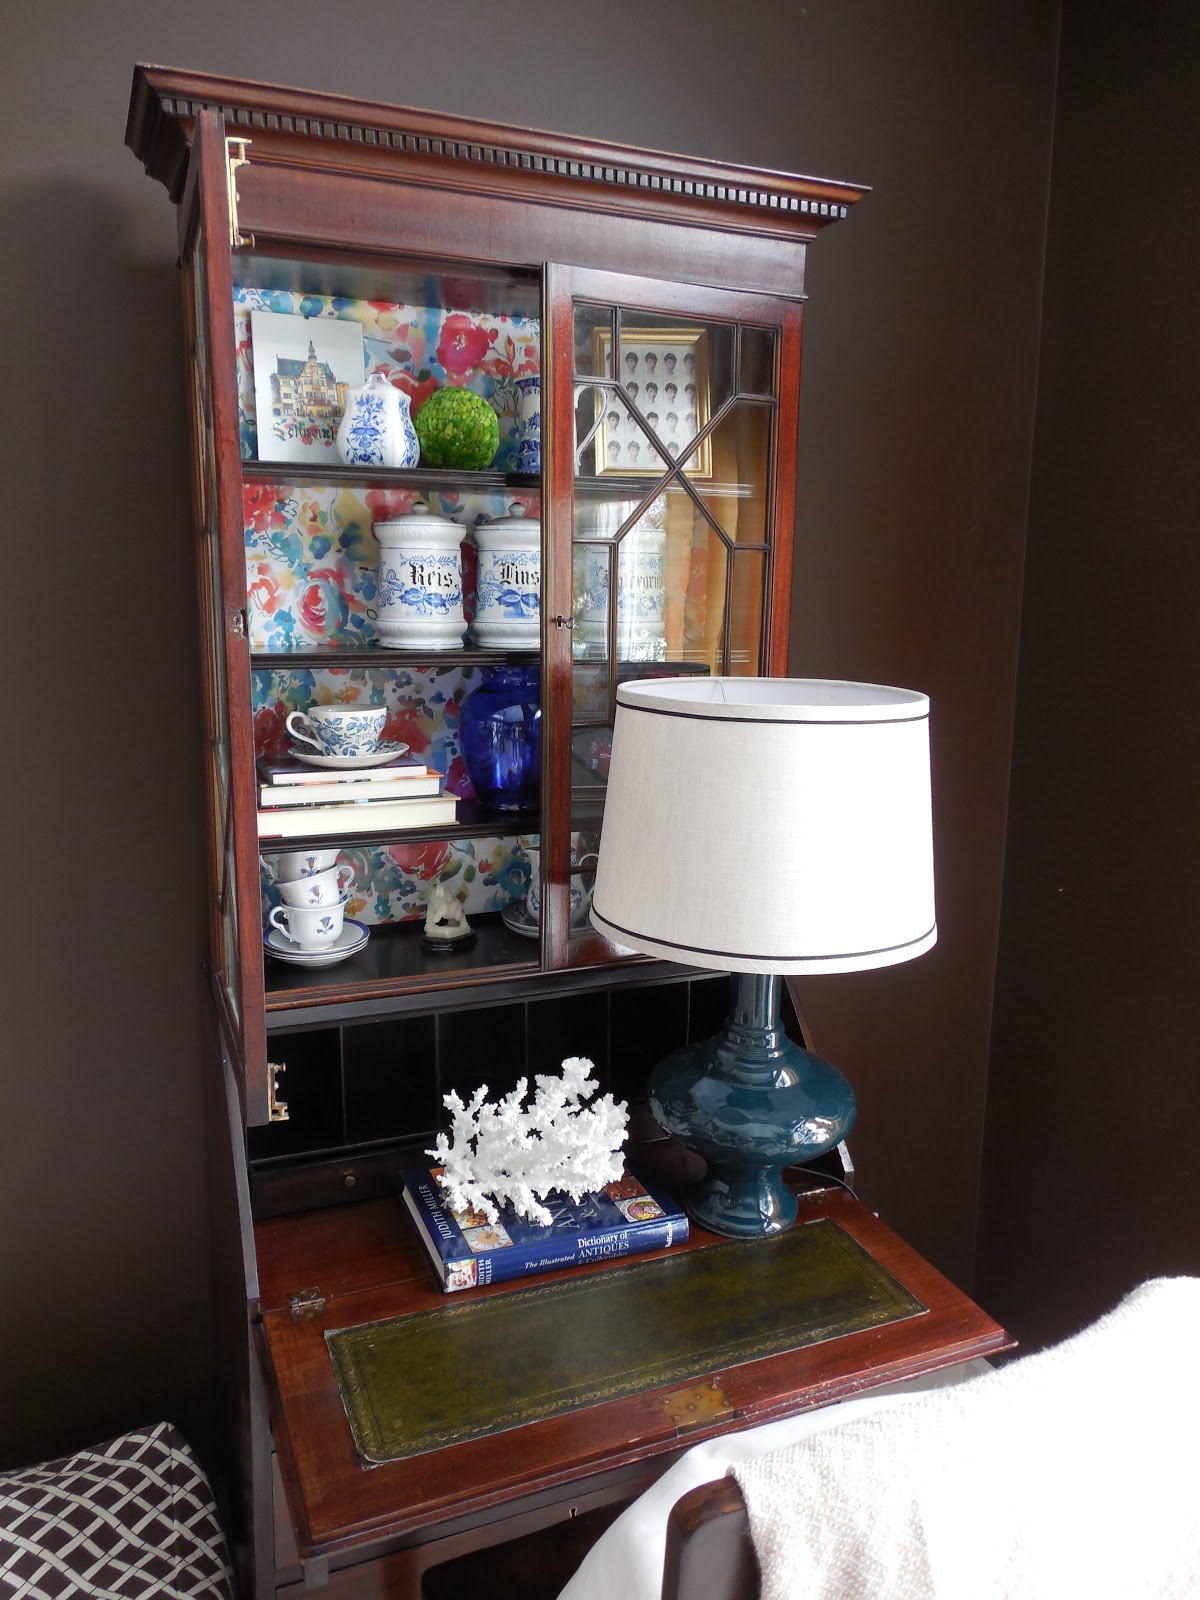
And here is the desk with the shelves installed…

Shelves Are In

And now it’s time for the accessories! I have been changing the styling since the paper went up, so I may even edit it some more. Theare are many options for shelf placement in this desk, so I can always adjust that later on. But here are the afters for now…
After


I have been having fun with this new change. What I love most, is that it’s versatile and can easily be changed when I come across a new paper or fabric that I love! All of the accessories were already in my home. I just shopped around my house and changed things up a bit. I only spent $3.99 on the wrapping paper! Just to recap, here is another before, without the paper…
Before
And After
Have you ever tried to use wrapping paper for projects that don’t include wrapping presents??
  • Tweet 0
  • Share 0
  • +1
  • Pinterest
  • Email

Comments

  1. Julia Konya says

    March 25, 2013 at 1:26 pm

    Oh looks so pretty. Love the colors!
    And yes I have used wrapping paper to line my secretary desk back but now I replaced it with shelf liner.

    Reply
  2. Emily A. Clark says

    March 25, 2013 at 1:28 pm

    It turned out so pretty! And, I love that paper with the blue lamp.

    Reply
  3. thefarmfiles says

    March 25, 2013 at 1:44 pm

    Looks great! My favorite aspect is that it can be changed anytime you want. Thanks for sharing the idea and the "how-to"!

    Hope your week is off to a nice start.

    Reply
  4. Karen@StrictlySimpleStyle says

    March 25, 2013 at 1:51 pm

    Love the floral, so unexpected-and I always love an inexpensive, temporary fix.

    Reply
  5. pam {simple details} says

    March 25, 2013 at 3:42 pm

    Such a pretty update for spring, Amber! Your styling is fabulous, too. That tape is different from what I used, I love that it's reuseable!

    Reply
  6. Kim@Chattafabulous says

    March 25, 2013 at 7:04 pm

    I just love what you did with that wrapping paper. It makes all the difference and I'm totally stealing that one when I do my dining room!

    http://www.chattafabulous.blogspot.com

    Reply
  7. Kim@Chattafabulous says

    March 25, 2013 at 7:05 pm

    Just pinned it.

    Reply
  8. McKae @ Kaes Corner Design says

    March 26, 2013 at 4:19 am

    It looks so pretty! I love the paper you chose, it makes such a huge difference!

    Reply
  9. Patty Lunz says

    March 26, 2013 at 5:17 am

    I adore your style. Thanks for all of your work on this beautiful blog.

    Reply
  10. Lynford Rozario says

    March 26, 2013 at 6:52 am

    Looks so gorgeous..:)

    Android Developer

    Reply
  11. Luci @Bungalow At Home says

    April 3, 2013 at 11:19 am

    Came over via Simple Details to check out your transformation…
    I like that you chose a floral for this piece, it just goes with it so much better than the more popular geometrics that are in right now.

    Reply
  12. modern jane says

    April 3, 2013 at 7:16 pm

    I am in love with this paper! What a great update! You've inspired me:)

    Reply
  13. Maria Akter says

    November 27, 2014 at 5:27 am

    brisbane renovations
    Brisbane Builders and Renovators Pty Ltd is owned and operated by Brisbane-based Gary Day who brings 25+ years of experience to your building project!

    We invite the opportunity to perform all builds of any level and during our lengthy building service have encountered a variety of builds from simple to more challenging and innovative projects.

    Reply

Leave a Reply Cancel reply

Your email address will not be published. Required fields are marked *

Welcome!

Hi, I'm Amber... a wife, mom and interior decorator. I am the writer of Simple Dwellings and the designer behind Amber B Design. Blog topics are all things design, with the occasional DIY attempt! Thanks for stopping by.Read more...

  • Bloglovin
  • Email
  • Facebook
  • Instagram
  • Pinterest
  • Twitter

@amberbdesign

amberbdesign

Umbrella update… after two years, this @target f Umbrella update… after two years, this @target find still looks brand new! It has been through wind, rain and lots of sunshine and still has that beautiful navy blue color. I wasn’t able to find the exact one, but my Like to Know It page has two very similar options! And if you need me, I’ll be here all weekend! #amberbdesignathome #coastalliving #poolside
Enjoying those ‘not rushing out the door, spring Enjoying those ‘not rushing out the door, spring break mornings’ #amberbdesignathome #coastalliving #sharemygrandin #yespb #myballardstyle #howyouhome #bhghome #hgtv #livingroom
A full recap of my visit to this year’s Kips Bay A full recap of my visit to this year’s Kips Bay Show House in Palm Beach is up on the blog! Link to my site in my bio. Enjoy all of this inspiration, including @katieridderinc Primary Bedroom design! #kipsbaypalmbeach #kipsbayshowhouse #coastalliving
I love every space to have at least a touch of bra I love every space to have at least a touch of brass and rattan! #amberbdesignathome #coastalliving #howyouhome #bhghome #sharemygrandin #yespb #myballardstyle
Show houses are so fun to visit to gain inspiratio Show houses are so fun to visit to gain inspiration. I could probably write a whole blog post on the fun, new ideas I have for our home over the next few years. But I also think it’s meaningful to find joy with the changes you have already made in your spaces and to reflect on how far it’s come. When I walk into our family room, I feel at home. It makes me smile and it’s one of those spaces where I don’t want to change a thing. I think it’s worthwhile to celebrate being content and feeling joy in your home just as it is! Celebrate that corner of your room that took a while to get just right. Finding joy and contentment along the way and during the process makes the end result that much sweeter! #amberbdesignathome #coastalliving #howyouhome #loveyourhabitat
I loved this guest bedroom designed by @eneiawhite I loved this guest bedroom designed by @eneiawhiteinteriors The bed’s canopy was so unique and felt like a luxurious getaway! #kipsbayshowhouse #kipsbaypalmbeach
Load More... Follow on Instagram

Blog Posts, Straight to Your Inbox

Popular Projects

Blog Love

  • Addison’s Wonderland
  • A Thoughtful Place
  • Alison Giese Interiors
  • Amber Interiors
  • Bailey McCarthy
  • Caitlin Wilson
  • Chris Loves Julia
  • Classic Casual Home
  • Cottage and Vine
  • Design Indulgence
  • Dwell by Cheryl
  • Eddie Ross
  • Elements of Style
  • Emily A Clark
  • Emily Henderson
  • Gallery No Eight
  • Hi Sugarplum
  • House of Jade
  • Jana Bek
  • Juniper Home
  • Kate Marker Interiors
  • Lucy Williams
  • Monika Hibbs
  • Our Fifth House
  • Pencil and Paper Co
  • Rachel Parcell
  • Rambling Renovators
  • Pure Style Home
  • Sita Montgomery
  • Studio Mcgee
  • The Makerista
  • The White Buffalo Styling Co
  • the Zhush
  • Traci Zeller
  • Young House Love

Copyright Amber B Design© 2023 · Design by Britt Douglas