Amber B Design Studio

Interior Design & Decoration for the South Florida region

  • Home
  • About
  • Services
  • Portfolio
  • Blog
  • Press
  • Contact

{DIY} Adding Pom Pom Fringe

April 2, 2013 by Amber Filed Under: DIY, Featured, foyer, personal design style, project


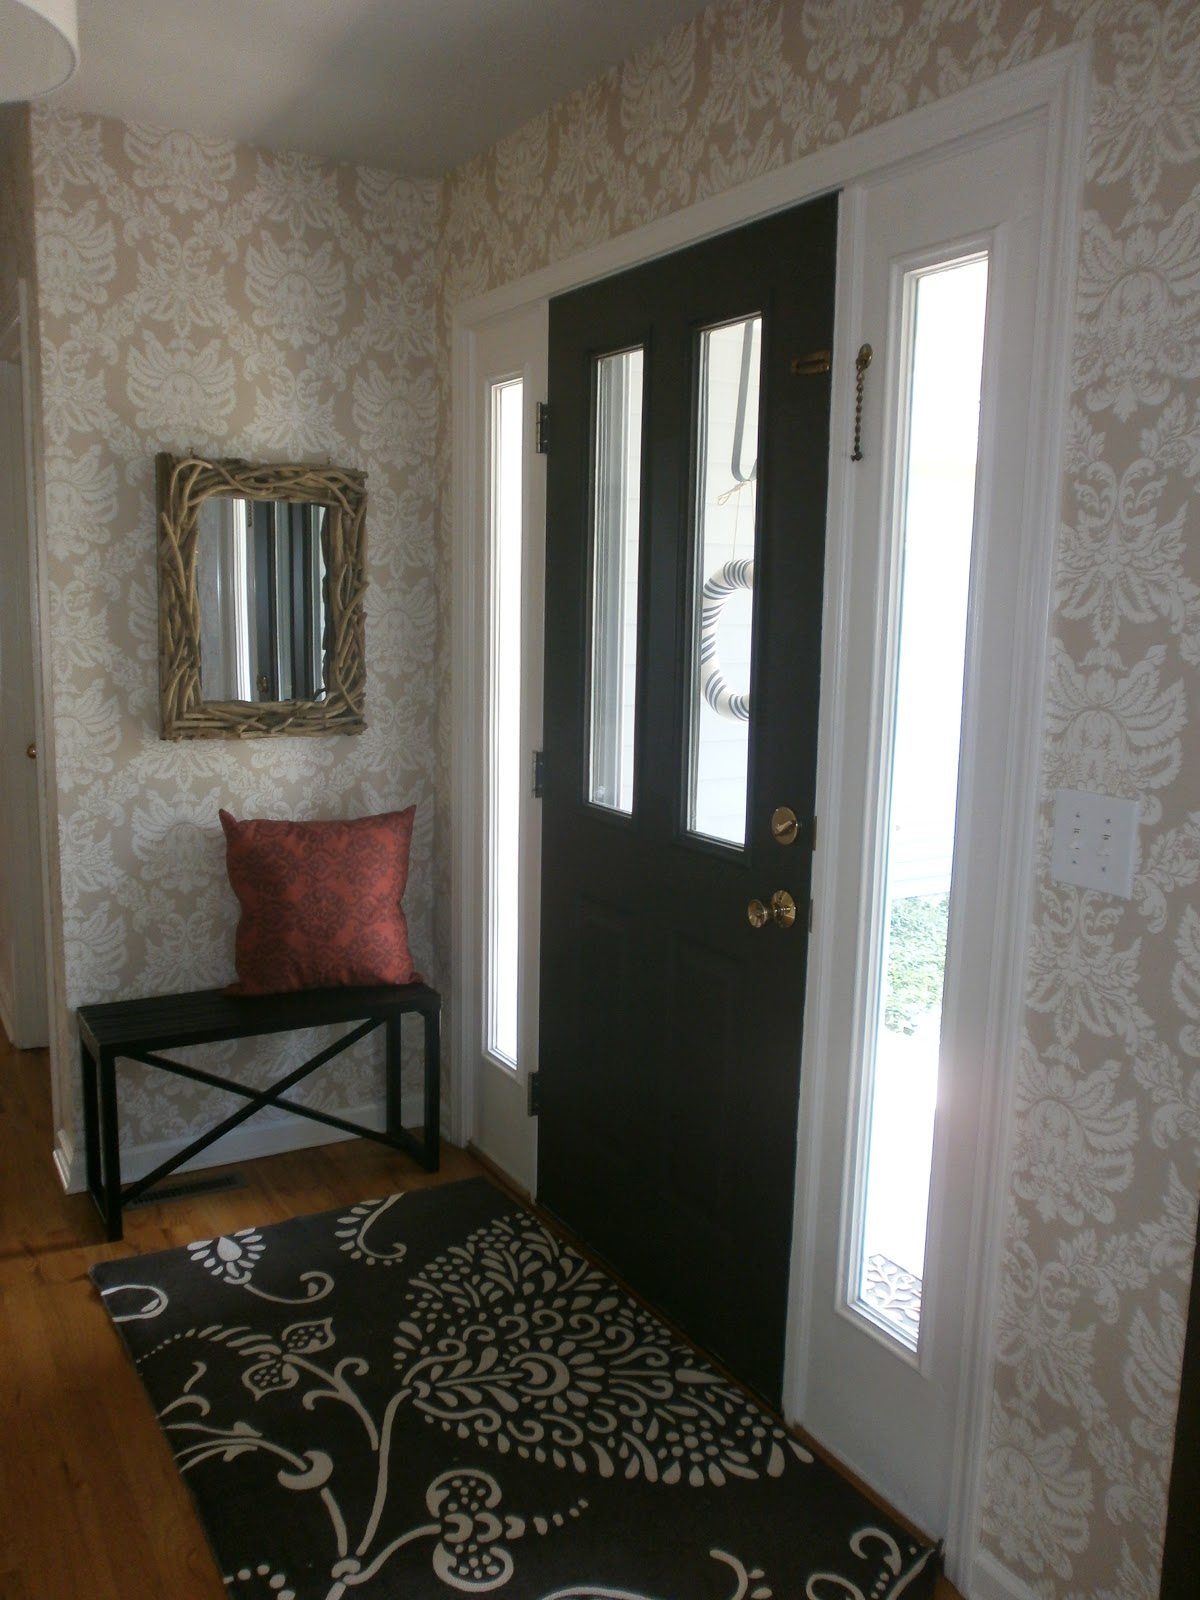
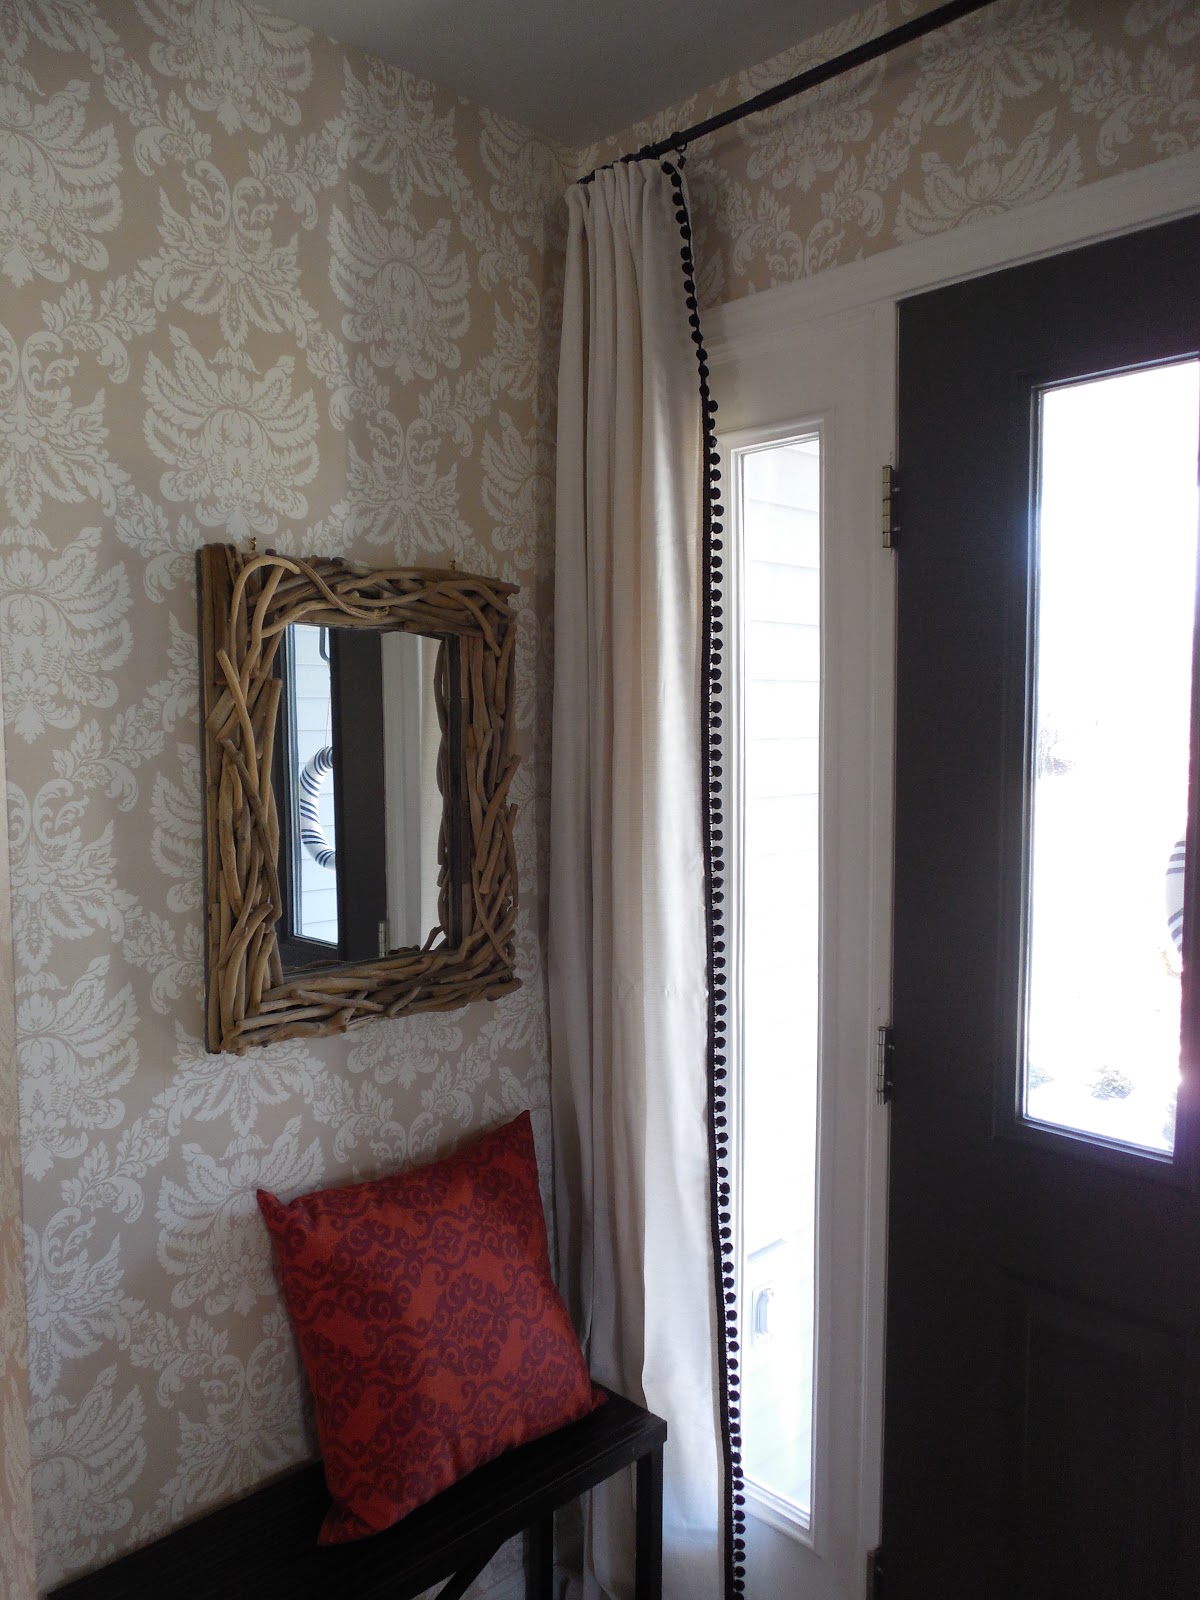
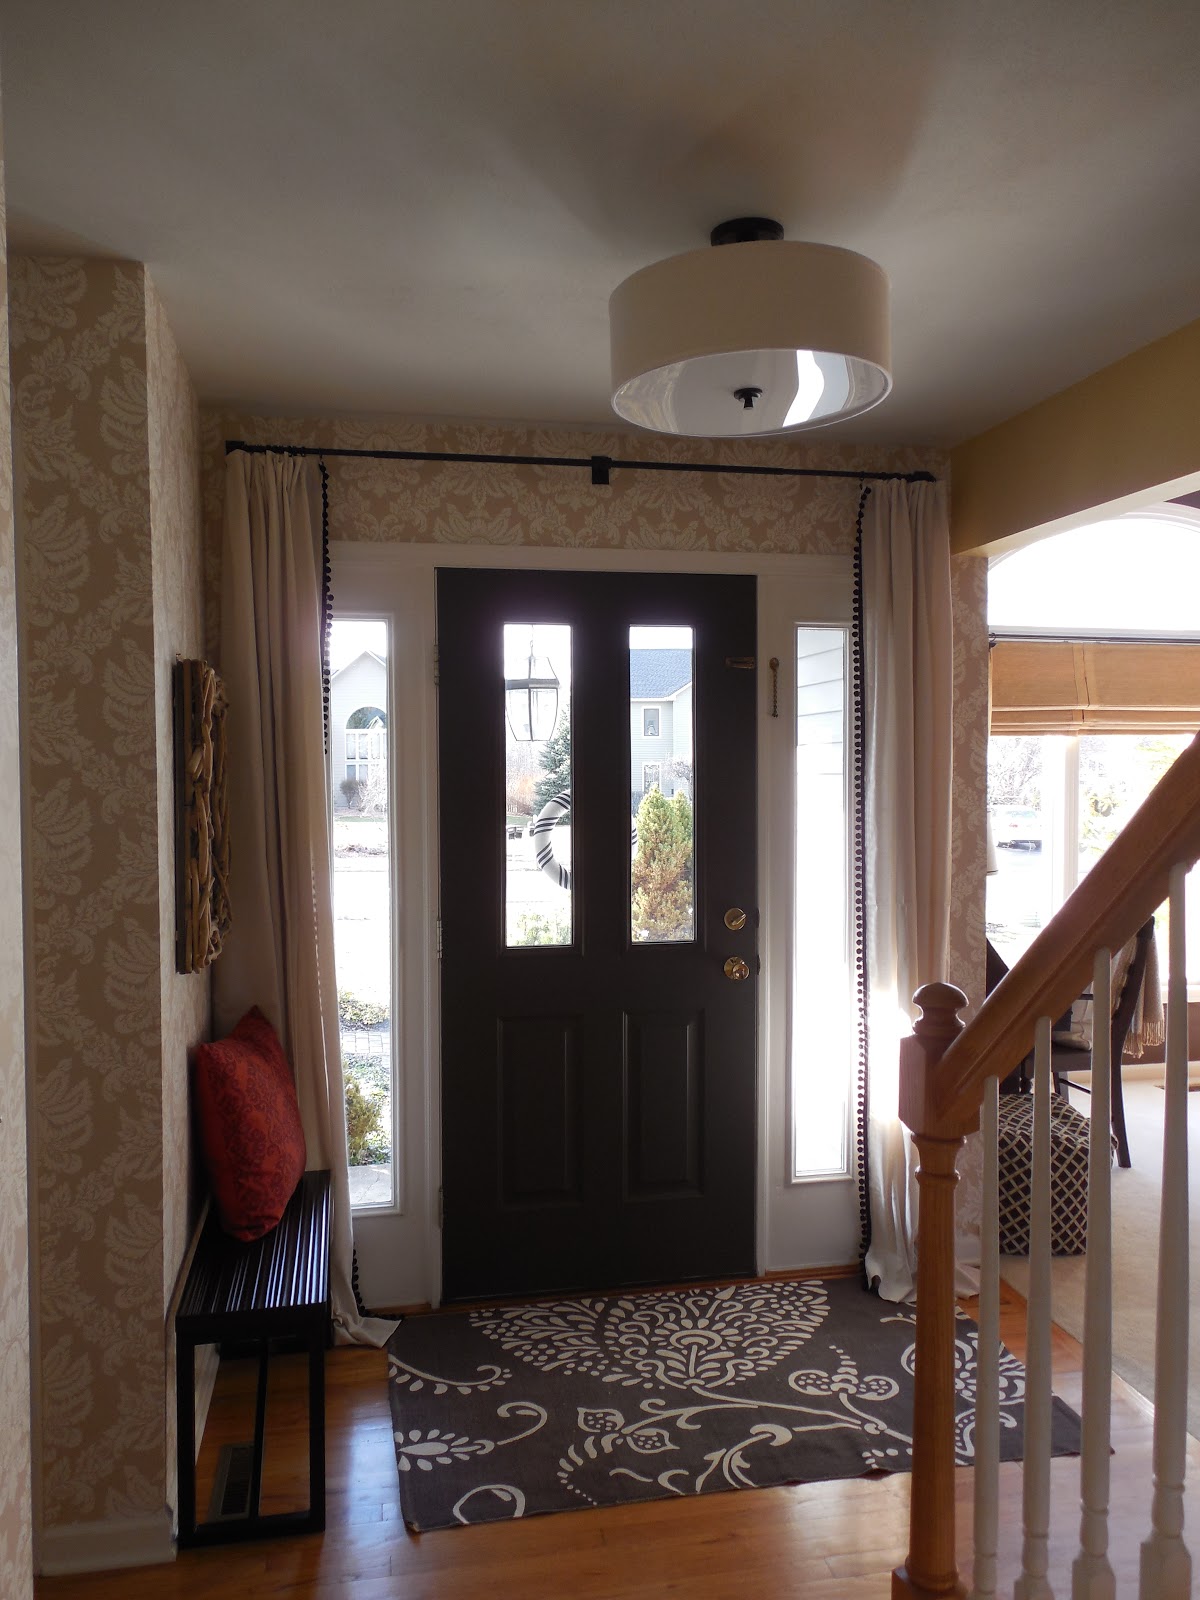
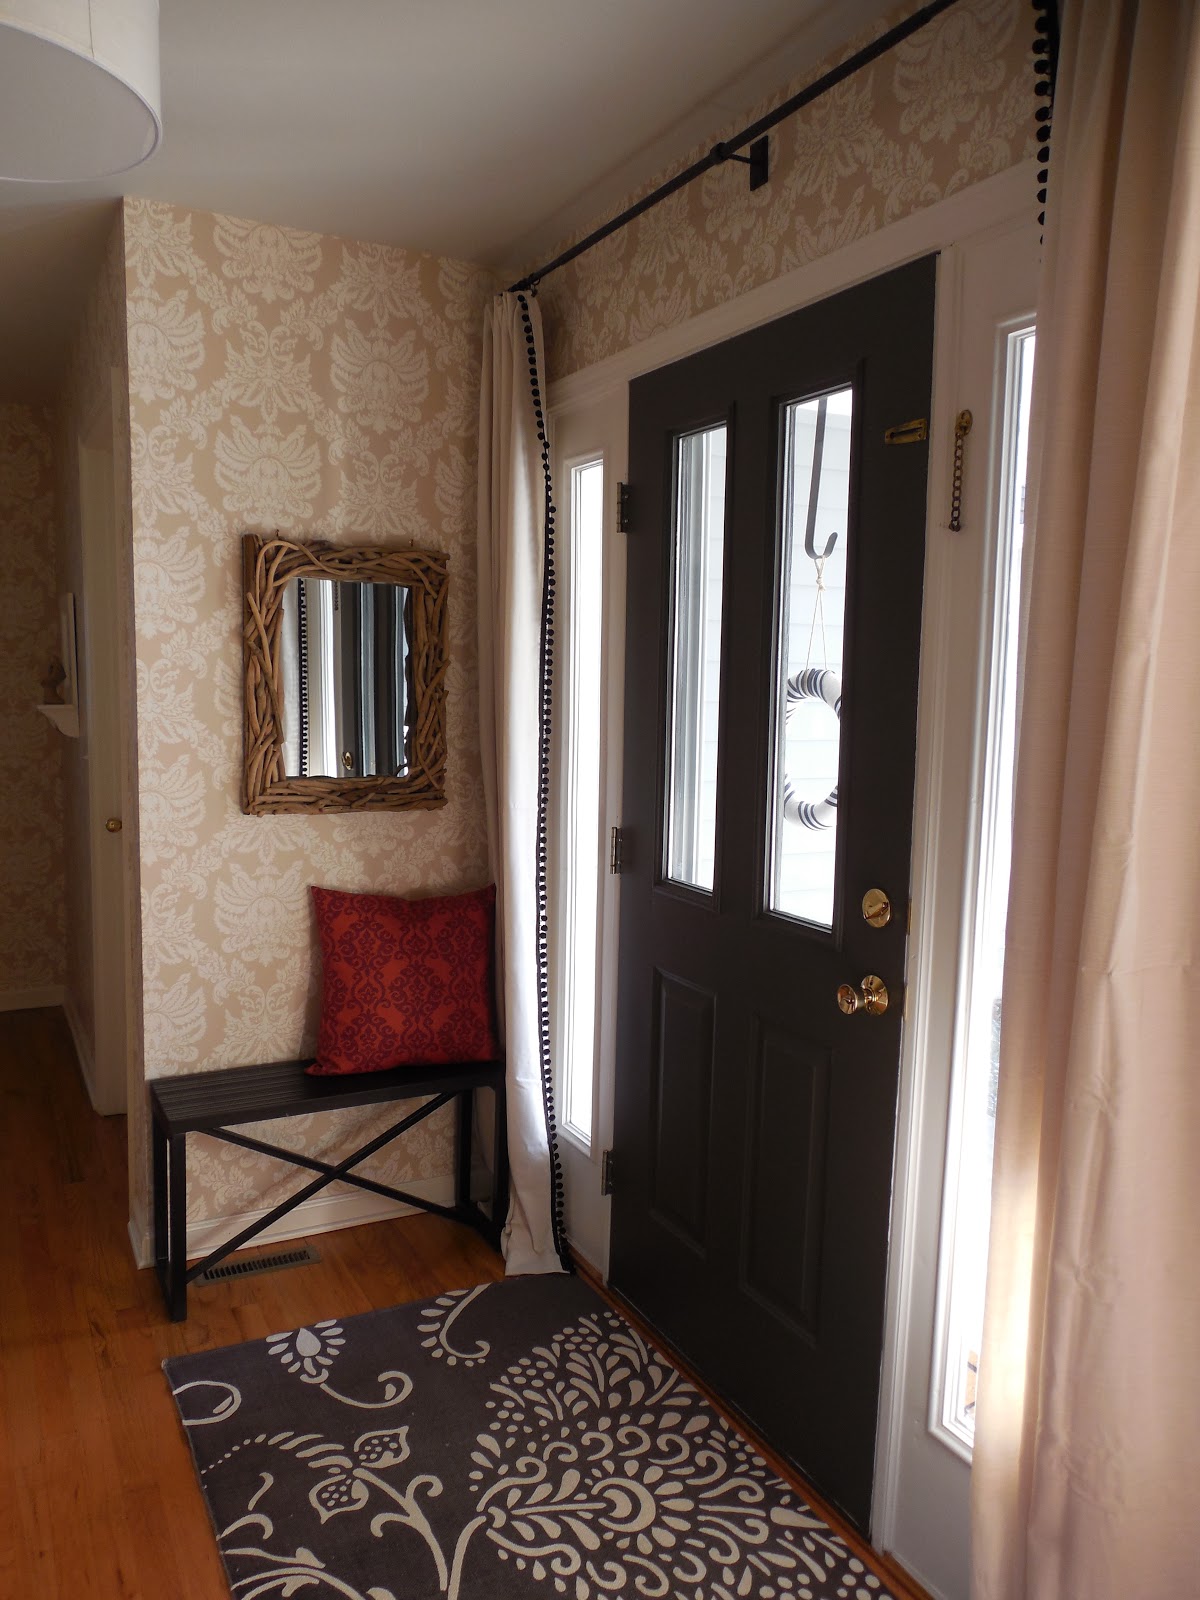
When I {or I should say my husband) installed a curtain rod above our front door, I chose the same drapery panels that are in our kitchen and family room. I wanted to do a little something more to them, so I decided to add black pom pom fringe to the edges of the panels. I am happy to report that this was super easy to do! It took about 20 minutes one night to get both panels finished!

After

Here’s a little step by step if you are thinking of adding a little pizazz to store bought drapery panels…

The Materials

You Will Need

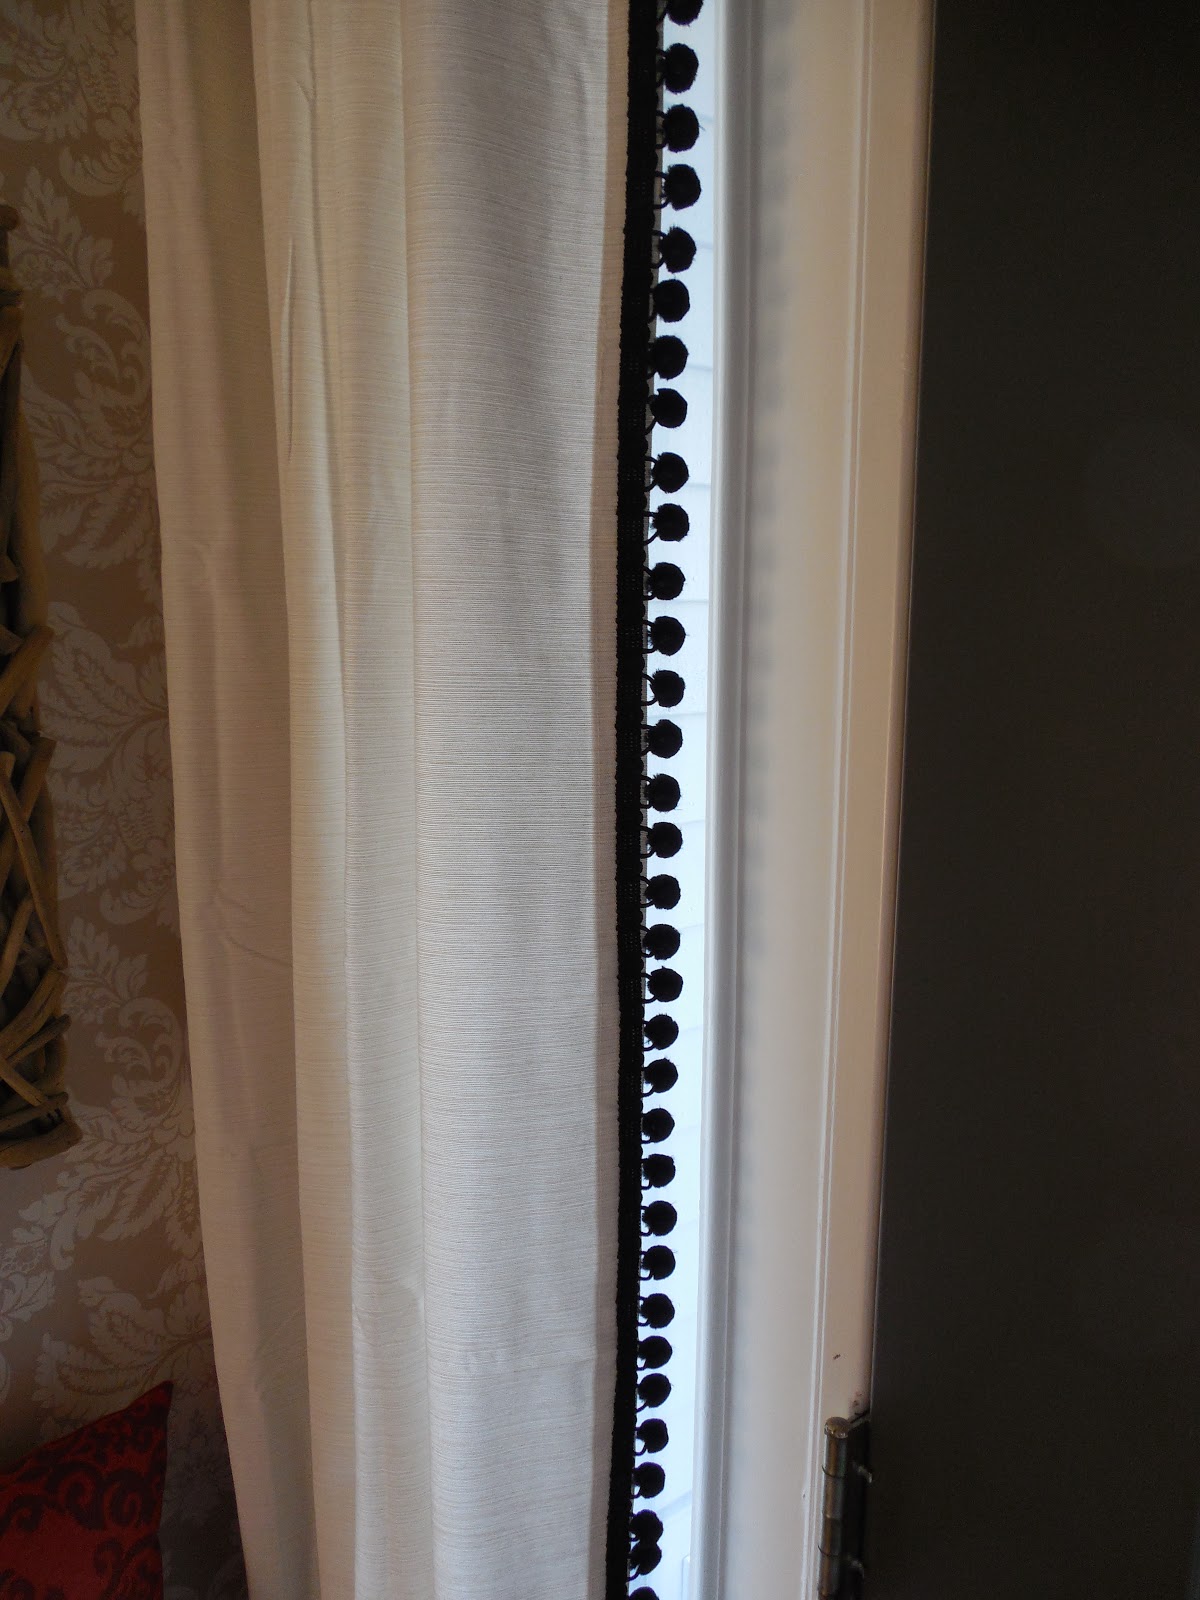
1. Black Pom Pom Fringe cut to size
2. Aleene’s Fabric Fusion
3. Drapery Panels
4. Scissors

I had the lady at Jo Ann Fabrics cut the pom pom fringe to size for each panel. She was great and added an extra few inches, which I cut off after the project was complete. It was nice to have that extra bit of fringe in case one side had an unfinished edge.

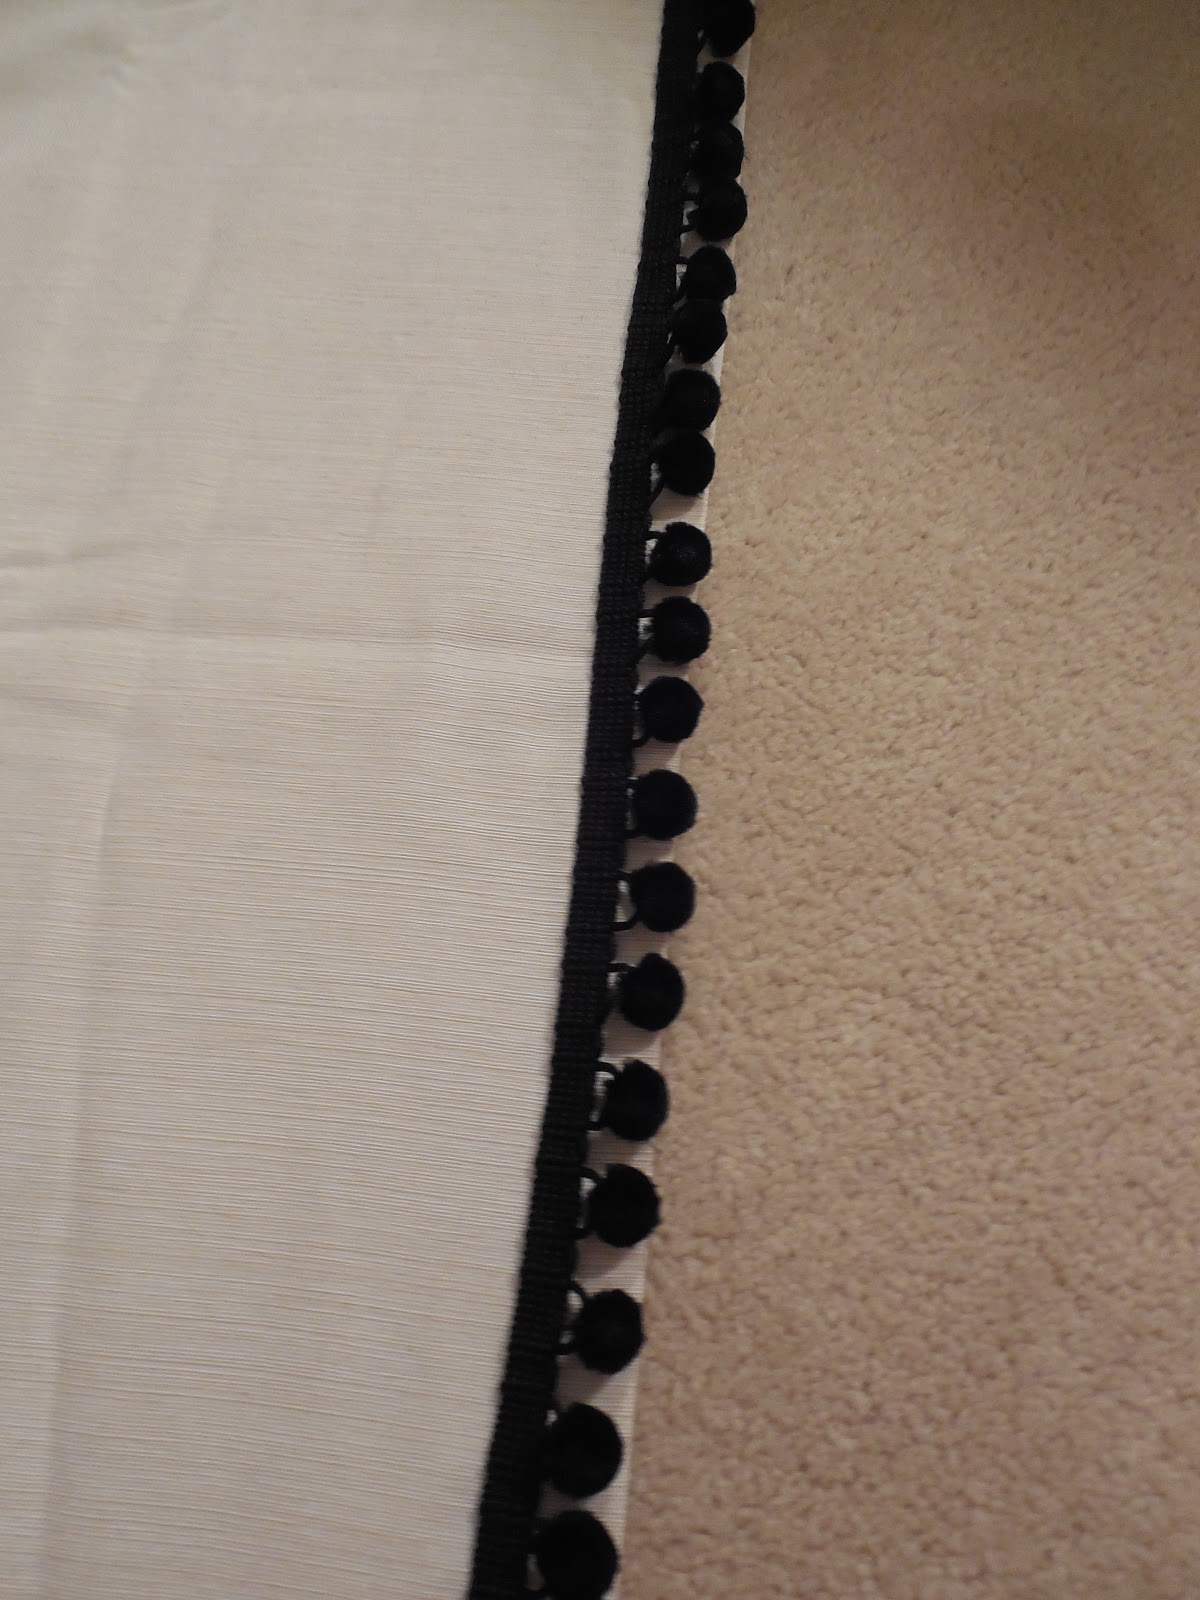
First, I layed the fringe in place to make sure I liked the way it looked. When I knew I had enough and it was just the way I wanted, I moved the fringe to the side and started to add fabric fusion to the panels. I love this stuff! I have used it to attach trim to lamp shades and now this! The fabric is washable after 24 hours and can also be dry cleaned! I don’t have a picture of this step, since I was using both hands, but I applied the fusion about 1/4 ” from the edge of each panel.

I started this project on the carpet, and then realized I might be getting permanent glue on the carpet! Not good. Luckily, I didn’t… but I came up with another way to do this project just to be sure-

I decided to place an old sheet under the panel where I was working. Both are terribly wrinkly, but nothing is perfect during the process, is it??

I waited about an hour to make sure the glue was secure to the panels. This stuff is amazing. It adhered so well and I could tell it wasn’t going anywhere. I decided to add a little fabric fusion to the top and bottom of the fringe, to prevent fraying. The lady at the store said I could stictch the edges to prevent fraying, but this girl doesn’t sew! So, the fusion will also work like a charm. I was too excited to wait until the next day to attach the panels to the curtain rings, so I went for it!

Next up, is painting the stair railing black! One of these days!  ๐Ÿ™‚ Oh, and of course adding drapery tie backs and steaming those panels. Is it ever done???

{Before and In Progress} Curtains Are on the Sidelights!

March 31, 2013 by Amber Filed Under: before and after, design, foyer


A while back, I mentioned that I wanted to add a decorative option to cover our sidelights. When we first moved in, we had stationary sidelight panels, but that didn’t give us the option to move them during the day. I wanted a more modern approach for covering these windows, that would also be moveable and let the light in. When I came across these inspiration photos, I knew this would work for us…

Source: jonesdesigncompany.com via Amber B Interiors on Pinterest
Source: southernliving.com via Amber B Interiors on Pinterest

Adding drapery panels was such a clever and stylish way to add privacy. My walls are wallpapered and busy, so I knew I didn’t want patterned drapery panels. I decided to try my own take on this project! Here is the before shot of our foyer…

Before

And here are the afters in progress, with the curtaind rod and panels…

After

I say in progress, because I still plan on installing some sort of tie backs for the panels. I ended up using the same panels that are in our kitchen and family room, but I added pom pom fringe for a special, fun touch. The curtain panels are from Target and are the Farrah Curtain Panels in Cream. They can be found here. I ordered the panels in size 54×95 so I could hang the rod high and near the ceiling. I think it helps to draw your eye up and create more space when you can mount your curtain rod as high as possible. I will be back next week for a full tutorial on adding the pom pom fringe!

To all who are celebrating Easter tomorrow, have a wonderful, special day!! We plan to do just that!

Should I Go For It??

November 5, 2012 by Amber Filed Under: DIY, foyer, personal design style


Thank you all for your encouraging comments about my last post. I am happy to say that my writer’s block is dwindling and I am slowly getting my blogging mojo back in gear! I have been thinking about trying out a little project in our foyer, but not ready to commit. Here is where your input is key! This is what our foyer looks like as of right now:

Our Foyer

While I love the light that comes in from the sidelights, there is no privacy at the front of our house. I would like something that can be swept away, so the sidelights can still be used during the day. Here is what I found on pinterest that has me thinking…

Source: southernliving.com via Amber on Pinterest
Source: jonesdesigncompany.com via Amber on Pinterest

What if I installed a curtain rod and drapes? I could pull the panels back during the day and have the privacy I need at night. Here’s the dilemma and where I need your opinion…
I am trying to go for the less is more mantra and don’t want to crowd my spaces too much with things. I am worried that if I try this, it might look too busy in my little foyer nook, as the space isn’t that large to begin with. I love the way these two images look, but their foyers are also larger than mine. I also worry about drilling holes into the wallpaper, as that would be so permanent.

Any thoughts? What would you do??

One Door Down…

July 1, 2012 by Amber Filed Under: design, foyer, painting tips


I am excited to show you a recent change we made in our foyer! I have been thinking about painting our interior doors black for quite a while. I love this look and believe it can work with many different design styles. It sounds like a dramatic change, but truly adds depth and character to any space. There are some blog posts, images on pinterest or magazines that just help me make decisions and go for it! (Does that ever happen to you too?) I am very confident when making decisions for client spaces but sometimes indecisive when it comes to my own home. When I recently saw Emily’s post from her blog, A Well Dressed Home, I knew that I had found the right color for our doors. I immediately got to work and here is the after…

After…

The paint color is Dragon’s Breath by Benjamin Moore, and I am in love. It’s a muddy, gray/black that shows very soft in person. I went with an eggshell finish to avoid a very glossy look. I knew when going with a dark color, the glossier it gets, the more imperfections it shows. This door did have some dents, but doesn’t show at all with this finish. I also like the way the brass knob and locks show against the black. A useful tip when painting doors, is to use a fine tip artist brush when going around molding and window openings. It allowed me to get into the crevices without a lot of clean up and painter’s tape! I know we all love a little before and after, so let’s take you back to how it looked before…

Before…

And after…

Sorry about the lighting on some of these pictures. The sunshine changes everything! Besides the door color, a lot has changed since the ‘before’ shot. We have replaced the coat rack with a bench, pillow and driftwood mirror. Our fun ceramic horse is on display and we replaced the ceiling fixture with a more dramatic drum shade light. I have also decided to take out the sheers on the door’s windows for good. I think it updates the entrance a bit more.

So like I said in the title of the post… one door down! I plan on painting most of our interior doors this color and also move on to finishing our railings.

Is there a design idea you’ve been wanting to try but haven’t?
What’s holding you back?
Are you looking to make changes to your space and have a home that reflects you and your style? Click on the ‘design services’ link at the top of my blog to get started!

Our Foyer Reveal – Let There Be Light!

January 17, 2012 by Amber Filed Under: foyer


I started making some changes to our foyer last year, with the new wallpaper, and I’m at it again! Ever since I saw this image on pinterest, I knew I had found the right style of light for our space:

Source: decorpad.com via Simple on Pinterest

I have loved that image for so long and it has been in the back of my mind when I went out on a new light hunt! I love the look of large drum shades and thought it looked great as a ceiling pendant. The light we had before was a mission style, stain glass pendant. It was nice, but never fit the scale of the space. (It was a rookie mistake of mine to not look at the measurements before the purchase!)
Our new light, is double in size and fits the scale of the space much better. Here it is in its new home:

This is a light fixture from Lowe’s and it is actually one of their energy efficient fixtures. I was a little weary at first, because I don’t usually like the glow from energy efficient bulbs. I am happy to say that these bulbs cast a soft, natural glow and I’m pleased with the result!

Have you had any luck with energy efficient bulbs??

Hello Gorgeous Foyer!

August 23, 2011 by Amber Filed Under: foyer, great design


There are some interior images out there, that instantly catch my eye. It might be the wall color, floors, lighting, furniture or all of the above… this space has it all! I wish I could go on a house tour, because I bet I would also fall in love with the rest of the home.

Image via Pinterest and Decor Pad

This foyer is a jawdropper for me… it is chic, neutral, fun and oh so stylish! That gorgeous glossy black door opens up to the most amazing dark stained floors. I love the risk they took by painting the ceiling black. The shiny finish glows with the reflection from the drum shade lights. You get a glimpse into the living room and outdoor space, with the neutral, classic drapery and woven shades. The pops of orange make the space fun, modern and inviting. I am ready to move in!

What are your thoughts on this space?

  • « Previous Page
  • 1
  • 2
Welcome!

Hi, I'm Amber... a wife, mom and interior decorator. I am the writer of Simple Dwellings and the designer behind Amber B Design. Blog topics are all things design, with the occasional DIY attempt! Thanks for stopping by Read more...

  • Bloglovin
  • Email
  • Instagram
  • Pinterest
  • Twitter

Blog Posts, Straight to Your Inbox

Popular Projects

A dining room with white walls and wooden table.
A black door with white curtains and a red chair
A staircase with black and white chevron pattern on the steps.

Blog Love

  • Addison’s Wonderland
  • A Thoughtful Place
  • Alison Giese Interiors
  • Amber Interiors
  • Bailey McCarthy
  • Caitlin Wilson
  • Chris Loves Julia
  • Classic Casual Home
  • Cottage and Vine
  • Design Indulgence
  • Dwell by Cheryl
  • Eddie Ross
  • Elements of Style
  • Emily A Clark
  • Emily Henderson
  • Gallery No Eight
  • Hi Sugarplum
  • House of Jade
  • Jana Bek
  • Juniper Home
  • Kate Marker Interiors
  • Lucy Williams
  • Monika Hibbs
  • Our Fifth House
  • Pencil and Paper Co
  • Rachel Parcell
  • Rambling Renovators
  • Pure Style Home
  • Sita Montgomery
  • Studio Mcgee
  • The Makerista
  • The White Buffalo Styling Co
  • the Zhush
  • Traci Zeller
  • Young House Love

Copyright Amber B Design © 2025 ยท Design by Britt Douglas